Prep time: 15 minutes
Cook time: 10 minutes
Total time: 25 minutes
Servings: 24 cookies
Imagine sinking your teeth into a warm, chewy caramel cookie, the kind that instantly transports you back to your childhood. Maybe you remember the smell wafting through your grandmother’s kitchen or the crinkle of wax paper enclosing a homemade treat. But what if your version of this comforting dessert misses that crucial *chewiness*? You’re not alone in this kitchen conundrum! This recipe dives deep into why your caramel cookies might be missing that perfect texture and how you can easily remedy it.
In this guide, you’ll learn not just about the ingredients that create the ideal caramel cookie, but also the techniques and *tips* that will elevate your baking game. You’ll discover the common pitfalls many face and the simple adjustments you can make to achieve that delightful chewiness that eludes so many. Get ready to transform your caramel cookie experience!
What Is Why Are Your Caramel Cookies Missing That Perfect Chewiness?
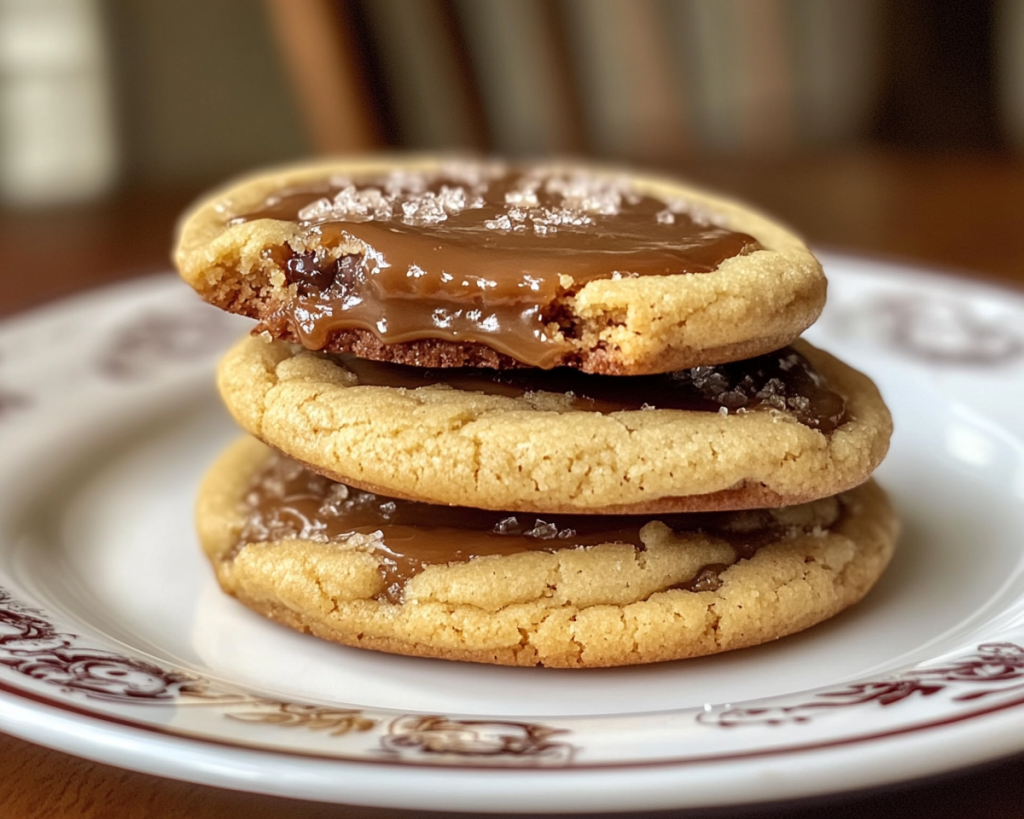
Caramel cookies are often celebrated for their sweet flavor and indulgent texture. Originating as a variation of traditional cookies, these treats are made with a butter and sugar base that solidifies into a delightful dessert when baked. The unique element here is *caramel*, which can either be mixed into the dough or used as a filling. The ideal caramel cookie boasts a golden-brown hue with a slightly crispy exterior while maintaining a soft and *chewy* center that melts in your mouth.
The flavor profile of caramel cookies is richly complex; they often feature buttery notes accented by the deep, sweet flavor of *caramel*. Unfortunately, when baked incorrectly, they can turn out dry, crumbly, or overly hard, leading to disappointment. Key ingredients, such as brown sugar, play a vital role here. Brown sugar not only lends a rich flavor but also retains moisture, which contributes to that essential chewiness. Understanding these ingredients and their functions is crucial for crafting a successful cookie.
Additionally, the texture of your caramel cookies can also be influenced by the cooking method and timing. A few simple adjustments can make all the difference. Whether it’s choosing the right type of sugar, measuring your flour correctly, or adjusting your baking time, each step is crucial to getting the outcome you desire. This recipe will equip you with the knowledge needed to perfect your caramel cookie baking skills.
Why You’ll Love This
There are countless reasons to love a good caramel cookie. First and foremost, the *taste* is incredible. The combination of melted caramel and brown sugar creates a sweet yet balanced flavor that most anyone can enjoy. Additionally, these cookies are incredibly *versatile*. You can easily adjust the ingredients or the mix-ins to create a dessert that suits your taste preferences or dietary needs. Whether you prefer dark chocolate chunks, nuts, or dried fruit, the options are endless!
In terms of ease, this recipe is beginner-friendly. Even if you aren’t a pro in the kitchen, the steps are straightforward and the *techniques* manageable. With just a handful of ingredients and a little time, you can create a batch that not only impresses your family but also makes for a delightful contribution to gatherings and special occasions.
Common misconceptions include the belief that all cookies should be hard and crumbly. A well-made caramel cookie stands apart, aiming for softness and chewiness, which can be achieved with a few key adjustments. This recipe will guide you through those adjustments while ensuring your cookies turn out perfectly every time, showcasing homemade decadence that rivals patisserie sales.
Ingredients You’ll Need
- All-Purpose Flour: This forms the base of your cookie dough. It provides structure while allowing the cookies to retain that chewy texture. If you’re looking for a gluten-free alternative, consider using almond or coconut flour, but be aware that this may affect the final texture.
- Unsalted Butter: This is what adds *richness* and moisture to your cookies. Always opt for unsalted, so you can control the salt level in the recipe. If you’re looking for a dairy-free option, coconut oil or vegan butter can work as substitutes.
- Brown Sugar: This ingredient is essential for achieving *chewiness*. Unlike granulated sugar, brown sugar contains molasses, which helps retain moisture and enhances flavor. If you’re out of brown sugar, you can make a quick substitute by mixing white sugar with a bit of molasses.
- Granulated Sugar: This sweetener aids in achieving a balanced sweetness while helping to create a crisp outer layer. You can also consider using coconut sugar for a lighter flavor, though the texture may slightly vary.
- Eggs: Eggs bind the ingredients together, giving the cookies their structure. If you’re vegan or allergic to eggs, you can use flaxseed meal mixed with water as a substitute for a similar binding effect.
- Vanilla Extract: This adds *depth* and enhances the overall flavor of your cookie. Make sure to use pure vanilla extract for the best outcome.
- Baking Soda: A leavening agent, baking soda helps your cookies rise and gives them a nice, *fluffy* texture. Be cautious with measurements, as too much can lead to overly airy cookies.
- Salt: A pinch of salt enhances all the flavors in your cookie. It can also help balance the sweetness of the caramel. If you’re using salted butter, you may want to reduce the salt content.
- Caramel Bits or Sauce: The star of the show! This ingredient adds that rich, sweet flavor that defines a caramel cookie. For a *healthier* option, look for sugar-free or low-calorie caramel bites.
How to Make
- Preheat your oven: Begin by preheating your oven to 350°F (175°C). This ensures an even baking temperature, critical for achieving that chewy center. Line a baking sheet with parchment paper or a silicone mat to prevent sticking.
- Mix the dry ingredients: In a medium bowl, whisk together the all-purpose flour, baking soda, and salt. This step helps to evenly distribute the leavening agent for uniform cookies. Set this mixture aside for later use.
- Cream the butter and sugars: In a large bowl, cream together the unsalted butter, brown sugar, and granulated sugar until the mixture is light and fluffy. This usually takes about 3-4 minutes using an electric mixer. Proper creaming incorporates air into the dough, contributing to that perfect texture.
- Add the eggs and vanilla: Beat in the eggs, one at a time, ensuring they are fully incorporated before adding the next. Pour in the vanilla extract and mix until well combined. The eggs will provide moisture and binding, so don’t skip this step!
- Combine the mixtures: Gradually add the dry ingredients into the wet mixture, mixing on low speed until just combined. You want to avoid over-mixing at this stage to ensure a tender cookie. Gently fold in the caramel bits using a spatula.
- Scoop and shape the dough: Using a cookie scoop or tablespoon, drop rounded balls of dough onto the lined baking sheet, spacing them about 2 inches apart. This will allow the cookies enough room to spread during baking. At this point, you can sprinkle a little sea salt on top for added flavor.
- Bake: Place the baking sheet in the preheated oven and bake for 8-10 minutes. The cookies should be golden brown around the edges while the centers may still look soft. Keep a close eye, as each oven behaves slightly differently!
- Cool: Once baked, remove the tray from the oven and let the cookies cool on the sheet for about 5 minutes before transferring them to a wire rack. This allows the cookies to set while they cool. Enjoy them warm for the ultimate experience!
Variations & Substitutions
Decadent Chocolate Caramel Variation: For chocolate lovers, adding chocolate chips or chunks is a game-changer. The combination of caramel and chocolate creates an indulgent treat. You can use semi-sweet, dark, or even white chocolate chunks, depending on your preference. Just stir in about one cup of chips into the dough for the last step and proceed as usual. This variation pairs well with coffee or can be enjoyed as a sweet snack during movie night!
Nutty Caramel Variation: If you want a crunch alongside your chewiness, consider adding a cup of chopped nuts, like pecans or walnuts. Nuts not only add texture but also bring additional flavor. Toasting the nuts before mixing them in can enhance their taste further. This variation is especially great for those who appreciate a more complex cookie experience. Keep in mind that some may have *nut allergies*, so check your guests’ preferences before serving.
Healthier Oatmeal Caramel Variation: Swapping some all-purpose flour for oats can create a heartier cookie that still maintains the chewiness while adding fiber. To achieve this, substitute one cup of flour with rolled oats. You can even add a pinch of cinnamon to elevate the flavor further. This is perfect for busy parents looking to add some nutritional value without sacrificing taste in their cookies!
Vegan Caramel Variation: To make this recipe vegan-friendly, substitute the butter with a plant-based option like coconut oil or vegan butter. Replace eggs with flaxseed meal mixed with water (1 tablespoon of flaxseed meal with 2.5 tablespoons of water equals one egg). You can still enjoy the wonderful caramel flavor while accommodating different dietary choices.
Sea Salt Caramel Variation: One simple addition can dramatically elevate your cookies—the incorporation of sea salt. After shaping your cookie dough onto the baking sheet, sprinkle a few flakes of coarse sea salt on top of each dough ball. This contrasting flavor not only heightens the sweetness but also brings a touch of sophistication to your cookies.
Common Mistakes to Avoid
When baking caramel cookies, there are several common pitfalls that could lead to undesirable results. One major issue is over-mixing the dough. When you over-mix, gluten develops, which can lead to cookies that are tough rather than *chewy*. It’s best to mix just until combined, ensuring that the flour is no longer visible.
Another common mistake is not properly measuring your ingredients. Flour should be scooped into a measuring cup and leveled off to avoid any excess, which can lead to dry cookies. Additionally, using a different type of sugar can also impact the texture; for example, using only granulated sugar will result in cookies that are crispier rather than chewy. Always use a combination of both brown and white sugars for that perfect balance.
Lastly, baking for too long can be a disaster. Each oven behaves differently, and factors like altitude and humidity can affect baking times. Aim to take the cookies out when the edges are set but the centers still look soft, as they will continue cooking on the tray. Trust your instincts and closely monitor them in the last few minutes!
Storage, Freezing & Reheating Tips
To keep your cookies fresh longer, store them in an airtight container at room temperature. If properly sealed, they can last for about a week, maintaining that sought-after chewy texture. For longer storage, consider freezing the cookies. Place them in a freezer-safe bag, separating layers with parchment paper to prevent sticking. You can store them this way for up to three months.
To reheat frozen cookies, let them come to room temperature, and then pop them in a warm oven for about 5 minutes. This will revive their delightful chewiness as if they were just baked. Just avoid microwaving them, as this can lead to a rubbery texture.
Always practice *food safety* by labeling bags with the date of storage, so you can keep track of freshness. Following these storage practices will ensure you always have delicious caramel cookies on hand whenever a craving strikes!
Frequently Asked Questions
Why are my cookies flat instead of chewy? One major reason cookies turn out flat is likely due to too much melted butter. If the butter was too warm when mixed in, it can cause the cookies to spread excessively. Ensure your butter is softened but not fully melted. Also, check that you’re using the correct ratios of flour to fat.
Can I use brown sugar only in the recipe? While using only brown sugar can create a richer flavor, it may lead to cookies that are too dense. Combining brown and granulated sugars helps achieve a balance in taste and texture. If you want a more caramel-like flavor, stick with the recommended ratios!
How do I know when my cookies are done? The key is to monitor the colors of the cookies. When the edges appear golden and the centers look slightly undercooked without being shiny, that’s the sweet spot. They will continue to firm up once taken out of the oven.
Can I make this recipe gluten-free? Absolutely! You can swap the all-purpose flour for a gluten-free flour blend. Make sure to choose one labeled for baking, as it will typically include starches that help mimic the structure provided by gluten.
What can I do if my cookie dough is too sticky? If you find your dough is too sticky to handle, a sprinkle of flour should help. Just add a little at a time until the dough is workable. Alternatively, chilling the dough in the fridge for about 30 minutes can also firm it up and make it easier to shape.
Conclusion:
In conclusion, understanding the key elements that contribute to delicious caramel cookies will ensure your baking is both enjoyable and successful. From ingredient selection to careful measuring and timing, each step plays a pivotal role. Don’t hesitate to customize the recipe with your own twists and make it your signature treat! The delightful flavor and texture of these caramel cookies make them perfect for any occasion, so gather your ingredients and start baking. Whether it’s a family gathering or a simple afternoon snack, these cookies are sure to impress. Happy baking!