Prep time: 20 minutes
Cook time: 25 minutes
Total time: 45 minutes
Servings: 12 bars
Creating something delightful for Easter can be a challenge, especially when you’re trying to please a crowd that includes kids and adults alike. That’s where these **Super Soft Loaded Easter Egg Bars** come in. They’re not just aesthetically pleasing but also pack a punch of flavor and texture that’s bound to impress. With a soft, cookie-like base layered with chocolate chips, pastel candies, and creamy frosting, these bars are perfect for parties, family gatherings, or simply a weekend treat. Let’s dive into how to make these delightful goodies.
What Is Super Soft Loaded Easter Egg Bars?
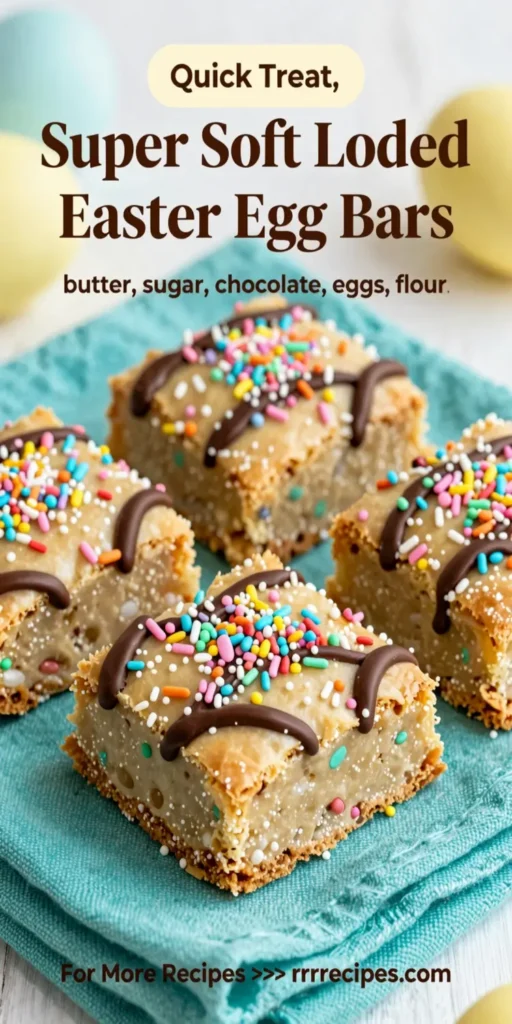
Super Soft Loaded Easter Egg Bars are a mouthwatering dessert that combine a rich, buttery cookie base with festive Easter candies and creamy frosting. Imagine biting into a bar that is soft and chewy, with every bite bursting with flavors and colors. They are often topped with pastel M&M’s or other seasonal candies that not only make them visually appealing but also add delightful bursts of sweetness. These bars come together quickly, making them ideal for both seasoned bakers and kitchen novices.
Why You’ll Love This
There are endless reasons to fall in love with these bars. First, they are incredibly easy to make, requiring minimal kitchen skills. This makes them perfect for **busy parents** or **kitchen beginners** who may not have hours to spend preparing a festive dessert. Secondly, the ingredients are simple and budget-friendly, making it feasible for anyone to whip up a batch without breaking the bank. They’re also versatile; you can play around with the toppings and flavors based on your family’s preferences. Lastly, the end result—a plate of colorful, soft bars—will make you the star of any gathering, ensuring your Easter celebration is as sweet as can be.
Ingredients You’ll Need
- 1 cup (2 sticks) unsalted butter – This adds richness and moisture to the bars.
- 1 cup granulated sugar – For sweetness and structure.
- 1 cup brown sugar – Deepens the flavor profile.
- 2 large eggs – Binds the ingredients together.
- 3 cups all-purpose flour – The base for the bars.
- 1 teaspoon baking powder – Helps the bars rise nicely.
- 1 teaspoon baking soda – Works with the baking powder for fluffy bars.
- 1/2 teaspoon salt – Enhances the flavors.
- 2 cups chocolate chips – Adds indulgence and richness.
- 1 cup pastel M&M’s – For a festive touch.
- 1 cup frosting (store-bought or homemade) – Provides a creamy top layer.

How to Make
- Preheat your oven to 350°F (175°C). This step is crucial for ensuring that the bars bake evenly and come out soft and chewy.
- Prepare a 9×13 inch baking dish by greasing it with butter or lining it with parchment paper. This will make it easier to remove the bars later.
- In a large mixing bowl, cream together the unsalted butter, granulated sugar, and brown sugar until the mixture is fluffy and light in color. This should take about 3-4 minutes.
- Add in the eggs, one at a time, mixing well after each addition. This ensures that the eggs are fully incorporated, helping to provide moisture to the bars.
- In a separate bowl, mix together the flour, baking powder, baking soda, and salt. Gradually add this dry mixture to the wet ingredients, mixing until just combined. Be careful not to overmix, as this can lead to tough bars.
- Gently fold in the chocolate chips and pastel M&M’s until they are evenly distributed throughout the batter. The bright colors of the M&M’s make this step extra fun!
- Pour the mixture into the prepared baking dish, spreading it evenly with a spatula. This will help the bars bake uniformly.
- Bake for 25-30 minutes or until the edges are golden and a toothpick inserted in the center comes out clean. Keep an eye on them; you want them to remain soft!
- Allow the bars to cool in the dish for about 10 minutes before transferring them to a wire rack to cool completely. This helps them set up without becoming too crumbly.
- Once cooled, spread your frosting evenly over the top for an extra layer of sweetness.
- Cut into bars and serve! Enjoy the vibrant colors and delectable textures.
Variations & Substitutions
Chocolate Chip Variations: If you want to get creative, consider swapping half of the chocolate chips for white chocolate or even peanut butter chips. This variation adds a different layer of flavor and complements the creamy frosting well.
Nutty Option: For those who love a crunchy texture, adding 1 cup of chopped nuts like pecans or walnuts can give the bars a new dimension. Just be sure to chop them finely so they mingle well in the soft base.
Gluten-Free Version: If you’re looking to make these bars gluten-free, simply substitute regular all-purpose flour with a 1:1 gluten-free blend. Just ensure the blend contains xanthan gum to help with the texture.
Lower Sugar Alternative: If you’re trying to cut back on sugar, consider using coconut sugar in place of granulated sugar. This not only lowers the glycemic index but also adds a lovely caramel note to the bars.
Common Mistakes to Avoid
Avoiding pitfalls in baking can be the difference between a success and a flop. One common mistake is **using cold butter instead of softened butter**. This can lead to a dense and chewy texture instead of the desired soft, cake-like consistency. Always ensure your butter is room temperature before creaming. Another issue could arise from **overmixing the batter**, which can create tough bars. Mix just until combined for the perfect texture. Lastly, make sure not to **overbake your bars**. It’s crucial to take them out of the oven as soon as a toothpick comes out clean; overbaking leads to dryness.
Storage, Freezing & Reheating Tips
These bars can be stored in an airtight container at room temperature for up to 3 days. If you’d like to keep them longer, they freeze wonderfully! Simply wrap them tightly in plastic wrap or foil and place them in a freezer-friendly container for up to 3 months. When you’re ready to enjoy them again, simply thaw them in the refrigerator overnight and bring them to room temperature. For a warm treat, pop them in the microwave for 10-15 seconds before serving.
Frequently Asked Questions
Can I make these bars ahead of time? Yes, these Super Soft Loaded Easter Egg Bars can be made up to 2 days in advance and stored tightly covered at room temperature. If you’re looking to make them even further ahead, consider freezing them and thawing when needed.
What other candies can I use? The beauty of these bars is in their versatility; feel free to substitute M&M’s with any of your favorite candies—think Reese’s Pieces, chocolate bunnies, or even crushed Easter eggs.
Can I use homemade frosting? Absolutely! If you’d like to make your own frosting, a simple buttercream or cream cheese frosting pairs beautifully with these bars and allows you to control the sweetness and flavor.
How can I tell when the bars are done? The bars are done when the edges are slightly golden and a toothpick inserted in the center comes out clean. Remember, they will continue to bake slightly from residual heat once removed from the oven.
Can I cut the recipe in half? Yes, if you want to make a smaller batch, simply reduce the ingredients by half and use an 8×8 inch baking dish. Just be mindful of the baking time, as it may need to be adjusted slightly.
Conclusion: Enjoying **Super Soft Loaded Easter Egg Bars** is a delightful experience that combines flavor, color, and fun. Whether you’re baking for a holiday gathering or just treating yourself, these bars are sure to impress. Happy baking!


