Prep time: 30 minutes
Cook time: 15 minutes
Total time: 45 minutes
Servings: 4
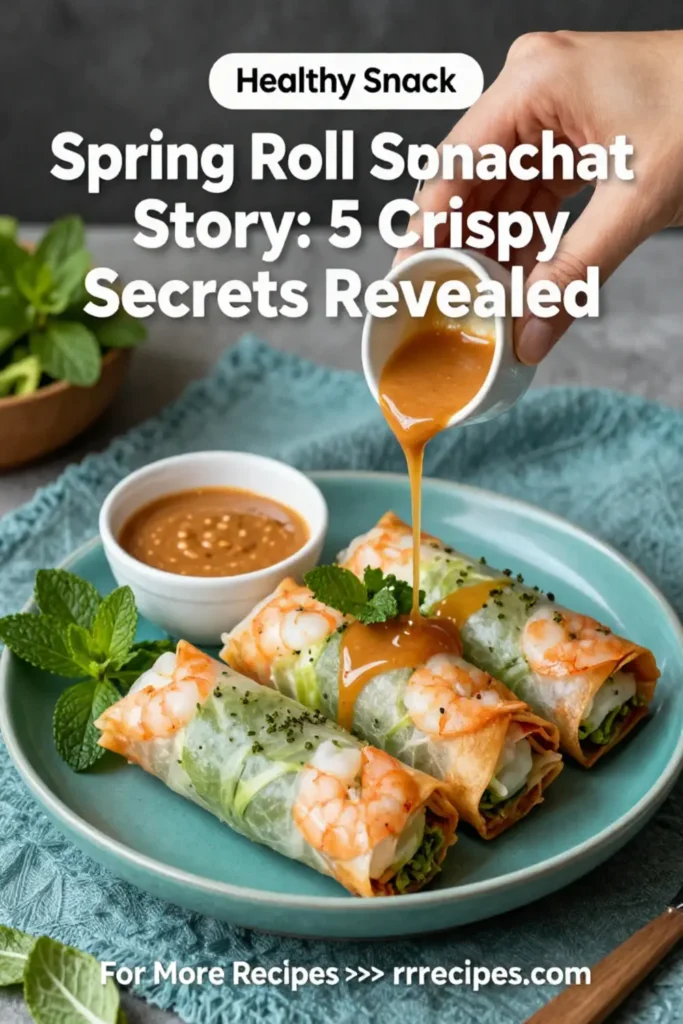
Making spring rolls is not just a delightful endeavor but also a fantastic way to showcase colorful vegetables and fresh ingredients. The crispy exterior combined with savory fillings can truly elevate any meal, whether it’s for a casual get-together or a more formal dinner. This recipe, titled “Spring Roll Snapchat Story: 5 Crispy Secrets Revealed,” is meant to guide you through the process of creating these delicious bites. Equip yourself with the necessary skills and knowledge and let’s dive into the world of spring rolls!
What Is Spring Roll Snapchat Story: 5 Crispy Secrets Revealed?
Spring rolls are a popular appetizer in Asian cuisine, originating in China. They consist of a thin wheat-based wrapper filled with a variety of ingredients, usually involving a mix of vegetables, proteins, and sometimes noodles. The invention of the spring roll was intended to celebrate the arrival of spring and the fresh harvest that it brings.
In this recipe, we will illuminate five key secrets to achieving the perfect crispy spring roll. Not only will we guide you on how to master the essential techniques, but we will also explore the best ways to explore flavors with diverse fillings. From textural contrasts to cooking temperature, this guide covers everything you need to know to impress your family and friends.
Why You’ll Love This
There are plenty of reasons to fall in love with this recipe. For starters, it is versatile. You can fill your spring rolls with virtually anything: meats, seafood, or an array of vibrant vegetables. Secondly, they are impressively quick to make; this can be a family cooking project enjoyed by busy parents who want to spend quality time together. Moreover, they are an excellent choice for meal prep, allowing you to store uncooked rolls in the freezer for a hunger-crushing snack at any time.
But the real charm lies in their **crispy texture** and **light flavor profile** that pairs wonderfully with a variety of dipping sauces. Each bite delivers a satisfying crunch followed by a burst of flavors that can take you straight to culinary bliss.
Ingredients You’ll Need
- Spring roll wrappers: These thin, pliable sheets are crucial for wrapping your filling. You can find them in Asian grocery stores or online.
- Soaked vermicelli noodles: Add a chewy texture to your filling. Soak the noodles in hot water for about 10 minutes until soft.
- Carrots: Shredded carrots bring a slight sweetness and color.
- Cabbage: Thinly sliced purple or green cabbage adds crunch and nutrients.
- Bell peppers: Vibrant color and the sweetness of bell peppers will enhance your spring rolls.
- Bean sprouts: These crunchy sprouts add a refreshing bite and are a common filling in traditional spring rolls.
- Fresh herbs: Mint and cilantro will provide an aromatic touch.
- Protein (optional): Cooked shrimp, chicken or tofu can make your rolls more filling.
- Cooking oil: For frying your rolls; vegetable or peanut oil is preferred due to its high smoke point.
- Dipping sauce: A sweet chili or hoisin sauce pairs exceptionally well with the rolls.
How to Make
- Prepare the filling: Start by washing and slicing all your vegetables into fine strips. Combine them in a large bowl with the soaked vermicelli noodles and your chosen protein. Add a splash of soy sauce and a dash of sesame oil for extra flavor. Ensure that all pieces are uniformly cut for even cooking and a pleasant texture.
- Prepare the spring roll wrappers: Soak the wrappers in warm water for about 10 seconds until just pliable. Working with one wrapper at a time, place it on a clean surface. Aim to fill each wrapper close to the bottom edge to make rolling easier.
- Fill and roll: Add about 2 tablespoons of your filling mixture along the bottom of the wrapper. Fold the sides over the filling and then roll it tightly starting from the bottom. Seal the edge with a bit of water to ensure it sticks together well.
- Heat the oil: In a deep frying pan, heat about 1 to 2 inches of oil over medium heat. You can test if the oil is ready by dropping a small piece of wrapper into the hot oil; it should sizzle immediately.
- Fry the spring rolls: Fry the rolls in batches, being careful not to overcrowd the pan. Cook each side for 2 to 3 minutes until they are golden brown. Use a slotted spoon to remove them and place them on a paper towel to drain excess oil.
- Serve hot: Arrange the spring rolls on a platters and serve them immediately with your desired dipping sauce for the ultimate experience.
Variations & Substitutions
Vegetarian Spring Rolls: For a meat-free version, skip the protein and increase the amount of vegetables. Consider adding avocado for creaminess or mushrooms for umami flavor. You can also incorporate seasonings like garlic or ginger to enhance the taste.
Shrimp Spring Rolls: For a seafood variation, use peeled and cooked shrimp. Mix them with crunchy vegetables and a touch of lime juice for a zesty lift. Their sweet flavor pairs beautifully with the crunch of the vegetables inside the rolls.
A spicy twist: If you enjoy a bit of heat, consider adding sliced jalapeños or a sprinkle of chili flakes to your filling mixture. This will add a spicy kick, making your spring rolls more exciting.
Gluten-free version: Substitute traditional wheat wrappers with rice paper or gluten-free spring roll wrappers, ensuring you’re accommodating any dietary restrictions without compromising the taste.
Mini Spring Rolls: For bite-sized appetizers, cut your wrappers into smaller squares and reduce the amount of filling. These can be a fun finger food option at parties or gatherings.
Common Mistakes to Avoid
Overstuffing the rolls: It’s tempting to fit as much filling as possible, but this can lead to tearing the wrapper. Stick to the recommended 2 tablespoons for an easy roll.
Not sealing properly: Ensure you seal the edges well with water. If the rolls come apart in the oil, they can absorb too much oil and become soggy instead of crisp.
Not maintaining oil temperature: If the oil is too cold, the rolls will absorb more oil and become greasy. If it’s too hot, they will burn before cooking through. Use a kitchen thermometer if necessary to maintain a consistent temperature of around 350°F (175°C).
Storage, Freezing & Reheating Tips
If you find yourself with leftover spring rolls, you can store them in the refrigerator for up to 2 days in an airtight container. To maintain their crispiness, try reheating them in an oven set to 375°F (190°C) for about 10-15 minutes.
For longer storage, uncooked spring rolls can be frozen. Place them on a baking sheet in a single layer until frozen, then transfer them to a freezer-safe bag. They will keep well for up to 3 months. When ready to cook, there’s no need to thaw; just fry them directly from the freezer, adjusting the cooking time by a few minutes to ensure they’re cooked through.
Frequently Asked Questions
Can I use store-bought spring roll wrappers?
Absolutely! Store-bought wrappers are a great time-saving option. Just ensure they are of good quality and check the packaging for instructions on how to soften them correctly.
How can I make spring rolls crispy?
To achieve crispiness, make sure the oil is adequately hot while frying. Avoid overcrowding the pan, as this can lower the oil temperature. Additionally, placing the rolls on paper towels after frying helps absorb excess oil, maintaining their crisp texture.
Can I bake spring rolls instead of frying?
Yes, baking is a healthier alternative. Brush the rolls lightly with oil and place them on a baking sheet. Bake at 400°F (200°C) for around 20-25 minutes or until golden brown, flipping halfway through for even browning.
What should I serve with spring rolls?
Spring rolls are best enjoyed with various dipping sauces, such as sweet chili sauce, hoisin, or even peanut sauce. You can serve them alongside a refreshing salad or a light broth for a complete meal.
How do I know when the spring rolls are done frying?
When frying, look for a uniform golden brown color around the entire roll. You can also test one by cutting it open; the inside should be hot and the filling cooked through. A perfect spring roll will have a satisfying crunch when bitten into.
Conclusion:
Creating your own spring rolls at home can be a rewarding culinary experience. Following the crispy secrets we’ve shared, you’ll impress not only yourself but also your family and friends with these delightful creations. Don’t forget to experiment with various fillings and dipping sauces to make them your own. Sit back, relish every crispy bite, and enjoy the profits of your labor!


