Prep time: 10 minutes
Cook time: 30 minutes
Total time: 40 minutes
Servings: 4-6
When it comes to hosting a gathering, the food you serve can elevate the entire experience. Picture this: a warm, rustic dish made with the simplest yet most flavorful ingredients, exuding the aroma of fresh herbs that beckons guests to the table. The recipe we’re diving into today is the beloved **Spring Dinner Party Baked Feta with Herbs**. This dish is not just a beautiful centerpiece; it’s a combination of creamy, tangy feta cheese, vibrant vegetables, and aromatic herbs, all baked to perfection.
What makes baked feta extraordinary is not just its rich taste, but the ease with which you can prepare it. This recipe takes only thirty minutes from start to finish and can effortlessly adapt to various palettes and dietary restrictions. As you read through this guide, you’ll discover essential tips, variations, and step-by-step instructions to ensure your baked feta dish is a resounding success at your dinner party.
What Is Spring Dinner Party Baked Feta with Herbs?
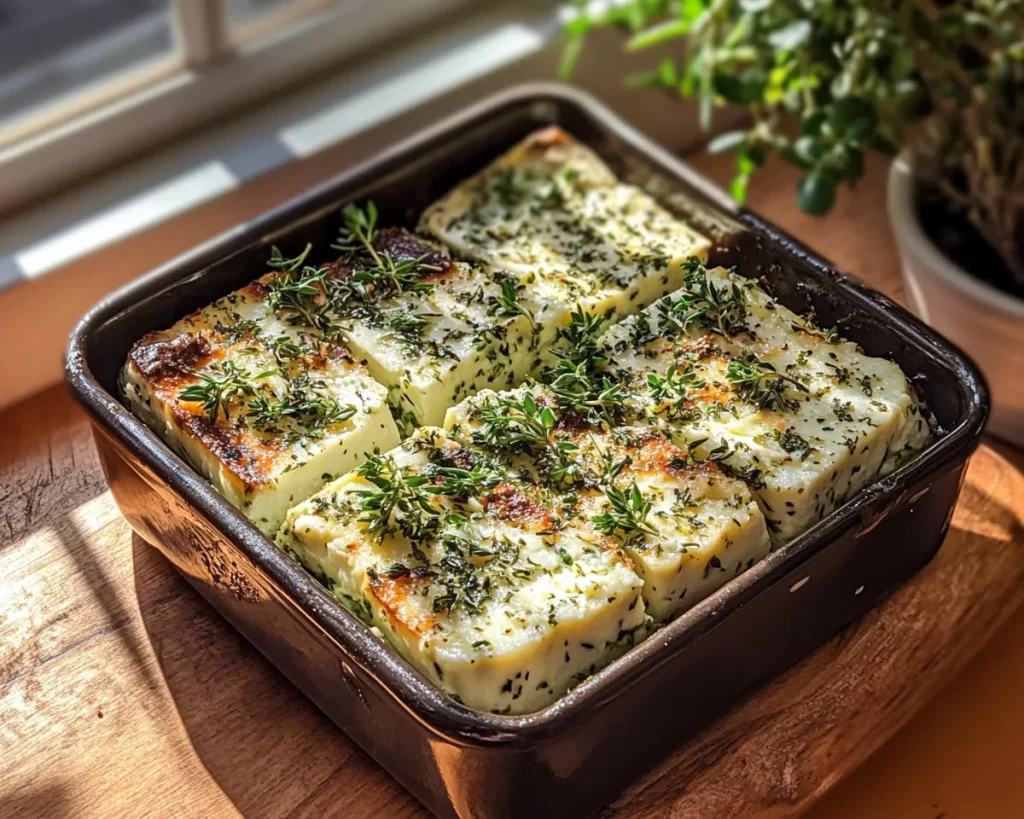
**Spring Dinner Party Baked Feta with Herbs** is a delightful dish that captures the essence of spring dining. The origins of baked feta can be traced back to Mediterranean cuisine, where feta cheese is celebrated for its creamy texture and salty flavor. This dish combines the warm, relaxing characteristics of baked cheese with an explosion of fresh flavors from an assortment of herbs, tomatoes, and olives.
When baked, the feta cheese takes on a soft and spreadable consistency, while the surrounding vegetables become tender and infused with the cheese’s rich notes. You’ll find that the combination of herbs such as oregano, thyme, and basil elevates this dish, making it vibrant and appealing both in taste and presentation. The toasted, golden crust contrasts beautifully with its creamy center, creating an inviting dish that is perfect for sharing.
It’s versatile enough to be a standalone dish or served alongside crusty bread for dipping. This baked feta with herbs isn’t just a meal; it’s an experience, bringing together aromas and flavors that transport you to sun-soaked vineyards and cozy Mediterranean bistros.
Why You’ll Love This
There are countless reasons to adore this dish. Firstly, the taste is simply divine. The **combination of creamy feta with aromatic vegetables** creates a complex flavor that pairs beautifully with fresh, crusty bread. This dish manages to be rich yet light, making it ideal for a spring gathering or dinner party.
On the practical side, the ease of preparation sets this recipe apart. With minimal ingredients and simple instructions, even those new to cooking can master it. The cost-effectiveness of this dish is another bonus. Feta cheese is often budget-friendly, and fresh vegetables can be seasonal, allowing you to make use of what you may already have in your fridge.
In addition to its flavor and practicality, the versatility of baked feta makes it appealing for various preferences. Whether your guests are vegetarian or trying to eat healthier, this dish fits seamlessly into various dietary categories. You can even customize it further by adding your favorite spices or vegetables to match your guests’ tastes.
Some might believe that baking feta can lead to an overly salty dish, but with the right preparation and fresh ingredients, this recipe won’t fall into that trap. Balance is key, and by incorporating fresh herbs and ripe tomatoes, you can create a harmonious dish that delights everyone around the table.
Ingredients You’ll Need
- Feta cheese: The star ingredient, providing a creamy and tangy base. Opt for high-quality feta for the best flavor. You can substitute with goat cheese for a different profile.
- Cherry tomatoes: These bring sweetness and acidity to the dish. Feel free to swap with bell peppers or zucchini if desired.
- Extra virgin olive oil: Essential for adding richness and aiding in roasting the vegetables. A good quality olive oil enhances the dish’s final taste.
- Fresh herbs: Oregano, thyme, and basil are ideal for this recipe. They contribute fresh flavors; however, dried versions can be used if fresh isn’t available.
- Garlic: Minced garlic adds a robust flavor that complements the feta and herbs. Consider roasting whole cloves for a milder taste.
- Red pepper flakes: For those who enjoy a little heat, red pepper flakes are a perfect addition. Adjust the amount to fit your guests’ heat tolerance.
- Black olives: Optional, but they add an earthy flavor. You can replace them with green olives or skip them altogether if preferred.
- Pita bread or crusty bread: An essential accompaniment for scooping up the baked feta and veggies.
Utilizing the freshest ingredients is vital to achieving the best taste. As you continue shopping, keep an eye out for seasonal veggies to elevate your dish.
How to Make
- Preheat your oven to 375°F (190°C). This temperature is perfect for baking the feta and roasting the vegetables evenly. Make sure to use an oven thermometer to ensure accuracy, as uneven baking can affect the texture.
- Prepare your baking dish by drizzling extra virgin olive oil on the bottom. This helps prevent sticking and infuses the feta with its rich flavor as it roasts. Using a dish that is too small can prevent even cooking, so choose wisely.
- Chop the cherry tomatoes in half and scatter them over the bottom of the baking dish. You want the tomatoes to be fresh and vibrant, as they will release juices that flavor the feta as it bakes.
- Add the feta cheese on top of the tomatoes. Ensure that the cheese is at room temperature; this allows it to soften easily in the oven. You can cut it into crumbles or leave it in one block—either way, it’s bound to melt beautifully.
- Sprinkle minced garlic and your chosen fresh herbs evenly over the feta and tomatoes. The aroma created by the garlic and herbs as they bake will be irresistible.
- Drizzle more olive oil generously over the entire dish and season with red pepper flakes, salt, and pepper. This adds additional flavor and is crucial for the baking process.
- Cover the baking dish with aluminum foil and place it in the oven for about 20 minutes. This helps to steam the dish and speeds up the cooking process, ensuring the veggies soften while the feta warms up.
- Remove the foil and bake for an additional 10 minutes, or until the feta is golden and bubbly. Open your oven door to a lovely scent that fills the room—it’s almost time to eat!
- Serve warm with sliced pita or crusty bread. Allow guests to dip into the warm, creamy feta for a shared experience. Pair with a fresh salad for a complete meal.
By following these simple steps, you are not just baking a dish; you are creating a memory that will linger in the hearts and taste buds of your loved ones.
Variations & Substitutions
Herbed Baked Feta Variation: If you want to take your dish to the next level, consider incorporating a variety of herbs. Instead of just oregano and thyme, add dill or parsley for a different flavor dimension. Fresh herbs give a vibrant touch, and you can mix them or even include a pinch of dried herbs if fresh isn’t available. This adaptation is particularly pleasant for herb lovers who cherish bright flavors.
Spicy Baked Feta Variation: For those who enjoy some heat, introducing jalapeños or chipotle peppers can greatly enhance the flavor profile. You can finely chop fresh jalapeños to mix in with the tomatoes or scatter some chipotle powder over the feta. The spicy element pairs beautifully with the creamy cheese, making it a delectable choice for spice enthusiasts.
Vegetable Lovers Baked Feta Variation: Increase the veggie content by incorporating bell peppers, zucchini, or even spinach to the mix. This not only adds more nutrients but introduces varied textures and colors that make the dish visually appealing. Do make sure to pre-cook heartier veggies such as zucchini to avoid excess moisture, ensuring your feta remains creamy and not watery.
Gluten-Free Baked Feta Variation: If you are catering to gluten-free guests, simply provide gluten-free bread for dipping. You could also serve the baked feta over a quinoa or cauliflower rice base for a satisfying meal that’s safe for those with gluten sensitivities.
Low-Carb Baked Feta Variation: For those adhering to low-carb diets, consider skipping the bread and using cucumber or bell pepper strips for dipping. It maintains the fresh-tasting elements of the meal while allowing you to enjoy all the flavors without compromising your dietary choices.
Common Mistakes to Avoid
One of the most common mistakes with baked feta is *not selecting high-quality feta cheese*. Always aim for authentic Greek feta for the best taste. If the cheese is too old or subpar, the flavor can become overly salty or bland when baked.
Another mistake is overcrowding the baking dish. If you stuff too many vegetables or feta into the dish, it can steam rather than roast, preventing that delicious golden-brown crust formation. Aim for a balanced ratio of vegetables to cheese to achieve the desired texture.
Also, be cautious with the baking time. Each oven can be different, so keep a close eye during the last few minutes. Burning the feta can produce a bitter taste that overshadows the dish’s delightful flavors.
Finally, don’t rush the cooling process. Allow the baked feta to cool slightly before serving; this ensures not only better flavor release but also enhances spreadability for dipping.
Storage, Freezing & Reheating Tips
Proper storage is essential to maintain the quality of your baked feta. After making this dish, let the leftovers cool down to room temperature before transferring them into an airtight container. It’s ideal to store it in the fridge for up to three days.
Reheating can be done in the oven, which helps retain the creamy texture of the feta. Simply place the leftovers in an oven-safe dish, cover with foil, and reheat at 350°F (175°C) for about 15 minutes or until warmed through. Avoid using a microwave, as it can cause the feta to become rubbery.
While it’s not recommended to freeze the baked feta dish due to the change in texture of the cheese upon thawing, if you need to store it, do so by separating the vegetables and feta for optimal texture upon reheating.
Always remember to practice food safety when storing. Draw attention to the date of cooking and consume leftovers within a safe time frame.
Frequently Asked Questions
Can I use a different type of cheese? Yes, while feta brings a unique flavor, you can substitute it with goat cheese or ricotta depending on your preference. Just keep in mind that the texture and taste may vary.
Can I use dried herbs instead of fresh herbs? While fresh herbs offer more flavor and aroma, dried herbs can be used if fresh aren’t available. Use about a third of the amount when substituting dried for fresh, as dried herbs are more concentrated.
Can this dish be prepared ahead of time? Absolutely! You can assemble the dish before your guests arrive, cover it, and store it in the refrigerator until you’re ready to bake. This is especially helpful for busy hosts looking to minimize kitchen time during the gathering.
Is this dish suitable for vegan diets? Unfortunately, as it contains feta cheese, it’s not suitable for vegans. However, you can experiment with dairy-free cheeses that melt well if desired, but check how those options behave when baked.
What sides work well with baked feta? Baked feta pairs beautifully with a fresh green salad or a refreshing tomato and cucumber salad. You can also serve it with hummus and assorted veggies for a complete spread that pleases various tastes.
Conclusion:
In summary, **Spring Dinner Party Baked Feta with Herbs** is the perfect dish to impress your guests while simplifying your hosting duties. With its incredible taste, easy preparation, and endless variations, it’s bound to become a new favorite in your culinary repertoire. Don’t hesitate to experiment and customize it to fit your tastes or those of your guests. Try this recipe for your next gathering and offer your loved ones a warm, delicious experience they’ll savor long after the meal. Share your creations, and don’t forget to encourage others to indulge in this warm, comforting dish. Happy cooking!


