Prep time: 20 minutes
Cook time: 0 minutes
Total time: 20 minutes
Servings: 6
Indulging in a delectable dessert is one of life’s sweetest pleasures, and when it comes to the perfect spring treat, few things can satisfy your cravings quite like a No Bake Strawberry Cheesecake Cup. Imagine creamy layers of rich cheesecake crowned with fresh, luscious strawberries, all in a convenient, individual serving. This delightful dessert not only satisfies your sweet tooth but also brings a burst of fresh, fruity flavor that is simply irresistible. Whether you’re planning a picnic, hosting a gathering, or just looking for a comforting after-dinner treat, these cheesecake cups will leave you and your guests feeling delighted.
This recipe is special not just because it’s easy to make but also because it’s adaptable to fit a variety of taste preferences and dietary needs. You will learn how to create a luscious dessert that is not only beautiful to look at but also incredibly satisfying to eat. From understanding the ingredients to mastering the techniques, I will share tips, variations, and essential information to ensure your No Bake Strawberry Cheesecake Cups turn out perfectly every time.
What Is Spring Dessert: No Bake Strawberry Cheesecake Cups?
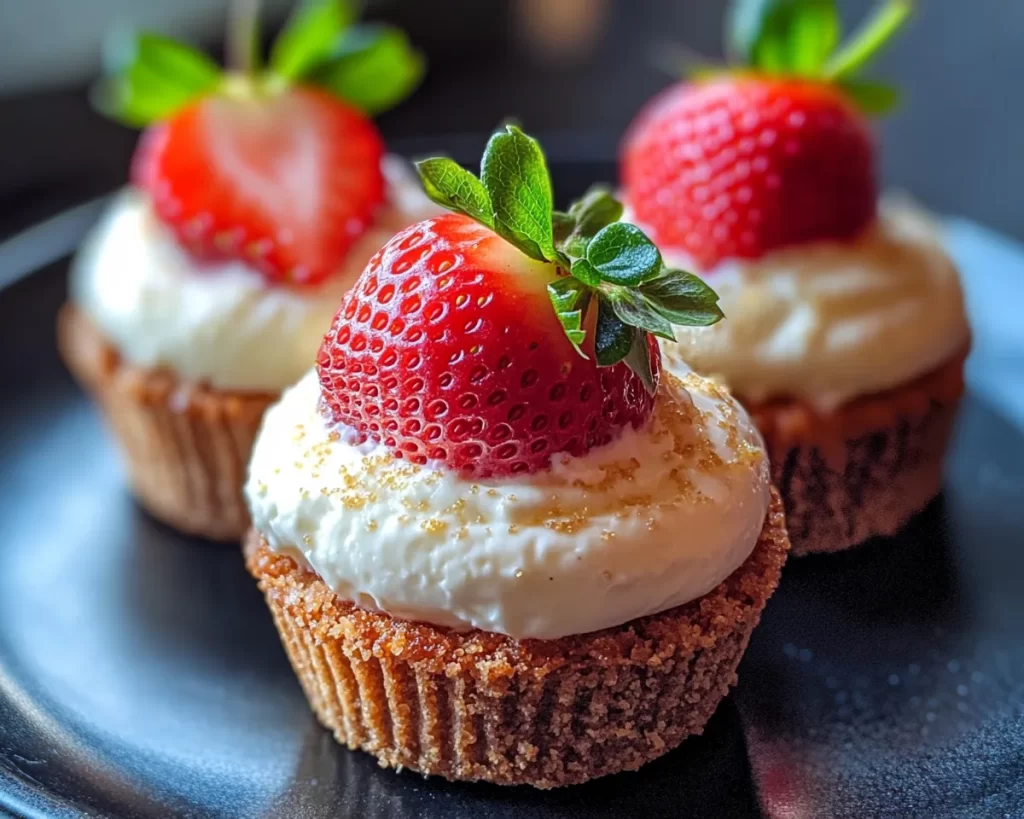
No Bake Strawberry Cheesecake Cups are a delightful fusion of creamy cheesecake filling layered with fresh strawberries, all served in individual cups for ease and elegance. The origins of cheesecake date back centuries, with a rich history that spans various cultures and cuisines. This lighter, no-bake version takes advantage of the natural sweetness of strawberries, making it a perfect spring or summer dessert. The texture is smooth and creamy, while the strawberries add both a fresh, juicy contrast and vibrant color.
With each spoonful, you’ll experience the mixture of tangy cream cheese and sweetened whipped cream, creating a harmonious balance that delights the palate. This dessert captures the essence of spring, invoking memories of warm days spent enjoying fresh produce straight from the garden. Whether enjoyed on a sunlit patio or as a refreshing finale to a family dinner, these cheesecake cups evoke the joy of seasonal flavors and simple pleasures.
Why You’ll Love This
You’ll fall head over heels for these No Bake Strawberry Cheesecake Cups because they offer a blissful combination of flavors, ease of preparation, and versatility. Not only are they a stunning addition to your dessert table, but they are also incredibly simple to make, requiring minimal cooking skills and only a handful of ingredients. This cost-effective treat allows you to indulge without breaking the bank, making it ideal for busy parents looking to whip up a sweet delight at home.
You may be thinking that cheesecakes are usually labor-intensive and time-consuming. In reality, this no-bake variation is a breeze, eliminating common mishaps like cracking, overbaking, or long chilling times. Plus, you can easily customize this recipe to suit your dietary preferences, whether you’re looking for gluten-free options or reduced-sugar alternatives. Imagine being able to serve everyone a dessert that caters to their needs and preferences while keeping the taste consistently divine!
Ingredients You’ll Need
- 1 ½ cups graham cracker crumbs – This is the base of your cheesecake cups and provides a crunchy texture and subtle sweetness. You can substitute with gluten-free cookies for a gluten-free version.
- ½ cup unsalted butter, melted – The butter binds the graham cracker crumbs together, creating a firm crust. Warm it up slightly before mixing for better consistency.
- 2 cups cream cheese, softened – A key ingredient that gives the cheesecake its creamy, rich flavor. Ensure it’s at room temperature for easy mixing.
- ½ cup powdered sugar – This adds sweetness to the filling while ensuring a smooth texture. Feel free to use a sugar substitute if you’re looking for a healthier option.
- 1 tsp vanilla extract – This common baking ingredient amplifies the flavors in your cheesecake filling. Opt for pure vanilla extract for the best flavor quality.
- 1 ½ cups heavy whipping cream – Whipped cream makes the cheesecake filling light and airy. You can substitute with coconut cream for a dairy-free alternative.
- 2 cups fresh strawberries, sliced – Adds freshness and vibrant color, tying all flavors together. Feel free to use other berries like blueberries or raspberries for variation.
Each ingredient plays a crucial role in achieving the delightful taste and texture of these cheesecake cups. It’s essential to consider the quality of your ingredients, especially when it comes to the cream cheese and strawberries. Fresh, in-season strawberries yield the best flavor, elevating your dessert to a whole new level.
How to Make
1. **Prepare the Crust**: In a mixing bowl, combine the grazing crumbs with the melted butter. Mix well until the crumbs resemble wet sand. You want them to stick together when pressed. This can be done in a food processor for an even finer texture or with a fork if you prefer a more rustic crust. Once combined, take small portions of the mixture and press them firmly into the bottoms of individual cups or glasses. Using the back of a spoon works well for this.
2. **Make the Cheesecake Filling**: In another bowl, beat the softened cream cheese until smooth and creamy. Gradually add in the powdered sugar and continue mixing until fully combined. Make sure to scrape down the sides of the bowl to ensure everything is well mixed. Add the vanilla extract at this point for extra flavor.
3. **Whip the Cream**: In a separate bowl, whip the heavy whipping cream until medium to stiff peaks form. This step is crucial as it adds volume and lightness to your cheesecake filling. Be careful not to over-whip, or it may become grainy. Gently fold the whipped cream into the cream cheese mixture until no streaks remain. This will create a luscious, fluffy filling.
4. **Layer the Ingredients**: Spoon a generous amount of the cheesecake filling over the prepared crust. Use a spatula to spread it evenly, ensuring no crust is visible. Follow with a layer of sliced strawberries, placing them artistically on top of the filling for a beautiful presentation. Repeat the layers until you reach the top of your cups, finishing with a final layer of whipped cream and a few additional strawberry slices for garnish.
5. **Chill**: Refrigerate the cheesecake cups for at least 2 hours. This chilling time allows the flavors to meld together and the filling to set properly. If you’re short on time, even a 30-minute chill can work, but longer is better for optimal texture.
6. **Serve and Enjoy**: When you’re ready to serve, gather your guests around, and present these delightful treats. The layers of cheesecake, crust, and fresh strawberries promise a burst of flavor that encapsulates the beauty of spring. Each cup is perfectly portioned, allowing everyone to enjoy this tasty delight without the fuss of slicing a whole cake.
Variations & Substitutions
Gluten-Free Option: If you or your guests are gluten-sensitive, simply replace the graham cracker crumbs with gluten-free cookies or even nuts for a nutty flavor. Almond flour can also be used to form a rich, buttery crust that pairs beautifully with the creamy filling.
Dairy-Free Version: For a dairy-free take on this beloved dessert, use vegan cream cheese and coconut cream instead of heavy whipping cream. The coconut cream will lend a subtle tropical flavor that enhances the strawberry’s freshness. Ensure that you use a dairy-free margarine or coconut oil for the crust as well.
Chocolate Strawberry Variation: If you’re a chocolate lover, consider adding a layer of chocolate ganache. Simply melt 1 cup of dark chocolate chips with ½ cup of heavy whipping cream and allow it to cool slightly before layering it atop the cheesecake filling. The combination of chocolate and strawberries will elevate your dessert to a deluxe level!
Mixed Berry Bliss: While strawberries shine in this recipe, you can easily swap them for other berries or a mix. Consider blueberries, raspberries, or blackberries, which all provide delightful sweetness and color. Layering various berries creates a beautiful visual and a delightful mix of flavors.
Incorporate Citrus: If you’re looking for a tangy twist, add some zest and juice from a lemon or lime into the cream cheese mixture. This addition brightens the flavor profile and enhances the overall experience of this dessert, making it even more refreshing for warmer days.
Common Mistakes to Avoid
One common pitfall in creating No Bake Strawberry Cheesecake Cups is not allowing the cream cheese to soften adequately. If your cream cheese is too cold, it can result in lumps that are difficult to integrate into the mixture. To avoid this, remember to leave the cream cheese at room temperature for about 30 minutes before you start mixing.
Another critical point to consider is overmixing the whipped cream. If you whip it for too long, it can become grainy and lose its ability to lighten the filling. Aim for medium peaks and gently fold it into the cream cheese mixture—patience is key here.
Lastly, be cautious about the chilling time. Not allowing enough time for the cups to set can lead to a messy experience during serving. Aim for at least 2 hours; this allows the flavors to meld beautifully and helps the filling firm up properly.
Storage, Freezing & Reheating Tips
To keep your No Bake Strawberry Cheesecake Cups fresh, store them in an airtight container in the refrigerator. They can last for up to 3 days, retaining their quality and flavor. If you need to prepare them in advance, it’s best to assemble them without adding the strawberries on top. Layer the crust and filling, cover, and refrigerate. Add the strawberries just before serving to prevent them from getting soggy.
Freezing is not recommended for the assembled cheesecake cups, as the texture may change unfavorably once thawed. If you’d like to prepare components in advance, you can freeze the crust mixture and cheesecake filling separately. Allow them to thaw fully in the refrigerator before assembly and serving.
When it comes to reheating, these cheesecake cups are best served chilled and do not require any reheating. Simply take them out of the refrigerator, add any fresh toppings, and enjoy.
Frequently Asked Questions
Can I use frozen strawberries instead of fresh for this recipe?
Yes, you can use frozen strawberries in a pinch. However, keep in mind that fresh strawberries offer superior taste and texture. If using frozen strawberries, ensure they are thawed and drained of excess moisture to prevent sogginess.
How do I achieve the perfect whipped cream consistency?
To achieve the perfect consistency for whipped cream, start with cold heavy cream. Use an electric mixer and whip until you see medium peaks forming. This means the cream will hold shapes but will still be smooth. Be cautious not to whip it too long or it will turn grainy.
Can I make this recipe without using sugar?
Yes, you can make this dessert without sugar by replacing the powdered sugar with a sugar substitute such as stevia or erythritol. Adjust the amount according to the sweetness equivalency of the substitute you choose.
What can I do if my cheesecake mixture is too runny?
If your cheesecake mixture turns out runny, it may be due to the cream cheese not being sufficiently beaten or the whipped cream being under-whipped. Ensure that the cream cheese is at room temperature and thoroughly mixed before folding in the whipped cream. If necessary, refrigerate the mixture for a short while to help it firm up before serving.
How can I prevent the strawberries from browning on top of the dessert?
To prevent strawberries from browning, you can toss them in a bit of lemon juice before placing them on top of the cheesecake. This will help maintain their freshness and vibrant color while adding a pleasant tartness to the dessert.
Conclusion:
These No Bake Strawberry Cheesecake Cups embody everything a dessert should be: simple, fresh, and utterly delicious. The joys of this dessert extend beyond its flavor; it offers versatility, is easy to make, and can please a variety of palates. I encourage you to try this recipe at home, customize it to your taste, and share it with loved ones. Create your own delightful memories, and remember that the best part of any meal is sharing it with those you care about. Get ready to dive into a world of creamy, sweet bliss that will transport your taste buds to the delights of spring!


