Prep time: 20 minutes
Cook time: 25 minutes
Total time: 45 minutes
Servings: 12
As the days grow longer and the weather shifts toward warmer breezes, there’s an undeniable urge to indulge in refreshing desserts that capture the essence of spring. One dish that perfectly embodies this vibrant season is **lemon bars**. With their lively, zesty flavor and the perfect balance of sweet and tart, lemon bars bring a little sunshine to any gathering or cozy afternoon at home. In this article, you will learn not only how to prepare these delicious treats but also explore variations, tips for perfect execution, and answers to common queries.
Lemon bars are an iconic dessert that dates back to the early 20th century in the United States. Their luscious filling made from freshly squeezed lemon juice is nestled atop a buttery and flaky crust — a combination that creates an irresistible bite. The texture of lemon bars is truly something special: the crust offers a satisfying crunch while the filling is silky smooth, providing a delightful contrast. With their brightness, lemon bars make a delightful ending to any meal or a refreshing afternoon snack that pairs wonderfully with a cup of tea or coffee.
Throughout this article, you will discover the ingredients that make lemon bars shine, step-by-step instructions for achieving the perfect bake, and ways to customize this classic treat. Whether you’re a beginner in the kitchen or an experienced cook, these lemon bars will surely become a go-to recipe as they resonate with everyone’s taste buds and provide a sense of achievement when presented beautifully to family and friends.
What Is Spring Dessert: Lemon Bars?
Lemon bars consist of a rich, buttery crust and a tantalizing filling made primarily from fresh lemon juice, sugar, eggs, and a touch of flour. Their origins can be traced to the United States, with many food historians attributing their creation to the 1960s. However, variations of lemon bars might be found in different cultures under various names, showcasing the universal love for tart citrus flavors paired with sweetness.
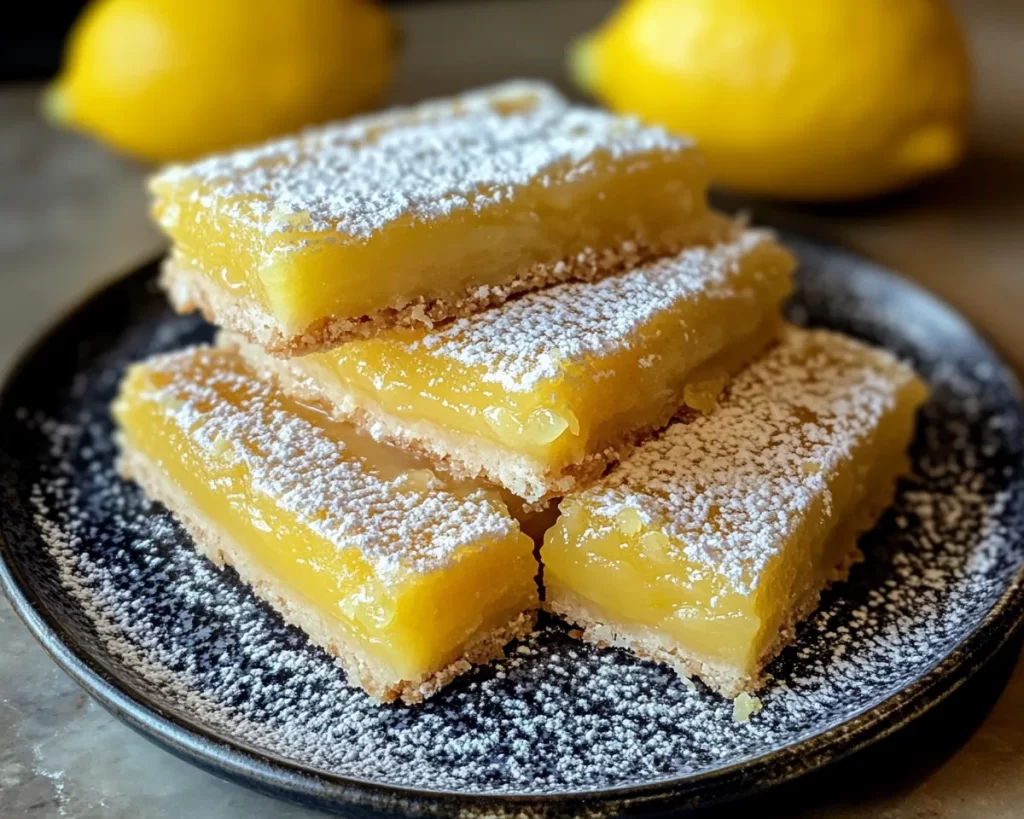
The allure of lemon bars lies in their contrasting profiles. The crust is made with simple ingredients like butter and flour, which produce a flaky base that acts as a perfect canvas for the **zesty filling**. When the filling is poured over the crust and baked, it becomes a sunshiny shade of yellow, giving a preview of its vibrant taste. Upon taking a bite, you are met with a **refreshing burst** of citrus flavor that dances on your palate, leaving behind a beautifully balanced sweetness. This dish is not only light and refreshing but also incredibly uplifting, making it a delightful springtime treat.
In addition to their delightful flavors, lemon bars also carry a sense of nostalgia for many home cooks. Whether made for family celebrations or served at casual gatherings, they bring people together in a shared appreciation of delicious desserts. Learning to make lemon bars is not just about the final product; it’s also about the joy of cooking and sharing. This recipe will empower you to replicate those moments in your own kitchen.
Why You’ll Love This
One of the primary reasons you will adore lemon bars is their **excellent taste profile**. The combination of bright lemon flavor with the buttery crust creates a harmony that tantalizes the taste buds. The dessert is refreshingly light, making it perfect for **spring and summer gatherings** where heavy cakes may not be suitable. Additionally, the preparation of lemon bars is straightforward, making them accessible to cooks of all skill levels, from beginners to seasoned baking enthusiasts.
Lemon bars also offer versatility in terms of presentation. They can be elegantly sliced into squares for a festive occasion or cut into smaller bites for a simpler tea-time snack. Plus, they can be easily transported, making them ideal for picnics, potlucks, or any event where you need to share a treat. The delightful aroma that fills your kitchen while they bake is an added bonus, making the process feel more rewarding and inviting.
It’s crucial to mention some common misconceptions surrounding lemon bars. Many assume that making these bars involves complex techniques or ingredients, but the reality is that they can be made with just a few pantry staples. Often, bakers are concerned about achieving the right balance between tartness and sweetness; however, once you learn to adjust the lemon juice and sugar levels, you can customize the taste to your liking. This adaptability makes lemon bars a favorite among individuals who may have specific flavor preferences or dietary considerations.
Ingredients You’ll Need
To make fantastic lemon bars, gather the following ingredients:
- 1 cup unsalted butter: Provides a rich flavor and flaky texture for the crust.
- 2 cups all-purpose flour: The base for the buttery crust, essential for structure.
- 1/2 cup granulated sugar: Adds sweetness to the crust and enhances flavor.
- 1 cup granulated sugar: For the lemon filling, balancing the tartness of the lemons.
- 4 large eggs: Acts as a binding agent in the filling and contributes to the creaminess.
- 1/2 cup freshly squeezed lemon juice: The star of the show, imparting the distinct, tangy flavor.
- 1 tablespoon lemon zest: Intensifies the lemon flavor, adding a fresh aroma.
- 1/4 teaspoon salt: Enhances the overall flavor balance.
- Powdered sugar (optional, for dusting): Adds a decorative touch and a hint of sweetness on top.
Each component plays a crucial role in the recipe. The combination of unsalted butter, flour, and sugar forms a delicate, crumbly crust that serves as a sturdy base for the smooth lemon filling. Fresh lemon juice and zest are essential, as they infuse the filling with **brightness and acidity**. Opt for fresh lemons whenever possible to ensure maximum flavor and aroma.
If you find yourself needing substitutions, you can use coconut oil in place of butter for a dairy-free option. Granulated sugar can be substituted with coconut sugar or honey if desired, but keep in mind that it may alter the final texture or taste slightly.
How to Make
Step 1: Preheat your oven to 350°F (175°C). This initial step is crucial because a preheated oven ensures your lemon bars bake evenly, resulting in the best texture and flavor.
Step 2: Prepare the crust. In a mixing bowl, combine 1 cup of unsalted butter, softened to room temperature, with 1/2 cup of granulated sugar and 2 cups of all-purpose flour. Mix until you achieve a crumbly texture that holds together when pressed. You can use a pastry cutter, fork, or your fingers for this if you prefer a more hands-on approach.
Step 3: Press the crust mixture evenly into the bottom of a greased 9×13-inch baking pan. It’s important to press the crust firmly so that it doesn’t crumble when baked. Aim for an even layer of about 1/4-inch thickness. Bake it in the preheated oven for about 20 minutes or until it’s lightly golden around the edges.
Step 4: While the crust is baking, prepare the filling. In a large mixing bowl, whisk together 4 large eggs until they are well combined. Next, add in 1 cup of granulated sugar, 1/2 cup of freshly squeezed lemon juice, 1 tablespoon of lemon zest, and a pinch of salt. Whisk this mixture until it is smooth and homogeneous, ensuring that there are no lumps.
Step 5: Once the crust has finished baking, remove it from the oven and pour the lemon filling directly over the hot crust. This helps the filling set better and meld into the crust, enhancing the overall flavor and texture.
Step 6: Return the pan to the oven and bake for an additional 25 minutes or until the lemon filling is just set. Keep an eye on the edges; they should appear slightly firm, but the center can remain a little wobbly. Overbaking may result in a dry filling, so a gentle touch is important here.
Step 7: After baking, allow the lemon bars to cool in the pan at room temperature for at least 1 hour. For best results, refrigerate them for another 2–3 hours before slicing into squares. Refrigeration helps the bars set properly and enhances their refreshing taste.
Step 8: Once chilled, dust with powdered sugar, if desired, and slice the lemon bars into squares. Use a sharp knife for clean cuts, and wipe the knife blade between cuts for a neat presentation.
Step 9: Serve chilled or at room temperature. These bars are best enjoyed within a week. Store leftovers in an airtight container in the refrigerator.
Variations & Substitutions
Ginger Lemon Bars: If you want to add a little spice to your lemon bars, try incorporating ginger. By adding 1 tablespoon of freshly grated ginger to the lemon filling, you introduce a layer of warmth and zestiness that complements the citrus beautifully. This variation is perfect for ginger lovers or those looking to experiment with different flavor profiles.
Blueberry Lemon Bars: For a delightful twist on the classic recipe, consider incorporating blueberries. By adding a cup of fresh or frozen blueberries to the lemon filling, you’re not only enhancing the visual appeal but also adding a natural sweetness that pairs brilliantly with the tartness of lemon. This variation is a great way to use seasonal fruits.
Vegan Lemon Bars: If you’re looking for a plant-based alternative, you can easily make vegan lemon bars. Substitute the eggs with 1/4 cup of unsweetened applesauce or a chia seed gel (1 tablespoon chia seeds mixed with 2.5 tablespoons water and left to sit until it thickens). For the crust, substitute dairy butter with coconut oil. The remaining ingredients can stay the same, ensuring you still achieve that delightful lemon flavor.
Gluten-Free Lemon Bars: To cater to gluten-free diets, simply replace the all-purpose flour with a gluten-free flour blend or almond flour. This swap will create a deliciously crumbly crust that is sure to impress. Just ensure that all your other ingredients are certified gluten-free to avoid any cross-contamination.
Herb-Infused Lemon Bars: For an aromatic twist, consider incorporating fresh herbs like rosemary or thyme. Adding a teaspoon of finely chopped fresh rosemary or thyme to the lemon filling will give an unexpected depth of flavor that works cohesively with the citrus. This version can be a great conversation starter at your next gathering.
Common Mistakes to Avoid
One common mistake when preparing lemon bars is overmixing the filling. Overmixing can introduce too much air, resulting in a **curdled appearance** and texture when baked. Ensure you are whisking just until well combined.
Another critical error is overbaking the bars. You want the filling to be set but still slightly wobbly in the middle. If they are baked for too long, the filling can become tough and chewy instead of creamy. Keep a close eye on the time and use visual cues to gauge doneness.
Failure to allow the bars to cool completely before slicing is another frequent pitfall. Cutting into the bars too soon can cause them to fall apart and lose their beautiful presentation. Be patient and let them chill in the fridge for optimal firmness before slicing.
Lastly, remember that using freshly squeezed lemon juice is essential for the best flavor. Bottled lemon juice lacks the vibrant taste necessary for delicious lemon bars. Take the time to squeeze lemons for the best outcome, ensuring your dessert shines with authentic **citrus flavor**.
Storage, Freezing & Reheating Tips
Storing lemon bars correctly is key to maintaining their flavor and texture. After they have cooled and set, cover them tightly with plastic wrap or place them in an airtight container. They will remain fresh in the refrigerator for up to a week.
If you want to extend their shelf life, lemon bars can also be frozen. To freeze, first, cut them into squares and place them in a single layer on a baking sheet. Freeze for about an hour until solid, then transfer the bars to a freezer-safe container or zip-top bag. They can be frozen for up to three months. When you’re ready to enjoy them, just take them out and let them thaw in the refrigerator overnight before serving.
Food safety is essential, particularly when using eggs in your dessert. Always ensure that the eggs are fresh and check for any signs of spoilage before use. This ensures that your lemon bars remain not only delicious but also safe to enjoy.
Frequently Asked Questions
Can I use bottled lemon juice instead of fresh lemon juice? Using fresh lemon juice is highly recommended for the best flavor in lemon bars. Bottled juice often lacks the brightness and aromatic qualities of fresh lemons. If you must use bottled juice, opt for a quality brand with no additives for the closest flavor.
How do I know when my lemon bars are properly baked? The best indicator that your lemon bars are ready is the surface appearance. When done, the edges of the filling will be slightly set, while the center may still wobble slightly. Keep a close eye toward the end of the baking time to avoid overbaking.
Can I make lemon bars ahead of time? Absolutely! Lemon bars can be made a day in advance and stored in the refrigerator. In fact, allowing them to chill overnight can enhance their flavors as they set. Just make sure to cover them properly to prevent them from absorbing any odors from the fridge.
What can I do if my lemon filling is too runny? If your filling seems runny after baking, it may be due to underbaking. Ensure that you’ve baked the bars long enough for the filling to set. If they don’t set after chilling, you may need to adjust the amounts of flour or eggs in your filling for future attempts.
How can I ensure my crust stays flaky? To maintain a flaky crust, avoid overmixing the butter and flour. Aim for a crumbly texture when combining ingredients, and be sure to chill the crust before baking. This helps the butter stay solid during baking, resulting in a lighter texture.
Conclusion:
The delightful experience of making and sharing lemon bars captures the essence of spring and brings joy to any table. With their **zesty filling** and crisp crust, these bars are sure to become a family favorite. Whether you stick to the classic recipe or explore the variations, you will find that lemon bars are a rewarding treat to craft and share with those you love. So gather your ingredients, don your apron, and get ready to impress as you whip up this delightful spring dessert! Don’t hesitate to customize it to your taste or occasion, and always remember to share the love through food. Happy baking!


