Prep time: 20 minutes
Cook time: 20 minutes
Total time: 40 minutes
Servings: 12 cupcakes
Spring is a season filled with colorful blooms and delightful flavors, and what better centerpiece for your spring gatherings than these stunning Spring Cupcakes: Strawberry Chocolate Swirl Cupcakes? With their enticing marble look and sweetly rich flavor, they are a perfect dessert for celebrations, birthdays, or simply a cozy family dessert night. These cupcakes not only look appealing but also burst with a combination of fresh strawberries and luscious chocolate, making every bite a delightful experience.
What Is Spring Cupcakes: Strawberry Chocolate Swirl Cupcakes in 7 Steps?
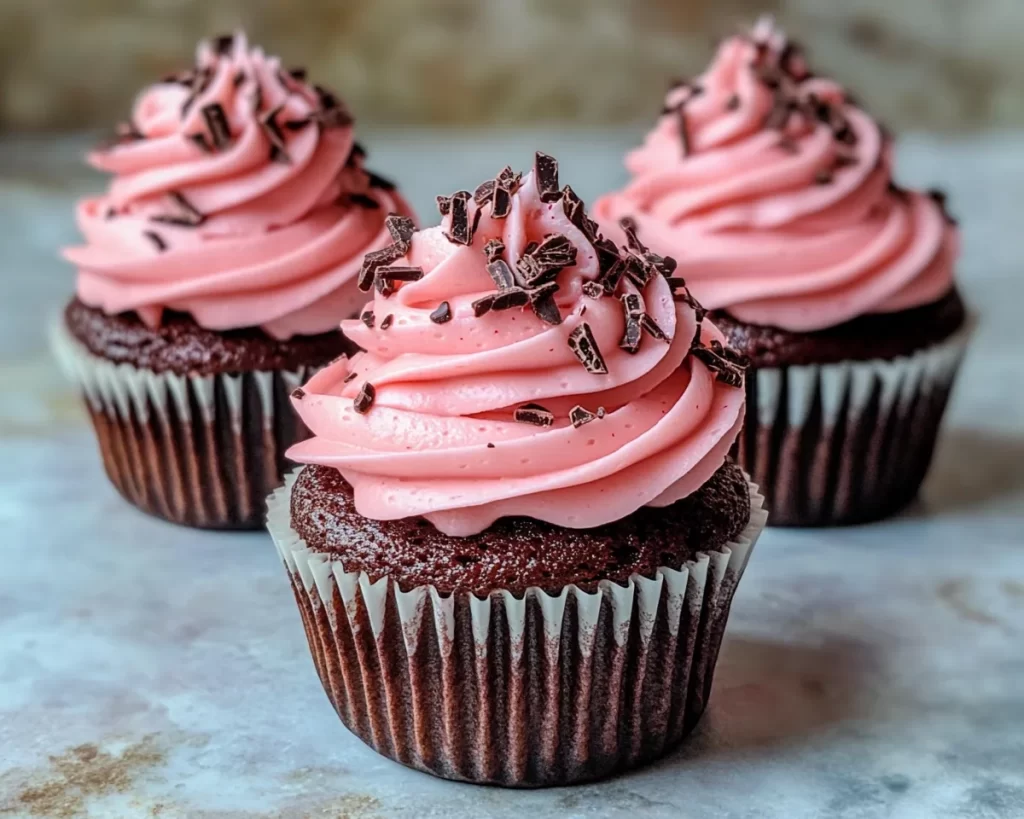
Spring Cupcakes: Strawberry Chocolate Swirl Cupcakes are a delightful fusion of chocolate and strawberry flavors. These beautiful cupcakes feature a light, fluffy vanilla base swirled with fresh strawberry puree and rich chocolate batter. The swirls create an inviting visual appeal while offering layers of flavor in each bite. Perfect for springtime celebrations, they make an elegant addition to any dessert table. Baking these cupcakes is simple and requires just seven steps to create a delicious treat that both adults and kids will love.
Why You’ll Love This
These cupcakes are not just about flavor; they’re also a feast for the eyes. The vibrant pink and deep brown swirls create a marbled effect that is both visually appealing and mouthwateringly tempting. Beyond their appearance, the combination of juicy strawberries and rich chocolate offers a balance that is sure to satisfy any sweet tooth. Plus, they are incredibly versatile; you can easily adapt the recipe to suit your dietary needs or preferences. Whether you’re a busy parent needing a quick dessert idea, or a kitchen beginner trying your hand at baking, these cupcakes will impress everyone.
Ingredients You’ll Need
- 1 ½ cups all-purpose flour: The base of our cupcakes, providing structure and fluffiness.
- 1 cup sugar: Adds sweetness and helps achieve a tender crumb.
- ½ cup unsalted butter: Creates a rich flavor and a moist cupcake texture.
- 2 large eggs: These help bind the ingredients together, adding moisture and richness.
- ½ cup buttermilk: Provides acidity which helps tenderize the gluten and adds flavor.
- 1 teaspoon vanilla extract: Enhances the buttery flavor and adds aroma.
- 1 teaspoon baking powder: Helps the cupcakes rise and become fluffy.
- ½ teaspoon baking soda: Works with the buttermilk for even leavening.
- ¼ teaspoon salt: Balances the sweetness of other ingredients.
- ½ cup strawberry puree: Fresh strawberries blended into a smooth puree, adding color and flavor.
- ½ cup cocoa powder: Provides rich chocolate flavor to the batter.
- ½ cup hot water: Helps moisten the cocoa powder and brings out its flavor.
How to Make
- Preheat your oven to 350°F (175°C) and line a cupcake pan with cupcake liners. This ensures easy removal and a neat presentation.
- In a large mixing bowl, cream together the unsalted butter and sugar until light and fluffy, about 3-4 minutes. This step incorporates air for a lighter texture.
- Add in the eggs one by one, mixing well after each addition. Then, stir in the vanilla extract. The mixture should look creamy and well combined.
- In a separate bowl, whisk together the all-purpose flour, baking powder, baking soda, and salt. Gradually add this dry mixture to the wet mixture alternately with buttermilk, starting and ending with the dry ingredients. Mix just until combined; overmixing can lead to dense cupcakes.
- Divide the batter in half into two different bowls. To one bowl, add the cocoa powder and hot water, and mix until smooth. To the other bowl, add the strawberry puree and fold gently until incorporated.
- Using a large spoon or scoop, fill each cupcake liner halfway with chocolate batter, followed by a layer of strawberry batter. Use a toothpick to swirl the batters together gently, creating a marbled effect. Be careful not to over-swirl—you want the two flavors to be distinct.
- Bake for 18-20 minutes or until a toothpick inserted into the center comes out clean. Let them cool in the pan for 5 minutes, then carefully remove to a wire rack to cool completely.
Variations & Substitutions
Gluten-Free Option: You can substitute all-purpose flour with a gluten-free 1:1 baking flour blend. It’s essential to confirm that your ingredients, like baking powder and chocolate, are gluten-free. These swaps will help maintain texture while making it suitable for gluten-free diets.
Dairy-Free Version: To make these cupcakes dairy-free, replace unsalted butter with coconut oil and use almond milk or any other plant-based milk in place of the buttermilk. The strawberry puree remains dairy-free! Always check that your chocolate and cocoa powder are dairy-free as well.
Incorporate Other Flavors: For a twist, consider adding a hint of almond extract for added depth. You can also mix in chocolate chips or crushed fresh strawberries into the batter for an extra flavor burst. These additions not only enhance texture but also create delightful surprises in every bite.
Frosting Alternatives: Top these cupcakes with whipped cream for a light touch, or opt for a rich chocolate ganache. You can also use a simple buttercream frosting flavored with strawberry or chocolate to match the cake’s theme. Feel free to experiment with various frosting toppings to find your favorite!
Common Mistakes to Avoid
Make sure to **avoid overmixing the batter**. Overmixing can lead to tough cupcakes due to gluten development. It’s best to mix just until no dry ingredients are visible.
Another common mistake is **not using room temperature ingredients**. Cold eggs and butter can create a lumpy batter and may not incorporate properly. Allow your butter and eggs to sit at room temperature for about 30 minutes before baking.
Lastly, **check your oven temperature**. Ovens can vary significantly; using an oven thermometer will give you accuracy. Baking at a too-high or too-low temperature can lead to cupcakes that are either undercooked or burnt.
Storage, Freezing & Reheating Tips
To store your Spring Cupcakes, place them in an airtight container at room temperature for up to two days. If you need them to last longer, refrigerate them, where they will stay fresh for up to a week. Always allow the cupcakes to come to room temperature before serving for the best flavor and texture.
For longer storage, consider **freezing** your cupcakes. First, allow them to cool completely. Wrap each cupcake in plastic wrap and then place them in a freezer-safe bag. They can be frozen for up to three months. When ready to enjoy, simply thaw them in the refrigerator overnight, then bring them back to room temperature before serving.
If reheating is necessary, place them in a microwave for a few seconds, ensuring they don’t dry out. You could also reheat them in the oven at a low temperature for a few minutes to restore their freshly baked texture.
Frequently Asked Questions
Can I use frozen strawberries for the strawberry puree?
Yes, frozen strawberries can be used; simply thaw them first. Make sure to drain excess moisture to prevent the batter from becoming too wet. Blend them until smooth to incorporate into the cupcake batter effectively.
How do I know when the cupcakes are done baking?
The best way to check for doneness is to insert a toothpick into the center of a cupcake. If it comes out clean or with a few crumbs attached, they are ready. Remember, they will continue to cook slightly from residual heat after being removed from the oven, so best to check a minute or two before the suggested baking time ends.
Can I make mini cupcakes with this recipe?
Absolutely! This recipe is versatile enough to be used for mini cupcakes. Simply adjust the baking time to around 10-12 minutes. Keep a close eye on them to ensure they don’t overbake.
What type of frosting pairs best with these cupcakes?
Cream cheese frosting pairs beautifully with the strawberry and chocolate flavors, balancing the sweetness perfectly. An elegant chocolate ganache would also make a delicious topping, providing a rich consistency that complements the cupcake’s lightness.
Can I make these cupcakes ahead of time?
Yes! You can bake the cupcakes a day in advance. Just store them in an airtight container and frost them on the day you plan to serve them. This will help keep the frosting fresh and beautiful.
Conclusion:
These Spring Cupcakes: Strawberry Chocolate Swirl Cupcakes are sure to impress anyone who lays eyes on them, and even more so when they take a bite. With their vividly swirled batters and the delightful balance of flavors, they are ideal for a variety of occasions. The easy step-by-step instructions make them accessible for bakers of all levels, ensuring that you will succeed in your cupcake endeavors. Enjoy impressing your family and friends with these fabulous treats that capture the essence of spring in every bite!