Prep time: 20 minutes
Cook time: 30 minutes
Total time: 50 minutes
Servings: 8
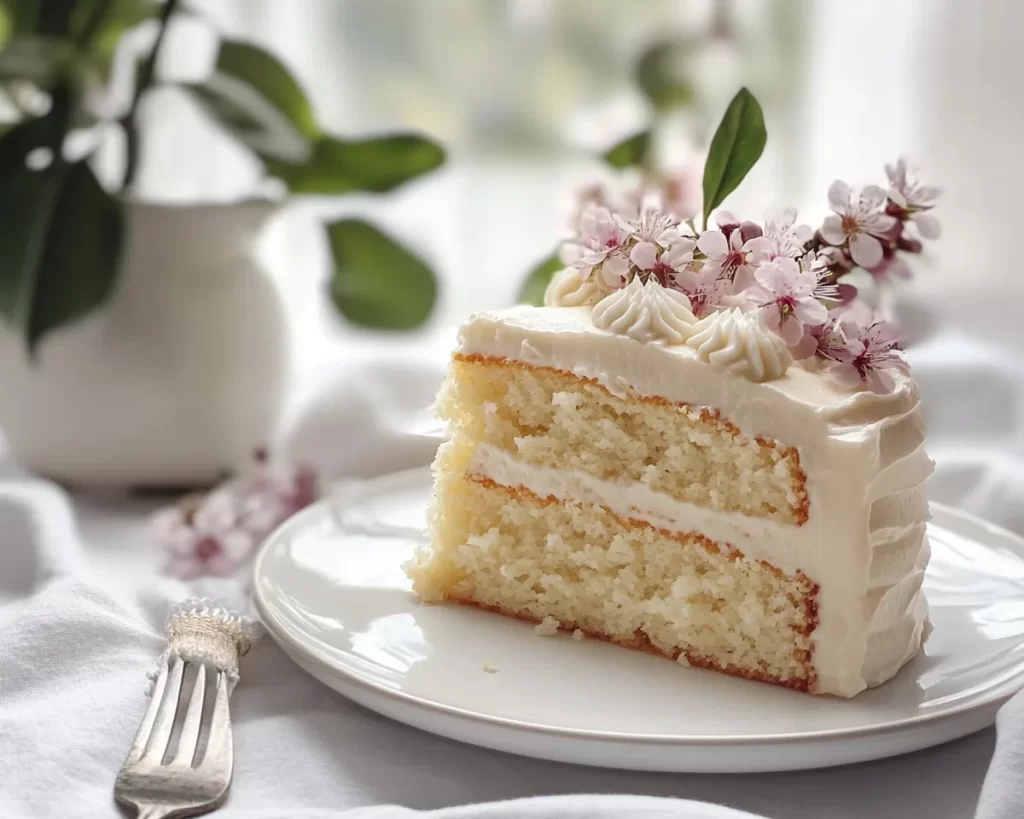
Are you ready to indulge in a delightful treat that embodies the essence of spring? If the mere thought of a light, airy, and fragrant vanilla cake invokes the feeling of sunshine on your skin and the blossoming of flowers, you’re in the right place. The **Spring Cake: Simple Vanilla Spring Cake** is not just a dessert; it’s a celebration of flavors, colors, and the changing seasons. Imagine serving it at a family gathering or enjoying a slice with your afternoon tea—this cake will leave you and your guests craving more.
This recipe takes the classic vanilla cake to new heights, introducing you to techniques that ensure a light, fluffy texture with every bite. You’ll learn about the essential ingredients to use and some handy tips that can take your baking skills to the next level. With the right methods, you can create a beautiful cake that looks as good as it tastes—perfect for any occasion!
What Is Spring Cake: Simple Vanilla Spring Cake?
Spring Cake, particularly this variant of Simple Vanilla Spring Cake, is a type of layer cake that is both light and decadent. Originating from traditional cake baking methods, its texture is often airy, achieved through the careful mixing of ingredients. The cake is typically flavored with vanilla, invoking a lovely, sweet aroma that fills the kitchen as it bakes. This flavor is both comforting and versatile, making it suitable for various occasions, from celebratory gatherings to casual afternoons.
The beauty of Spring Cake lies in its simplicity. It features a tender crumb thanks to the perfect balance of **butter**, **sugar**, and **eggs**. Additionally, the cake can be dressed up with a variety of frostings or fillings, allowing you to tailor it to your taste or the theme of your event. This cake also benefits from optimal moisture retention, giving it a wonderful mouthfeel that contrasts beautifully with crispy frosting or fresh fruit toppings.
Another appealing aspect of Spring Cake is its adaptability. Whether you’re looking to create a layered masterpiece or a simple one-layer cake, the structure and flavor lend themselves well to a variety of styles, making it a go-to option for bakers at all skill levels.
Why You’ll Love This
There are endless reasons to love this Spring Cake. First and foremost is its **unmatched taste**. The combination of the delicate vanilla flavor with the sweetness creates a balance that can satisfy any sweet tooth. Plus, it’s incredibly easy to whip up—perfect for busy parents or those new to baking. In just under an hour, you can have a beautiful cake ready to serve.
Cost-effectiveness is another advantage. With staple ingredients that you likely already have in your pantry, this Spring Cake won’t break the bank. Thinking about guests with **special dietary needs**? Fear not! This cake can easily be adapted to accommodate dietary restrictions or preferences by substituting ingredients or changing flavors to tailor it to your guests’ needs.
Common misconceptions about baking often lead to mistakes that can turn a cake into a disaster. Many may think that achieving a professional-looking cake requires experience, but this recipe proves that anyone can succeed with the right tips and techniques. Variations allow for creativity; you can add ingredients to make it chocolatey, fruity, or even nutty, keeping the flavor fresh and exciting for everyone.
Ingredients You’ll Need
- All-purpose flour: The backbone of the cake, providing structure. Consider using cake flour for an even lighter texture.
- Sugar: Granulated sugar adds sweetness and caramelization. Brown sugar could also be substituted for a hint of molasses flavor.
- Baking powder: This leavening agent is crucial for the cake to rise, making it fluffy. Ensure it’s fresh for best results.
- Salt: A pinch is essential to enhance flavor; don’t skip it! Sea salt can also add a delightful hint of crunch.
- Unsalted butter: The richness from butter adds moisture and flavor. Make sure to soften it at room temperature for easier mixing.
- Eggs: These provide moisture and help bind ingredients together. Room temperature eggs whip better, resulting in a fluffier cake.
- Vanilla extract: This ingredient is the star of the cake, imparting natural sweetness and fragrance that elevates its overall profile.
- Milk: Adds moisture; whole milk works best, but low-fat milk can also be used if preferred.
Understanding the ingredients is key in baking, and each plays a role in achieving a perfectly balanced and delicious cake.
How to Make
- Preheat your oven: Start by preheating your oven to 350°F (175°C). This step is crucial as it ensures even baking. While the oven heats, prepare your baking pan.
- Prepare the pan: Grease two 9-inch round cake pans with butter and consider dusting them with flour to prevent sticking. This will help your cakes release effortlessly after baking, ensuring a smooth finish.
- Mix the dry ingredients: In a large mixing bowl, whisk together the all-purpose flour, baking powder, and salt. This helps to evenly distribute the leavening agent and prevents clumping, so your cake rises evenly.
- Cream the butter and sugar: In another bowl, beat the softened unsalted butter with sugar until it’s light and fluffy—a process that usually takes about 3-4 minutes. The fluffy texture is important as it creates air pockets that help with the cake’s lift.
- Add the eggs: Incorporate the eggs one at a time into the butter mixture, ensuring each one is completely combined before adding the next. This step helps emulsify the mixture. Gently scrape down the sides of the bowl as you go to ensure everything is mixed well.
- Include the vanilla: Add the vanilla extract to the mixture at this point, mixing well until you have a smooth, creamy batter. The aroma at this stage is a true delight!
- Combine wet and dry ingredients: Gradually add the dry mixture into the wet ingredients, alternating with the milk. Begin and end with the dry ingredients. Mix just until combined—overmixing can lead to a tough cake.
- Pour and bake: Divide the batter evenly between the prepared pans and smooth the tops with a spatula. Bake in the preheated oven for 25-30 minutes, or until a toothpick inserted into the center comes out clean.
- Cool the cakes: Once baked, let the cakes cool in the pans for about 10 minutes. Then, carefully turn them out onto a wire rack to cool completely. This prevents sogginess.
- Prepare your frosting: While your cakes cool, prepare your frosting of choice. A simple buttercream made from whipped butter, powdered sugar, vanilla, and a splash of milk works wonderfully. Feel free to customize the frosting flavor or add food coloring for a festive look.
- Assemble the cake: Once the cakes are completely cool, place one layer on a serving plate. Spread a layer of frosting on top, then place the second cake layer on top. Frost the top and sides as desired. Garnish with fresh fruits or edible flowers for that spring flair!
With patience and attention to detail, you’ll find this Spring Cake remarkably easy to make, even for beginners. As you master the method, you’ll feel more confident experimenting with flavors and toppings!
Variations & Substitutions
Citrus Spring Cake: If you’re a fan of bright flavors, consider adding lemon or orange zest to your batter. The acidity brings a refreshing twist, perfectly complementing the vanilla. This variation works well for those who love citrus-infused desserts, making it a perfect choice for spring-time gatherings. To further enhance the flavor, you could include a citrus glaze drizzle on top.
Gluten-Free Vanilla Spring Cake: For those who follow a gluten-free diet, substituting all-purpose flour with a 1:1 gluten-free baking mix is an excellent option. Be sure to ensure all other ingredients, especially baking powder, are certified gluten-free. This adaptation ensures that everyone can enjoy a slice of delicious vanilla goodness without compromising on flavor or texture.
Chocolate Delight Spring Cake: Transform this vanilla cake into a chocolate dream by replacing some of the all-purpose flour with cocoa powder. This change will add a rich flavor and darker color to the cake. You could also enhance the chocolate experience by incorporating chocolate chips into the batter or topping it with chocolate ganache for an indulgent treat that captivates the senses.
Berry-Stuffed Spring Cake: For a fruity twist, consider folding in fresh blueberries or raspberries into the cake batter before baking. Alternatively, you can layer fresh berries between the cake layers along with the frosting, creating a delightful surprise with each slice. This addition not only adds flavor but also brings a vibrant pop of color—a treat for both the eyes and the palate!
Common Mistakes to Avoid
Baking is an exact science, and some common mistakes can lead to less-than-perfect results. One **critical warning** is to never skip the preheating step; starting with a cold oven can affect how your cake rises, resulting in a dense texture. Another common issue can arise from overmixing the batter. While it might be tempting to ensure everything is thoroughly blended, overmixing can lead to a tough cake.
Another mistake is using cold ingredients straight from the fridge. Make sure to let your butter and eggs come to room temperature before starting. This helps in creating a uniform batter that will rise beautifully. Lastly, always check for when your cake is done; inserting a toothpick should come out clean. Baking is an art that requires practice, so don’t be discouraged if your first cake doesn’t come out perfect—learn from the experience!
Storage, Freezing & Reheating Tips
To keep your Spring Cake fresh, it’s best to store it in an airtight container at room temperature for up to three days. If you want to keep it longer, you can refrigerate it for up to a week. Just be cautious about the frosting; some frosts might harden in the fridge, altering the mouthfeel.
If you wish to store the cake for a longer period, consider freezing it. Carefully wrap the cooled cake layers in plastic wrap, followed by a layer of aluminum foil. This method helps in preventing freezer burn, allowing you to enjoy your cake for up to three months. When ready to enjoy, let it thaw in the refrigerator overnight, and then bring it to room temperature before serving.
Reheating is usually unnecessary for cakes, as fresh cakes taste best; however, if you wish to have a warm slice, you can pop it in the microwave for a few seconds. Just be sure to check frequently to avoid drying it out.
Frequently Asked Questions
Can I substitute eggs in this recipe? Absolutely! If you’re looking for an egg substitute, consider using 1/4 cup of unsweetened applesauce for each egg or a flax egg made from 1 tablespoon of ground flaxseed mixed with 2.5 tablespoons of water. These alternatives can achieve similar moisture and binding properties while accommodating vegan diets.
What can I do if my cake isn’t rising? If your cake is not rising as expected, the most common reason is expired baking powder. Always check the expiration date before using it. Additionally, ensure you are not overmixing the batter, as this can create a denser texture.
How can I make this cake ahead of time? You can prepare the cake layers up to two days in advance. Store the cooled layers wrapped tightly in plastic wrap at room temperature. When ready to serve, frost the cake shortly before your gathering, ensuring it remains fresh.
Can I use this recipe for cupcakes? Yes! This Spring Cake recipe can easily be adapted for cupcakes. Bake the batter in a preheated oven at 350°F for about 18-20 minutes or until a toothpick inserted in the center comes out clean. This makes for delightful individual servings perfect for parties.
What’s the best way to decorate my Spring Cake? The decoration opportunities for this cake are manifold. Fresh fruits, edible flowers, or a simple dusting of powdered sugar can elevate its appearance. You can also pipe decorations with your preferred frosting for an elegant touch, or drizzle chocolate ganache for an indulgent finish.
Conclusion:
This Spring Cake: Simple Vanilla Spring Cake is a delightful canvas that invites creativity while promising incredible taste. Its airy texture combined with the richness of vanilla makes it a stand-out dessert, whether you’re celebrating a special occasion or simply indulging yourself. Remember, the beauty of this cake lies not only in its flavor but also in its adaptability. Feel free to customize it to suit your preferences or those of your guests.
Now that you have this recipe, why not dive in and bake something wonderful today? You’ll not only impress your friends and family but also gain invaluable confidence in your baking skills. So go ahead, gather your ingredients, and enjoy the delightful experience of making a cake that truly embodies the spirit of spring!