Prep time: 30 minutes
Cook time: 50 minutes
Total time: 1 hour 20 minutes
Servings: 8–10 servings
Who doesn’t love the sight of a beautifully decorated cake adorned with delicate buttercream flowers? The Spring Cake Designs: Simple Buttercream Flowers Cake is a delightful blend of taste and aesthetics that can bring joy to any gathering. This cake is not just a feast for the eyes; its moist layers and rich buttercream make it a tactile experience that’s equally satisfying. Whether you are celebrating a birthday, an anniversary, or simply indulging yourself on a Saturday afternoon, this cake offers both flavor and charm—a true showstopper in its entirety.
The simplicity of this cake allows for customization, making it perfect for both beginners and seasoned bakers. You may be amazed at how straightforward the process is! Throughout this recipe, you will learn about flavor pairings, seasonal ingredients, and the techniques needed to master simple buttercream flowers. Not only will you leave with a stunning cake, but also the confidence to impress friends and family at your next gathering.
What Is Spring Cake Designs: Simple Buttercream Flowers Cake?
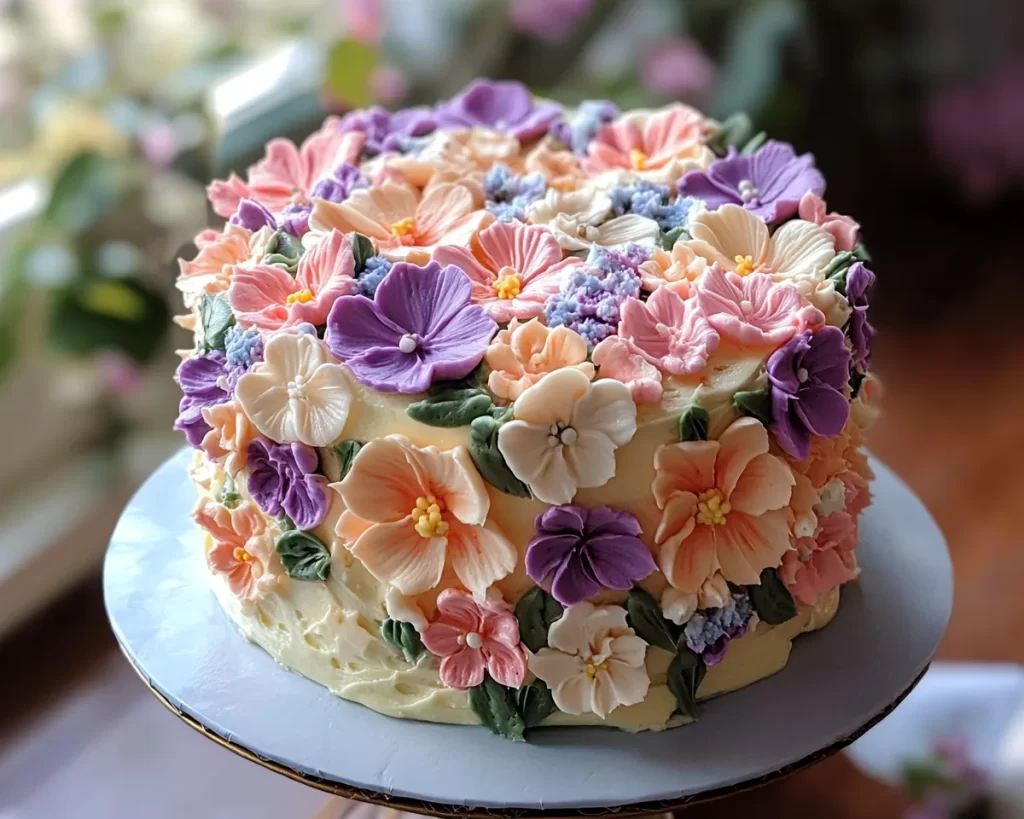
The Spring Cake Designs: Simple Buttercream Flowers Cake is a charming cake that captures the essence of spring through its vibrant and colorful buttercream decorations. Originating from classic baking traditions, this cake features layers of fluffy sponge cake filled with delicious buttercream frosting and accompanied by hand-piped flower designs. The cake is often celebrated for its eye-catching presentation, which serves as a beautiful centerpiece for any spring or summer event.
The texture of this cake is light and fluffy, thanks to the carefully measured ingredients that create perfectly risen sponge layers. Each bite offers a delightful contrast of softness from the cake and the creamy richness of the buttercream. You’ll experience the sweet aroma of freshly baked cake combined with the whisper of vanilla and the lightness of buttercream that melts effortlessly in your mouth. The added bonus is that the cake is highly adaptable—making it an ideal canvas for a variety of flavor combinations, seasonal fruits, or even chocolate ganache.
As this cake is decorated with buttercream flowers, it becomes a project that allows any baker to showcase their creative flair. Whether you are an experienced baker or a novice looking to try something new, the techniques learned here will serve you well in future baking endeavors. You’ll gain the essentials needed to create not just this cake, but also a variety of other cakes decorated in similar styles.
Why You’ll Love This
Incorporating the Spring Cake Designs: Simple Buttercream Flowers Cake into your baking repertoire is a decision you will not regret. This cake is not only visually stunning but also remarkably delicious, satisfying both the sweet tooth and aesthetic preferences of your guests. The flavor combinations can be adjusted based on seasonal ingredients, taste preferences, or dietary restrictions, making it a versatile choice for any occasion.
Moreover, creating this cake is a wonderful way to tap into the joys of baking, especially when sharing it with loved ones. The process of piping flowers can be therapeutic and fulfilling, allowing you to express your creativity while honing your skills. Beginners will find the instructions user-friendly, while more experienced bakers can add an extra layer of complexity by playing with colors and designs.
A common misconception about cakes adorned with piped decorations is that they are challenging to make. While some aspects require practice, our step-by-step approach ensures that anyone can achieve professional-looking results with relative ease. If you’re budget-conscious, making your own cake at home offers a worthwhile alternative to expensive bakery options. Best of all, this cake can be made ahead of time, leaving you free to enjoy the moments that matter most.
Ingredients You’ll Need
- 2 cups all-purpose flour: Essential for structure, flour gives the cake its body. You can substitute with gluten-free flour blends if necessary.
- 1 ½ cups granulated sugar: This sweetener provides flavor and helps the cake stay moist.
- ½ cup unsalted butter, softened: Butter adds richness and helps create a tender crumb.
- 1 cup whole milk: Enhances the flavor and moisture levels in the cake. You can replace it with almond milk for a dairy-free option.
- 3 large eggs: Eggs give structure and stability while also enriching the flavor.
- 2 ½ teaspoons baking powder: This leavening agent enables the cake to rise and become fluffy. Avoid using expired powder for best results.
- 1 teaspoon vanilla extract: Provides a warm flavor that complements the other ingredients beautifully.
- 4 cups unsweetened powdered sugar: For the buttercream frosting, it gives the right texture for piping and decorating.
- 1 cup unsalted butter, softened: The base of your buttercream; always ensure it’s at room temperature for the best texture.
- 2 tablespoons heavy cream: Enhances the smoothness of your frosting; can be substituted with milk.
- Food coloring: Optional, for adding color to your buttercream flowers—gel colors work best for vibrant shades.
Each ingredient plays a vital role in creating a delicious cake that is both visually appealing and enjoyable to eat. Make sure to gather these ingredients ahead of time to streamline your baking process.
How to Make
1. **Prepare Your Pans**: Begin by preheating your oven to 350°F (175°C). Grease and flour two 9-inch round cake pans, ensuring that you coat them evenly to prevent the cake from sticking. Alternatively, you can use parchment paper at the bottom of the pans for ease of removal post-baking.
2. **Mix Dry Ingredients**: In a bowl, whisk together the all-purpose flour, baking powder, and a pinch of salt. This step is crucial as it ensures the leavening agent is evenly distributed through the flour, contributing to a uniform rise in the cake.
3. **Cream Butter and Sugar**: In a mixing bowl, use an electric mixer to beat the softened butter and granulated sugar together until the mixture is light and fluffy, about 4–5 minutes. This process incorporates air into the butter and sugar, contributing to a tender textured cake.
4. **Add Eggs and Vanilla**: Add the eggs one at a time, mixing well after each addition. Then, add the vanilla extract. The mixture should appear creamy and slightly pale. Ensure there are no lumps of butter; this will affect the cake’s texture.
5. **Combine Wet and Dry Ingredients**: Gradually add the flour mixture and the whole milk to the butter mixture in three additions, starting and ending with the flour. Mix until just combined; over-mixing can lead to a tough cake.
6. **Bake**: Divide the batter evenly between the prepared pans and spread it out to ensure an even surface. Bake in the preheated oven for 25–30 minutes or until a toothpick inserted in the center comes out clean. It is essential to avoid opening the oven door during the first 20 minutes to prevent the cakes from sinking.
7. **Cool Layers**: Once baked, let the cakes cool in the pans for 10 minutes, then turn them out onto wire racks to cool completely. This is a crucial step as it sets the texture and prevents sogginess.
8. **Prepare the Buttercream**: While the cakes are cooling, in a separate bowl, beat the softened butter for the frosting until creamy. Gradually add the powdered sugar, mixing on low speed until combined. After that, add the heavy cream and beat on medium speed for another 2-3 minutes. The goal is a smooth, spreadable consistency.
9. **Color the Buttercream**: If you want to pipe flowers in different colors, divide the buttercream into smaller bowls and mix in your desired food coloring. Make sure to mix thoroughly to achieve an even hue.
10. **Assemble the Cake**: Place one cake layer on a serving plate, and spread an even layer of buttercream on top. Add the second layer and apply a thin coat of buttercream around the sides and top of the cake, known as a crumb coat. Refrigerate the cake for 20 minutes to set the coat.
11. **Decorate with Buttercream Flowers**: Once the crumb coat is set, use a piping bag fitted with your desired flower tip to create beautiful decorations on the cake. Take your time to practice different techniques, and don’t worry if your flowers aren’t perfect; practice makes perfect!
12. **Serve and Enjoy**: Finally, slice the cake, serve to family or friends, and watch the joy on their faces as they enjoy your creation. The combination of flavors and textures is sure to delight everyone!
Variations & Substitutions
Citrus Zest Buttercream: For a refreshing twist, consider adding citrus zest—such as lemon or orange—to your buttercream frosting. This brings a lively brightness that pairs beautifully with the cake and awakens the senses, making it perfect for spring or summer celebrations. The use of fresh ingredients is particularly appealing for those looking to incorporate natural flavors into their desserts.
Chocolate Cake Variation: Swap half of the all-purpose flour for unsweetened cocoa powder to transform this cake into a rich chocolate experience. This variant is perfect for chocolate lovers and pairs well with vanilla or chocolate buttercream. To ensure that you maintain the fluffiness of the cake, keep a close eye on baking time, as chocolate cakes can bake faster than vanilla.
Fruit-Filled Layers: Add a layer of fresh fruit or fruit filling between the cake layers before frosting. Strawberries, raspberries, or a tangy lemon curd can lend a burst of flavor that contrasts wonderfully with the sweet buttercream. This variation is ideal for those keen on incorporating more natural elements into their desserts.
Dairy-Free Buttercream: For a dairy-free alternative, replace the butter in the frosting with vegan butter or coconut cream. Whip the coconut cream until fluffy and gradually mix in the powdered sugar. This option allows those with lactose intolerance to enjoy the cake without compromising on flavor or texture.
Gluten-Free Cake: Substitute all-purpose flour with a 1:1 gluten-free flour blend suitable for baking. This will ensure a similar texture without the gluten. However, note that the taste may vary slightly. Adding a teaspoon of xanthan gum can also help mimic the properties of gluten.
These variations not only add complexity to your baking experience but also ensure that everyone at your gathering can enjoy a slice of this lovely cake, catering to various tastes and dietary requirements.
Common Mistakes to Avoid
One of the most common pitfalls when baking is overmixing the batter, leading to a dense cake. To avoid this mistake, mix only until ingredients are combined—no more. Additionally, be mindful of your oven temperature; always use an oven thermometer to ensure accurate readings, as baking times can vary dramatically with temperature fluctuations.
Another issue often encountered is not adequately preparing the cake pans. Failing to grease and flour the pans, or neglecting to use parchment paper, can result in cakes that stick and tear during removal. Be diligent in this preparation step, as it impacts the final presentation.
Lastly, when decorating with buttercream flowers, a common mistake is using stiff frosting. To achieve beautiful flower petals, your buttercream should be smooth and somewhat soft for easy piping. Adjust the consistency with either milk or powdered sugar as needed. Remember, practice is key, and while it might take a few tries to master buttercream flowers, each attempt will teach you valuable skills.
Storage, Freezing & Reheating Tips
To store your Spring Cake, keep it in an airtight container at room temperature for up to three days. If you live in a particularly warm environment, consider refrigerating it to prevent the buttercream from melting or becoming too soft. Before serving, allow it to come back to room temperature for the best flavor and texture.
If you plan to store leftovers, ensure the cake is wrapped tightly in plastic wrap or placed in an airtight container to maintain moisture. For longer-term preservation, this cake freezes beautifully. Wrap it tightly in plastic wrap, followed by aluminum foil, and store it in the freezer for up to three months. When you’re ready to enjoy, allow it to thaw in the refrigerator overnight, and bring it to room temperature before serving.
If any of the buttercream is leftover, it can be stored in the refrigerator for up to a week. Simply re-whip it with a bit of heavy cream or milk before using it again.
For food safety, always ensure your cake is completely cool before storing, and never leave it out for extended periods, especially when decorated with buttercream.
Frequently Asked Questions
Can I make this cake in advance?
Yes, you can make this cake one to two days in advance. Just ensure that it is properly stored in an airtight container, and it will remain fresh and delicious. If you choose to frost the cake ahead of time, just keep it in the refrigerator to maintain the integrity of the buttercream.
What can I do if my buttercream is too sugary?
If you find that your buttercream is excessively sweet, consider adding a pinch of salt to balance the flavors. Additionally, mixing in a bit of heavy cream or butter can help soften the sweetness and achieve a more pleasant flavor profile.
How can I achieve bright colors with my buttercream flowers?
To achieve vibrant colors, use gel food coloring rather than liquid dyes. Gel colors are more concentrated and will produce brighter results without altering the consistency of your buttercream. Start with small amounts and gradually add until you reach the desired shade.
Is this recipe suitable for decorating with fondant?
Yes, this buttercream is an excellent base for cakes decorated with fondant. Apply a smooth layer of buttercream as a crumb coat, allowing the fondant to adhere better. You’ll find that the combined textures create a lovely dessert experience.
How do I know when my cake is fully baked?
The best test is to insert a toothpick into the center of the cake; when it comes out clean or with a few crumbs attached, the cake is ready. Avoid opening the oven door too frequently as it can lead to uneven baking.
Conclusion:
The Spring Cake Designs: Simple Buttercream Flowers Cake is more than just a treat; it’s an experience that combines flavors, colors, and creativity. This cake has the potential to redefine your culinary adventures, empowering you to explore further into the delightful world of baking. So why not give it a try? Customize it to suit your tastes or the preferences of your loved ones. Remember, making this cake is not just about the final product but also the joy in creating it. Share your journey, and let the warmth of your kitchen bring smiles to those you cherish the most. Happy baking!


