Prep time: 30 minutes
Cook time: 25 minutes
Total time: 55 minutes
Servings: 12 servings
Every bite of cake layered with gorgeous pastel buttercream can evoke that unmistakable feeling of spring blossoming around you. This recipe for Spring Cake Designs: Pastel Spring Buttercream Swirls is truly a celebration on a plate. Picture yourself serving this delightful cake at a birthday party, an Easter gathering, or just a casual dinner with friends. That vivid burst of colors alongside the creamy texture will not only awaken your taste buds but also ignite the joy of connection through sharing delicious treats.
What truly sets this recipe apart is its versatility. You can easily customize the flavors, making it perfect for each season or any occasion. Whether you’re a busy parent seeking a fun weekend project with your kids or a beginner eager to learn the art of baking, this cake is tailored for you. Throughout this article, we’ll guide you step-by-step, sharing helpful tips, alternatives, and plenty of encouragement to assure you that your cake will be a success.
What Is Spring Cake Designs: Pastel Spring Buttercream Swirls?
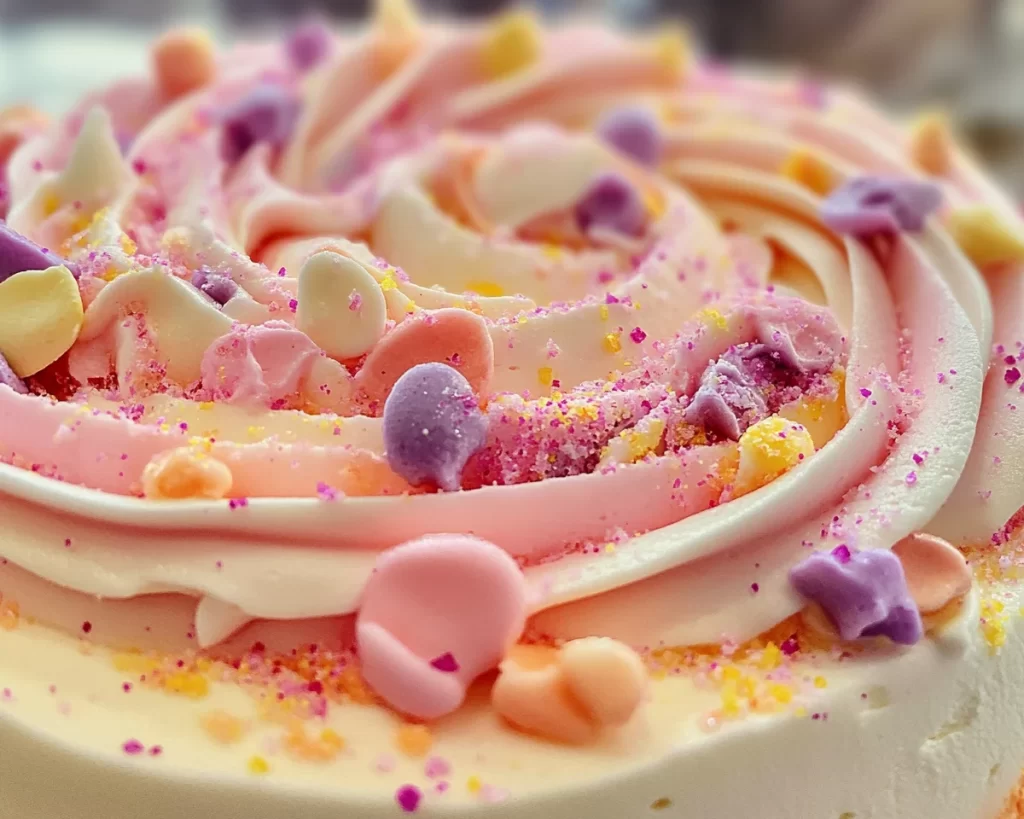
Spring Cake Designs: Pastel Spring Buttercream Swirls is not just another cake; it is a beautiful embodiment of the season itself. This delightful confection features layers of moist vanilla cake adorned with beautifully swirled pastel buttercream frosting, reminiscent of blooming flowers at the time when nature awakens from its winter slumber. Originating from classic layered cakes, this design incorporates simple yet impressive decorating techniques that are both visually stunning and utterly delicious.
The texture of this cake is light and fluffy, perfectly complemented by the rich, creamy frosting that melts delightfully in your mouth. Thanks to its delicate flavor, the cake allows the buttercream to shine, making each bite a symphony of sweetness that transports you to a sunlit meadow! Not only is the taste delightful, but the artistry involved in creating these buttercream swirls makes it an engaging baking experience for all involved. From the creamy base of the frosting to the vibrant pastel colors, every element celebrates spring’s charm.
Why You’ll Love This
There’s a multitude of reasons why Spring Cake Designs: Pastel Spring Buttercream Swirls will quickly become a favorite in your baking repertoire. First and foremost, its flavor is perfectly balanced; the buttery cake embraces the sweet creaminess of the frosting without overwhelming it. Additionally, the cake allows for ease and flexibility in preparation, making it simple even for novice bakers.
Moreover, this cake is cost-effective and requires only accessible ingredients. You don’t need to spend a fortune to impress your family and friends with this delightful dessert. The budget-friendly nature of the components means you can whip it up for any occasion, without breaking the bank. The cake also provides a canvas for creativity. You can switch up the colors and flavors based on what you have on hand, catering to various dietary preferences or simply what you’re in the mood for.
One common misconception is that cake decorating requires advanced skills; however, this cake’s swirled buttercream makes it surprisingly easy to create a stunning effect without the need for intricate piping techniques. Believe me, even if you are a beginner, you’ll be amazed at how simple it is to achieve a professional-looking finish.
Ingredients You’ll Need
- All-purpose flour: This is the base of your cake, providing structure. If you need gluten-free options, almond flour or a gluten-free blend can work well.
- Baking powder: This gives your cake the lift it needs. Ensure it’s fresh for optimum results.
- Salt: Just a pinch enhances the flavor of the cake. It’s important not to skip it, as it balances the sweetness.
- Butter: Use unsalted butter for the batter and the frosting. It contributes to the cake’s moisture and richness. Alternately, you can use coconut oil for a dairy-free version.
- Sugar: Granulated sugar works best for providing sweetness. For a healthier option, consider coconut sugar.
- Eggs: They serve as a binder, adding richness and moisture; you can substitute with applesauce for a vegan option.
- Vanilla extract: Pure vanilla extract enhances the cake’s flavor. If you want a twist, try almond extract instead.
- Heavy cream: Perfect for making the buttercream fluffy and creamy. You can use a dairy-free cream for an alternative.
- Powdered sugar: This is essential for the buttercream, providing that sweet, smooth finish you’ll love.
- Food coloring: Choose pastel shades of your liking to make the buttercream visually stunning. You can also use natural colorants like beet juice.
Gathering your ingredients beforehand is a tremendous help. Ensure everything is fresh to achieve the best taste and texture. Moreover, feel free to explore substitutions that fit your dietary needs without sacrificing flavor.
How to Make
1. **Preheat your oven:** Begin by preheating your oven to 350°F (175°C). This is essential for an even bake. While the oven heats, prepare your cake pans by greasing them with butter or lining them with parchment paper.
2. **Mix dry ingredients:** In a mixing bowl, whisk together the all-purpose flour, baking powder, and salt. This step ensures that the leavening agent is evenly distributed throughout the flour, contributing to a uniform rise.
3. **Cream the butter and sugar:** In a large mixing bowl, use an electric mixer to cream the softened butter and granulated sugar together until the mixture turns light and fluffy. This process usually takes about 4-5 minutes. The incorporation of air during this step is crucial for a light cake texture.
4. **Add eggs and vanilla:** Once your butter and sugar are creamed, add the eggs one at a time, mixing well after each addition. Then, pour in the vanilla extract, ensuring that all ingredients are well combined until you have a smooth mixture.
5. **Combine wet and dry:** Gradually incorporate the dry ingredients into the wet mixture. Alternate adding the flour mixture and any remaining liquid (such as milk or cream) into the bowl. Begin and end with the dry mix to maintain an even consistency. Be cautious not to overmix; about 30 seconds should do it.
6. **Divide the batter:** Once your batter is smooth, divide it evenly between the prepared cake pans. Use a spatula to level the tops, ensuring that both cake layers bake evenly.
7. **Bake the cakes:** Place the pans in the preheated oven and bake for about 25 minutes or until a toothpick inserted in the center comes out clean. The cakes should have a light golden color on top.
8. **Cool the cakes:** After baking, remove the cakes from the oven and allow them to cool in the pans for 10 minutes. Then, run a knife along the edges to loosen them before transferring to a wire rack to cool completely.
9. **Prepare the buttercream:** In a large mixing bowl, beat the softened butter until creamy. Gradually add the powdered sugar, mixing on low speed. Once combined, increase the speed and add heavy cream and the desired food coloring, mixing until fluffy.
10. **Frost the cake:** Once your cake layers are completely cool, place one layer on a cake stand. Spread a generous layer of buttercream on top, topping with the second layer. Cover the entire cake with a thin layer of frosting, known as the crumb coat, and chill it in the refrigerator for about 15 minutes.
11. **Decorate with swirls:** After the crumb coat is set, use a piping bag fitted with a large star tip to create beautiful swirls on top of the cake. For a more artistic look, use different colors of buttercream to achieve a lovely pastel swirl effect.
12. **Serve and enjoy:** After decorating, let the cake sit at room temperature for a bit before serving to ensure every bite is as delicious as possible.
Enjoy this fun baking experience, and don’t hesitate to customize it according to your tastes!
Variations & Substitutions
Chocolate Cake Variation
A fabulous alternative that many enjoy is the chocolate version of this cake. Simply substitute half of the all-purpose flour with unsweetened cocoa powder. This adjustment transforms the flavors remarkably without complicating the process. For a richer texture, add a splash of coffee to the batter, which will enhance the chocolate flavor. This variation is perfect for chocolate lovers or as a decadent treat for special occasions.
Gluten-Free Option
If you or your guests are gluten-sensitive, you can easily make this cake gluten-free. Replace the all-purpose flour with a 1:1 gluten-free baking blend. Baking time and technique remain the same. Always ensure to check the label on your baking blend for any specific guidelines to ensure the best results and flavor stand. With it being so delicious, the gluten-free guests will appreciate the thoughtful consideration!
Dairy-Free Version
For a dairy-free variant of this delightful cake, switch out the unsalted butter for coconut oil or a vegan butter substitute. Choose an alternative milk such as almond milk or oat milk in the batter. For the frosting, use coconut cream to achieve that creamy texture—just whip it until fluffy and add powdered sugar. This way, you can share this scrumptious cake with those who follow a dairy-free lifestyle.
Fruit-flavored Buttercream
Customize your buttercream further by incorporating pureed fruits like strawberries or raspberries. Blend the fruits until smooth and fold them into the buttercream before swirling it onto the cake. Not only does this heighten the flavor, but it also adds an appealing natural color to the frosting, which takes the spring aesthetic to a whole new level. Serve this variation at brunch or garden parties for an elegant touch.
Common Mistakes to Avoid
Baking a cake may seem straightforward, but there are several common pitfalls to watch out for. One critical mistake is not properly measuring your ingredients. Always use the spoon-and-level method for flour, as packing it can result in a dense cake. Additionally, don’t skip the **importance of preheating** the oven. Pouring your batter into a cold oven can lead to uneven baking.
Another common error is overmixing the batter. Once you combine the wet and dry ingredients, mix them only until they come together. Overmixing can lead to a tough cake due to gluten development. Moreover, ensure your cake is completely cool before applying the frosting; otherwise, you risk melting the buttercream into a gooey mess.
Lastly, when decorating your cake, don’t rush the process. Take your time with the buttercream swirls for that beautiful spring look. Enjoy this aspect of cake-making as an artistic endeavor rather than a chore. Remember, practice makes perfect!
Storage, Freezing & Reheating Tips
Proper storage is essential to maintain the cake’s freshness and flavor. Store this cake at room temperature in an airtight container for up to three days. If you live in a particularly warm environment, refrigerating the cake may help preserve its integrity. However, allow it to come to room temperature before serving to ensure optimal taste.
For longer storage, individual slices can be frozen. Wrap slices in plastic wrap and then foil to prevent freezer burn and store them in an airtight container. The cake can last up to 3 months this way. When ready to enjoy, let it thaw in the refrigerator overnight, and allow to reach room temperature before serving.
If you find yourself with leftover buttercream, you can store it in the fridge for up to a week. Just remember to whip it back up to restore its creamy texture before using it again. Keeping these tips in mind will help you enjoy your delicious cake for days to come!
Frequently Asked Questions
Can I make the cake ahead of time?
Absolutely! You can bake the cake layers a day or two in advance. Just ensure they are completely cooled before wrapping them well and storing them at room temperature. Frost the cake the day you plan to serve it for the freshest taste and appearance.
Can I substitute egg options?
Yes, you can substitute eggs based on your dietary needs. For each egg, use 1/4 cup of applesauce, mashed bananas, or a flaxseed meal mixture (1 tablespoon of ground flaxseed mixed with 3 tablespoons of water). Just note that this may alter the final texture slightly.
How do I achieve the pastel buttercream swirls?
To create those lovely pastel washed swirls, divide the buttercream into separate bowls and add a small amount of food coloring to each. Use a spatula to fold in the color gently, achieving that softness. When you pipe it onto your cake, swirl different colors together for a delightful effect!
How can I prevent my cake from sinking in the middle?
To prevent this common issue, ensure your oven is at the correct temperature before baking. It’s also crucial to mix your batter just until combined. Lastly, using fresh baking powder helps assure that the batter rises adequately during baking.
What is the best way to slice my cake for serving?
Using a long serrated knife is your best bet for slicing the cake. Dip the knife in hot water and wipe it dry before each slice to maintain clean cuts. This allows you to cut through both the cake and the buttercream smoothly without tearing.
Conclusion:
This Spring Cake Designs: Pastel Spring Buttercream Swirls recipe truly celebrates the joy of baking and the arrival of beautiful springtime moments. The flavors, colors, and textures harmoniously unite to create an unforgettable treat that brings people together. Whether you customize it for events or keep it simple for family, this cake is bound to shine. Try it out, make it your own, and share it with those you love. Happy baking!