Prep time: 30 minutes
Cook time: 25 minutes
Total time: 55 minutes
Servings: 12
When spring arrives, it brings with it a sense of renewal and joy. Garden flowers bloom, and a lightness fills the air. It’s the perfect backdrop for festive celebrations and delicious desserts. One way to capture that essence is through a delightful cake adorned with beautifully crafted pastel buttercream rosettes. This Spring Cake Designs: Pastel Buttercream Rosettes Cake is not only visually stunning but also packs a flavor that dances upon your palate with every bite. Imagine the soft, airy texture of a vanilla cake layered with luscious buttercream, all topped with vibrant rosettes that celebrate the spirit of the season. If you’ve ever found yourself lost in the world of cake decorating or just want to bring a bit of spring into your kitchen, this detailed guide will walk you through everything you need to know.
Prepare to embark on a delightful journey that will not only satisfy your sweet tooth but will also enhance your baking skills. You will learn how to create this beautiful cake, from selecting the right ingredients to mastering the art of buttercream rosettes. We’ll explore various tips and tricks along the way that will ensure your cake is a stunning centerpiece for any occasion, whether it’s a birthday, wedding, or just because. So, grab your apron and let’s dive into the art of making this exquisite Spring Cake Designs: Pastel Buttercream Rosettes Cake.
What Is Spring Cake Designs: Pastel Buttercream Rosettes Cake?
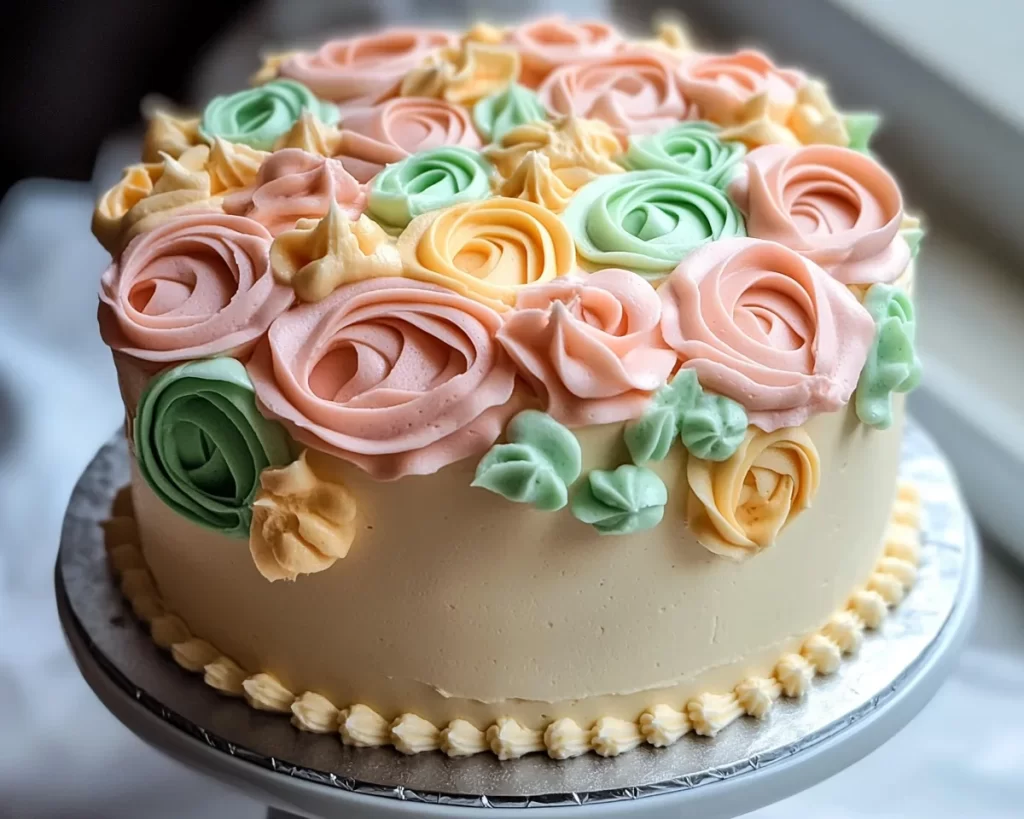
Spring Cake Designs: Pastel Buttercream Rosettes Cake is a delightful concoction that perfectly embodies the beauty of the spring season. Traditionally made with a moist and fluffy vanilla cake, this creation is layered with rich buttercream frosting, which can be easily tinted with pastel colors. The authentic essence of this cake comes from the combination of flavors, coupled with its aesthetically pleasing design.
A vanilla cake is a staple in many baking repertoires for its light and airy texture. When complemented with the right buttercream frosting, your cake becomes not just a dessert but a work of art. The rosettes you will create are fabricated using a piping technique that not only requires a steady hand but also a bit of patience. The combination of elegantly piped decorations and the whispered notes of vanilla and butter results in a slice of heaven that is hard to resist. Every forkful brings a delightful mix of creamy sweetness balanced with the lightness of the cake itself.
The origins of these types of cakes can be traced back to traditional celebratory cakes, which were decorated to symbolize the beauty of nature. This cake is no different; it represents spring with its soft hues and vibrant floral designs, drawing familial gatherings and special moments closer together. The inviting aroma and shimmering appearance make it a joy to create and share, resulting in a centerpiece that truly brings a smile.
Why You’ll Love This
You’re going to adore this Spring Cake Designs: Pastel Buttercream Rosettes Cake for several compelling reasons. For starters, the taste is truly delightful; the interplay of sweet buttercream and fluffy cake delivers a sensory experience that will have you coming back for seconds. This cake is not only a visual treat but also appeals to a wide range of palates, making it suitable for various occasions.
This cake is also incredibly easy to make, even if you’re a beginner in the kitchen. The steps are straightforward, focusing on techniques that enhance your baking skills without overwhelming you. Additionally, you can personalize the colors and flavors to suit your preferences or themes, making it versatile enough for birthdays, graduations, and even bridal showers. By learning to pipe rosettes, you’re gaining a skill that can be applied to many other cakes and desserts, adding to your baking repertoire.
Moreover, with the right ingredient choices, you can make this cake a little healthier without sacrificing its deliciousness. For instance, you can substitute a part of the sugar with natural sweeteners and make use of organic ingredients tailored to dietary needs, which extends its reach to those who may have food restrictions.
Ingredients You’ll Need
To build your Spring Cake Designs: Pastel Buttercream Rosettes Cake, here’s a comprehensive list of ingredients you’ll need, along with their roles and some tips for substitution.
- For the Vanilla Cake:
- 2 cups all-purpose flour – forms the base of your cake.
- 1 ½ cups granulated sugar – sweetens the cake and contributes to its structure.
- 1 cup unsalted butter, softened – adds moisture and a rich flavor.
- 4 large eggs – provides structure and stability.
- 1 cup milk – helps in keeping the cake moist.
- 2 ½ teaspoons baking powder – helps the cake rise.
- 1 teaspoon vanilla extract – enhances the cake flavor.
- ½ teaspoon salt – balances sweetness.
- For the Buttercream Frosting:
- 1 cup unsalted butter, softened – creates a creamy texture base.
- 4 cups powdered sugar – for sweetness and structure.
- 2 tablespoons milk – adjusts the consistency of the frosting.
- 1 teaspoon vanilla extract – deepens flavor.
- Food coloring (pastels) – for creating beautiful rosettes.
Understanding what each ingredient brings to the table will not only help you appreciate this recipe more deeply but will also empower you to make informed choices. If you’re missing any staples, like unsalted butter, you can substitute it with an equal amount of margarine, though the flavor will alter slightly. Alternatively, cream cheese can add a new dimension of flavor, turning the buttercream into a tangy treat. Similarly, if you’re looking to manage sugar content, try a blend of powdered erythritol or granulated coconut sugar as a substitute for granulated sugar without compromising taste.
How to Make
Creating your Spring Cake Designs: Pastel Buttercream Rosettes Cake involves a series of straightforward yet detailed steps. Follow this guide to ensure your creation comes out perfectly every time.
- Preheat your oven: Start by preheating your oven to 350°F (175°C). Preparing the oven beforehand helps your cake rise evenly. Grease and flour two 9-inch round cake pans to prevent sticking. Consider using parchment paper on the bottom for added security.
- Mix the dry ingredients: In a mixing bowl, whisk together 2 cups of all-purpose flour, 2 ½ teaspoons of baking powder, and ½ teaspoon of salt. This not only combines the ingredients but also aerates the flour, ensuring an even texture throughout your cake.
- Cream the butter and sugar: In another bowl, cream together 1 cup of softened unsalted butter and 1 ½ cups of granulated sugar until light and fluffy. This process should take about 5 minutes and is crucial for the airy texture of your cake. The butter needs to be at room temperature, which will help it incorporate better.
- Add the eggs: Incorporate 4 large eggs into the mixture, one at a time, ensuring each is fully combined before adding the next. It’s essential to mix in 1 teaspoon of vanilla extract at this stage, as it will enhance the overall flavor of your cake.
- Combine wet and dry ingredients: Gradually add the flour mixture to the creamed butter mixture, alternating with 1 cup of milk. Start and finish with the flour. Mix until just combined; over-mixing can lead to a denser cake.
- Bake the cake: Divide the batter evenly between the two prepared cake pans and smooth the tops with a spatula. Bake for 25-30 minutes, or until a toothpick inserted into the center comes out clean. The tops should be lightly golden and springy to the touch.
- Cool the cakes: Once out of the oven, let the cakes cool in the pans for about 10 minutes before transferring them to a wire rack to cool completely. This step is crucial to ensure the cakes remain moist.
- Prepare the buttercream frosting: In a large bowl, beat together 1 cup of softened unsalted butter until creamy. Gradually add in 4 cups of powdered sugar and blend well. Pour in 2 tablespoons of milk and mix until you achieve a smooth consistency. Add in 1 teaspoon of vanilla extract to bring flavor.
- Tint the frosting: Separate the frosting into multiple bowls and add different shades of pastel food coloring as desired. Use a spatula to blend until you get the right shades. Remember, it’s easier to start with a small amount of coloring and gradually add more.
- Assemble the cake: Place one layer of the cooled cake on your serving plate. Spread a generous layer of buttercream frosting on top, then place the second cake layer on top. Cover the entire cake with a thin layer of frosting, known as a crumb coat, and refrigerate for about 15 minutes to set the frosting.
- Create rosettes: Using a piping bag fitted with a star tip, fill it with your tinted buttercream. Starting from the center of your cake, pipe small rosettes outward. Practice on a piece of parchment paper if you’re new to piping. The more you try, the better you’ll get!
- Finish and present: Once you’ve decorated your cake with pastel buttercream rosettes, feel free to add additional decorations such as edible glitter or sugar flowers. Place your stunning Spring Cake Designs: Pastel Buttercream Rosettes Cake in a prominent spot to be admired and enjoyed!
By following these detailed steps, you’re sure to create a cake that not only looks fantastic but also tastes incredible. Every stage is an opportunity to build your skills and confidence in the kitchen. From the satisfying aroma of baking cake to the artistic flair of decorating with buttercream, each moment is an experience to cherish.
Variations & Substitutions
Chocolate Variation: If you’re a chocolate lover, consider making a chocolate version of this cake. Simply replace 1 cup of all-purpose flour with 1 cup of unsweetened cocoa powder. This will change the flavor profile entirely, providing a rich chocolate experience. Pair the chocolate cake with a vanilla buttercream for a delightful contrast or try a chocolate-flavored frosting for a double dose of decadence. This variation is perfect for chocolate lovers and works great for spring and summer occasions.
Gluten-Free Variation: For those with gluten sensitivities, you can substitute traditional flour with a gluten-free all-purpose flour mix, ensuring it contains xanthan gum or other binding agents. This will provide similar texture without compromising on taste. Additionally, ensure your baking powder is gluten-free, and for added flavor, try incorporating almond flour on a 1:1 basis to boost richness. This cake variation is a fantastic way to share this delightful dessert without worrying about dietary restrictions.
Fruit-Inspired Variation: Make your Spring Cake even more vibrant by incorporating fresh fruit. Fold in 1 to 1.5 cups of crushed strawberries, raspberries, or blueberries into your cake batter. This will add a fruity burst of flavor and a lovely texture to your cake. You can also top the cake with fresh fruit or homemade fruit compote to add a touch of sweetness and color, turning your cake into a fresh spring celebration every time you serve it.
Vegan Variation: A vegan version can be achieved by substituting eggs with flax eggs (1 tablespoon of ground flaxseed mixed with 2.5 tablespoons of water per egg) and using plant-based alternatives for butter and milk. Opt for coconut or almond milk and use vegan butter in your frosting. The cake can still turn out fluffy and delicious, allowing everyone to enjoy this delightful dessert regardless of dietary preferences.
Layered Design Variation: Instead of a traditional layer cake, you can also prepare cupcakes or mini cakes, each decorated with pastel buttercream rosettes. This idea not only makes the individual servings easy to handle but also allows for creative flavor combinations. Each mini cupcake can have its own hue, making a beautiful display that’s perfect for any occasion, especially springtime parties!
With these variations, you have countless ways to enjoy and celebrate the Spring Cake Designs: Pastel Buttercream Rosettes Cake. Whether you’re catering to specific dietary needs or simply wanting to explore new flavors, customization is the name of the game.
Common Mistakes to Avoid
Baking can be a delicate art, and mistakes are a natural part of the learning process. However, avoiding common pitfalls can elevate your baking from good to great. One of the most frequent issues is **overmixing the batter**, which can result in a dense cake. Mixing just until combined will keep that light, fluffy texture you’re aiming for.
Another common mistake is using cold ingredients. Cold butter and eggs can lead to an uneven batter and a lesser rise. Always ensure that your ingredients are at room temperature unless specified otherwise. Likewise, **not allowing the cake to cool entirely before frosting** may cause the buttercream to melt, resulting in a droopy mess that compromises both looks and taste.
Lastly, be cautious with the timing of your baking. Every oven is different; investing in an oven thermometer can help you know if your temperatures are accurate. If your cake is taking longer than suggested, check intermittently to avoid an overbaked, dry structure. Monitoring with a toothpick or cake tester will help you prevent these baking mistakes.
Storage, Freezing & Reheating Tips
Proper storage is essential for enjoying your Spring Cake Designs: Pastel Buttercream Rosettes Cake over a few days. If you have leftover cake, it is best stored in an airtight container at room temperature for up to 3 days. If you notice warmer weather approaching, refrigerate the cake if it is the buttercream frosting; this will help it from melting and losing that beautiful shape.
If you want to keep your cake for a more extended period, you can freeze it. To do so, slice the cake into pieces and wrap each slice in plastic wrap before placing them in an airtight freezer bag. Ensure you press out as much air as possible to prevent freezer burn. The cake should remain good in the freezer for up to three months. When ready to enjoy, let it thaw in the refrigerator overnight. Avoid reheating it in the microwave, as this can further dry it out; allow it to come to room temperature naturally.
In general, always prioritize food safety. If you’ve added fresh fruit on top, it is best consumed within a day or two since fruits can spoil quickly. Furthermore, remember to check for any signs of spoilage before enjoying previously stored cake.
Frequently Asked Questions
Can I make this cake ahead of time? Yes! You can bake the cake layers a day or two in advance. Simply wrap the cooled layers tightly in plastic wrap and store them in the refrigerator until you’re ready to frost and serve. Alternatively, you can freeze the baked layers, and when you’re ready, allow them to thaw completely before frosting.
What if I don’t have the right piping tips for the rosettes? If you don’t have a star piping tip, you can still create a delightful cake! Use a zip-top bag with a corner snipped off as an improvised piping bag, or even spread the buttercream with a spatula for a unique finish. You can swirl the frosting instead to create a rustic look.
How can I prevent my cake from sinking in the middle? A cake may sink due to a few reasons, such as using too much liquid, not baking long enough, or under-mixing the batter. Always follow the ingredient measurements precisely and ensure that your oven is fully preheated before placing the cake inside.
Can I use different flavors of buttercream? Absolutely! While this recipe provides a perfect base for vanilla buttercream, you’re welcome to make flavored variations. Experiment with different extracts like almond, lemon, or even coffee for a unique twist on your frosting.
How do I make the buttercream frosting less sweet? If you find that traditional buttercream is too sweet for your taste, consider adding a pinch of salt to balance the sweetness, or incorporate unsweetened cocoa powder to make a chocolate buttercream. You can also try reducing the sugar amount slightly, but ensure the texture remains stable for piping.
Conclusion:
The Spring Cake Designs: Pastel Buttercream Rosettes Cake is not merely a dessert; it’s a heartfelt creation that captures the spirit of spring. Its delicate layers, vibrant colors, and a delicious combination of flavors make every bite an experience worth savoring. As you embark on this delightful baking adventure, remember that personalization is key. Feel free to experiment with flavors, colors, and designs, and make it truly your own. Don’t shy away from inviting family and friends to partake in the joy of baking alongside you. So, gather your ingredients, channel your inner baker, and create a sweet memory that will not only delight your taste buds but also warm your heart. Enjoy the journey, and happy baking!


