Prep time: 15 minutes
Cook time: 60 minutes
Total time: 1 hour 15 minutes
Servings: 8
There’s something truly magical about the arrival of spring, and it beckons the sweetest of flavors to the table—like strawberries. The vibrant hue and juicy texture make strawberries the star of many culinary creations, and one of the simplest yet delightful ways to enjoy them is through a warm loaf of Strawberry Bread. This recipe promises not just ease and flavor, but also the fragrant aroma that fills your kitchen, evoking memories of sunny days and family gatherings. If you’re eager to learn how to master this **easy** Strawberry Bread recipe, read on and discover its layers of flavor, tips for success, and delightful variations.
What Is Spring Baking: Strawberry Bread (Easy)?
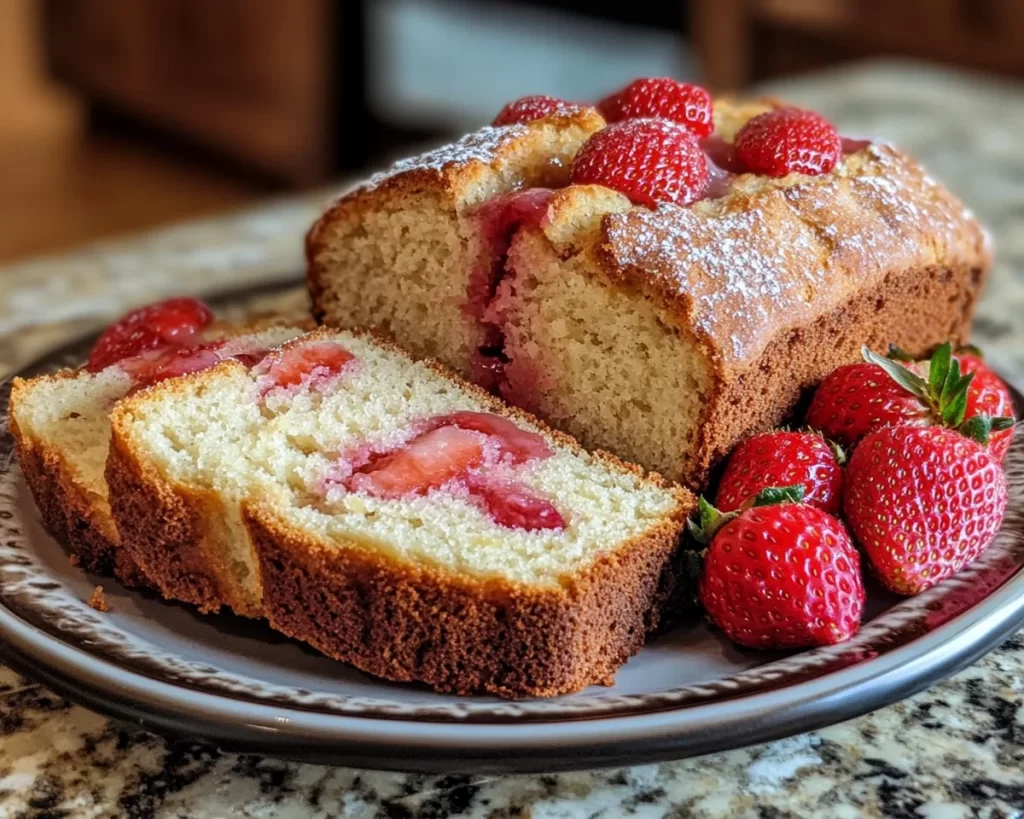
Strawberry Bread is a delightful quick bread that incorporates fresh strawberries, giving it a moist texture and a lovely sweet-tart flavor. Originating as a popular treat in American kitchens, particularly during the spring and summer months, this bread is known for its versatility. You can slice it and use it as a base for breakfast, enjoy it as a snack, or even serve it with dessert.
The texture of Strawberry Bread can be likened to a sweet cake. Each bite offers a burst of juicy strawberry, complemented by the soft, tender crumb of the bread. The sweetness is well balanced; it isn’t overpowering, which makes it perfect for pairing with cream cheese spread or simply enjoyed on its own. It celebrates the bounty of strawberries, making it a seasonal favorite for friends and family gatherings.
As spring arrives and strawberries are in abundance, baking this easy Strawberry Bread becomes an effortless activity that brightens up any day. With its simple ingredients and straightforward method, you’ll find yourself whipping up batch after batch, all while filling your home with that irresistible, inviting aroma.
Why You’ll Love This
This Strawberry Bread recipe stands out for several reasons. First of all, it’s incredibly **easy** to make. You don’t need to be a seasoned baker to achieve delicious results; even beginners can follow this straightforward recipe. The ingredients are readily available, making it a budget-friendly option for your baking endeavors.
Moreover, Strawberry Bread is incredibly versatile. You can enjoy it warm, toasted, or even as a sandwich with your favorite fillings. It also makes for an excellent base for various toppings—think nut butter, mascarpone cheese, or just a sprinkle of powdered sugar. Its mild flavor allows it to blend perfectly with both sweet and savory accents.
A common misconception about baking with fresh fruit is that it can be challenging. However, once you learn the basics of incorporating strawberries into your bread, you’ll realize how simple it actually is. You’ll also find that this recipe holds up well to kid-friendly eaters and adults alike, making it suitable for all ages.
Ingredients You’ll Need
To create a scrumptious loaf of Strawberry Bread, gather the following ingredients:
- 1 ½ cups of all-purpose flour – This serves as the base for your bread. You can also experiment with whole wheat flour for added health benefits.
- 1 teaspoon of baking powder – This ingredient provides the necessary lift, ensuring your bread rises beautifully.
- ½ teaspoon of baking soda – Works alongside baking powder to make the bread fluffy.
- ½ teaspoon of salt – Balances out the sweetness of the strawberries and enhances flavor.
- 1 cup of granulated sugar – Adds sweetness to the bread and helps achieve a lovely crust.
- 1 large egg – Acts as a binding agent, bringing all the ingredients together.
- ½ cup of vegetable oil – Ensures moisture, making your bread tender and delicious.
- 2 cups of fresh strawberries, chopped – The star ingredient! Choose ripe, sweet strawberries for the best flavor.
- 1 teaspoon of vanilla extract – Adds depth to the flavor profile.
Each ingredient plays a specific role in creating a harmonious balance of flavors and textures. If you need substitutions, you can replace granulated sugar with brown sugar for a deeper flavor, or opt for a sugar substitute if you’re watching your sugar intake.
How to Make
Now that you have your ingredients, let’s dive into the step-by-step process of creating this delightful Strawberry Bread.
- Preheat your oven: Begin by preheating your oven to 350°F (175°C). This step is crucial as it ensures that your bread starts cooking at the right temperature for a perfect rise and golden crust.
- Prepare the baking pan: Grease a standard 9×5-inch loaf pan with cooking spray or butter. You may also line the bottom with parchment paper for easy removal. This will prevent the bread from sticking and make cleanup a breeze.
- Mix dry ingredients: In a large bowl, sift together the all-purpose flour, baking powder, baking soda, and salt. Mixing these ingredients thoroughly ensures that the leavening agents are evenly distributed, providing an even rise throughout your loaf.
- Combine wet ingredients: In a separate bowl, whisk together the sugar, egg, and vegetable oil until well combined. The mixture should be smooth and slightly frothy. Stir in the vanilla extract and set this bowl aside.
- Add wet to dry: Pour the wet mixture into the bowl of dry ingredients. Stir gently using a spatula or wooden spoon. Be careful not to overmix; a few lumps are perfectly okay. Overmixing can lead to a dense bread instead of the light, airy texture you desire.
- Add strawberries: Gently fold in the chopped strawberries. Try to distribute them evenly throughout the batter. This step not only adds flavor but also creates beautiful pockets of fruit in your bread, which will caramelize slightly as they bake.
- Pour into the pan: Transfer the batter to your prepared loaf pan, smoothing the top with a spatula. Give the pan a gentle tap on the counter to release any air bubbles trapped in the batter, ensuring an even rise.
- Bake: Place the loaf pan in your preheated oven and bake for about 50-60 minutes. You’ll know it’s done when a toothpick inserted into the center comes out clean or with just a few crumbs. The top should be golden brown and slightly springy to the touch.
- Cool: Once baked, remove the bread from the oven and allow it to cool in the pan for about 10 minutes. After cooling, carefully transfer it to a wire rack to cool completely. This step is important to prevent the bottom from becoming soggy.
As you make this easy Strawberry Bread, be aware of the delightful aroma wafting through your kitchen—it’s hard not to anticipate the first bite!
Variations & Substitutions
Each variety brings its own unique twist, satisfying different taste buds and dietary restrictions.
Banana Strawberry Bread: For those who love the flavor of banana, try adding 1 mashed ripe banana to the batter. This substitution brings a delightful moistness and a banana flavor that pairs beautifully with strawberries. It’s perfect for families who might have a few extra ripe bananas lying around!
Chocolate Chip Strawberry Bread: For chocolate lovers, fold in ½ cup of semi-sweet or dark chocolate chips along with the strawberries. The combination of chocolate and strawberries enhances the overall sweetness and offers a decadent touch. This variation is sure to delight kids and adults alike, making it a wonderful dessert option.
Nutty Variation: Add ½ cup of chopped walnuts or pecans for added crunch and a nutty flavor. This variation not only provides a different texture but is also a great way to boost your bread’s nutritional profile. Nuts add healthy fats and protein, making the bread even more satisfying.
Gluten-Free Version: If you’re following a gluten-free diet, substitute the all-purpose flour with a gluten-free flour blend specifically designed for baking. You might need to adjust the baking powder slightly, as gluten-free flour can behave differently. Keep an eye on the texture; it should still be thick but pourable.
Low-Sugar Option: For those watching their sugar intake, replace granulated sugar with natural substitutes like stevia or erythritol. These alternatives can significantly reduce the calorie count while maintaining sweetness. Make sure to check conversion rates since some sugar substitutes are far sweeter than regular sugar.
Each variation opens up new avenues for exploration, allowing you to customize the bread according to your personal taste or dietary needs.
Common Mistakes to Avoid
Baking, while fun, can sometimes lead to mishaps if you’re not careful. Here are some common mistakes to avoid when making Strawberry Bread:
Overmixing the batter: It can be tempting to stir until everything is smooth, but this can lead to a dense loaf. Remember, a few lumps are perfectly okay. Stir gently until just combined for a light and airy texture.
Using overripe strawberries: While it may seem convenient, overripe strawberries can lead to a mushy bread. Opt for fresh, firm, and sweet strawberries for the best flavor and texture. If you have slightly overripe strawberries, consider blending them into a sauce instead.
Not measuring your flour correctly: Flour should be measured accurately for the best results. Using too much flour can lead to a dry bread. Use the scoop and level method or invest in a kitchen scale for precise measurement.
Not letting it cool: After baking, patience is key. Allowing the bread to cool in the pan and then on a wire rack helps maintain its moisture and prevents sogginess on the bottom. Cutting into warm bread can also lead to a gummy texture.
By recognizing and avoiding these mistakes, you can feel confident in achieving a beautiful Strawberry Bread every time!
Storage, Freezing & Reheating Tips
Proper storage of your Strawberry Bread ensures its longevity and keeps it fresh for longer. Here’s how to do it:
– Once cooled, store the Strawberry Bread in an airtight container at room temperature for up to 3 days. If your kitchen is warm, consider refrigerating it to maintain freshness.
– For longer storage, you can freeze individual slices wrapped tightly in plastic wrap and placed in a freezer bag. This method allows you to take out the number of slices you need without defrosting the entire loaf.
– When ready to eat, simply thaw the slices at room temperature or reheat them in the microwave for 10-15 seconds. You can also toast them directly from the freezer for a delightful, warm treat.
Adhering to these guidelines not only preserves taste and texture but also ensures the safety of your baked goods.
Frequently Asked Questions
Can I use frozen strawberries instead of fresh?
Yes, you can use frozen strawberries in this recipe. However, be aware that they might release more moisture during baking, which could affect the texture of the bread. Thaw them and pat them dry with a paper towel before adding to the batter.
Can I add other fruits to the bread?
Absolutely! Feel free to mix in other fruits like blueberries or raspberries. The balanced flavor profile of strawberries makes it a perfect canvas for various fruit combinations. Just ensure the total fruit amount doesn’t exceed the recipe’s suggested amount to maintain the bread’s structure.
How can I tell when the bread is fully baked?
You can check for doneness by inserting a toothpick into the center. If it comes out clean or with a few moist crumbs, the bread is ready. Additionally, the top should be golden brown and spring back when lightly pressed.
Can I make mini loaves instead of one large loaf?
Yes, you can divide the batter into smaller loaf pans. This will reduce the baking time; check for doneness at around 30-40 minutes. Mini loaves are perfect for gift-giving or portion control.
What can I serve with Strawberry Bread?
Strawberry Bread pairs excellently with cream cheese frosting, butter, or even a dollop of whipped cream. For a more substantial meal, try serving it alongside yogurt and fresh fruit for breakfast or brunch.
Conclusion:
The simplicity and deliciousness of Strawberry Bread make it a must-try for everyone, whether you’re an experienced baker or just starting. With a foolproof recipe, the ability to customize, and a warm aroma that fills your kitchen, this easy dessert or snack will surely become a family favorite. Don’t hesitate to make it your own by exploring variations or enjoying it as it is. Your taste buds will thank you, and so will those you share it with! Get your baking gear ready and dive into the joy of making this delectable loaf. Enjoy every crumb!


