Prep time: 15 minutes
Cook time: 60 minutes
Total time: 1 hour 15 minutes
Servings: 1 loaf
Spring is in the air, and what better way to celebrate the season than with a deliciously moist and flavorful Banana Walnut Bread? With just five simple ingredients, you’ll be amazed at how easy it is to whip up this comforting treat in no time. Whether you’re looking to enjoy a slice with your morning coffee or searching for a sweet snack to keep the kids happy, this recipe is perfect for busy parents, kitchen beginners, and budget-friendly cooks alike!
What Is Spring Baking: Banana Walnut Bread in 5 Ingredients?
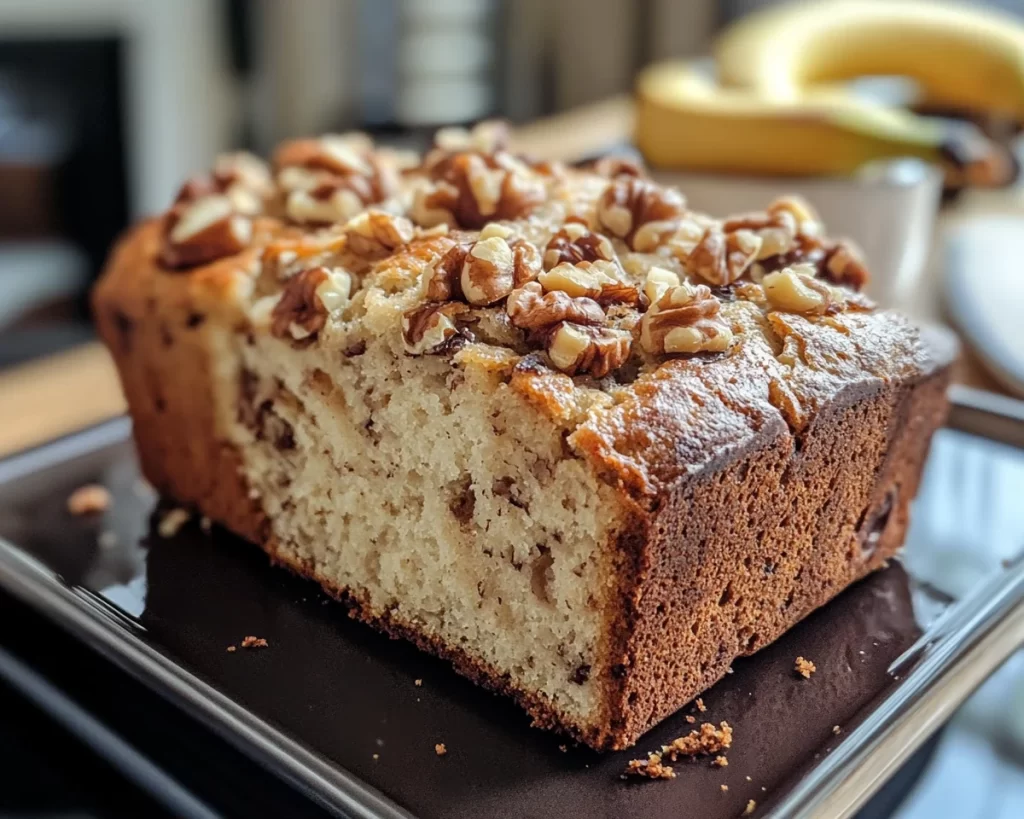
This Banana Walnut Bread, as simple as it is, is a celebration of flavors and textures. Ripe bananas add natural sweetness and moisture, while walnuts contribute a delightful crunch. The beauty of this recipe lies in its simplicity, perfect for both novice bakers and seasoned pros trying to whip up something wholesome without a mountain of ingredients. What makes this bread even more wonderful is its versatility; it can be enjoyed fresh out of the oven or toasted to perfection for an invigorating breakfast or snack.
Why You’ll Love This
There are countless reasons to adore this Banana Walnut Bread! For one, it can be made with pantry staples, making it a convenient option whenever those sweet banana cravings hit. The warm aroma of baking bread will fill your kitchen, creating an inviting atmosphere. Moreover, this recipe provides an excellent way to reduce food waste; those overripe bananas you’ve been neglecting on your counter transform into something magical. Plus, every slice offers a hearty dose of nutrients, thanks to the bananas and walnuts, making this not just a treat but a wholesome addition to your day.
Ingredients You’ll Need
- 3 ripe bananas: The key to moisture and sweetness. The more spots, the better!
- 1 cup of sugar: This balances the natural sweetness of the bananas.
- 1/2 cup of butter: Adds richness and a tender crumb. It’s best to use unsalted butter.
- 1 cup of all-purpose flour: The base for your bread, giving it structure while keeping it light.
- 1/2 cup of chopped walnuts: Offers a satisfying crunch and nutty flavor that complements the bananas beautifully.
How to Make
- Begin by preheating your oven to 350°F (175°C). Preparing your oven in advance ensures even cooking and helps achieve that sought-after golden crust.
- In a large mixing bowl, mash the ripe bananas with a fork until smooth. This is where the fun begins! The riper the bananas, the easier they will be to mash. Make sure to leave a few small chunks for texture.
- Next, melt the butter in the microwave or on the stove until it’s just liquid. Allow it to cool slightly before adding it to the mashed bananas. Stir well to combine.
- Slowly mix in the sugar, ensuring it dissolves thoroughly and blends nicely with the bananas and butter. This step is crucial for achieving a sweet, even flavor throughout your bread.
- Add the flour to the mixture and stir gently until just combined. Be careful not to overmix; “just combined” means some small lumps are perfectly fine!
- Fold in the chopped walnuts, allowing their wonderful texture to enhance the batter. Pour the mixture into a greased loaf pan, smoothing the top with a spatula.
- Bake in your preheated oven for 60 minutes, or until a toothpick inserted in the center comes out clean. You’ll know it’s ready when the top is beautifully browned, and your kitchen smells heavenly!
- Once baked, remove from the oven and let it cool in the pan for about 10 minutes. Then, turn it out onto a wire rack to cool completely. Allowing it to cool fully enhances the flavor and texture, making it easier to slice.
Variations & Substitutions
Chocolate Chip Banana Walnut Bread: If you find yourself unable to resist a little extra sweetness, consider adding a cup of semi-sweet chocolate chips. Not only do they melt beautifully, but they also provide pockets of indulgent sweetness. The combination of banana, walnut, and chocolate is simply divine!
Maple-Glazed Banana Walnut Bread: For an added touch of luxury, drizzle the finished bread with a maple glaze made from powdered sugar and real maple syrup. This variation brings a delightful sweetness that pairs beautifully with the nutty flavor of walnuts and the creamy bananas.
Gluten-Free Banana Walnut Bread: Substitute the all-purpose flour with a 1:1 gluten-free flour blend. Ensure the blend contains xanthan gum to achieve that perfect texture. Gluten-free lovers will appreciate how there’s still no compromise on flavor!
Nutrient-Packed Banana Walnut Bread: Make this recipe even healthier by substituting half the sugar with honey or maple syrup. Additionally, you can blend seeds like chia or flax into the bananas for additional fiber and omega-3 fatty acids. These adjustments provide beneficial nutrients while maintaining the loaf’s delightful taste.
Common Mistakes to Avoid
One common mistake is using under-ripe bananas. It’s essential to opt for bananas that are well-spotted for optimal sweetness and moisture. Under-ripe bananas may yield a dense loaf that’s lacking flavor.
Another mistake some make is overmixing the batter. Overmixing activates gluten in the flour, resulting in a tough and chewy bread. Mix until just combined to keep that light, tender crumb everyone loves.
Lastly, neglecting to test for doneness can lead to disappointment. Always use a toothpick to check if the banana bread is fully cooked in the center. If it comes out with wet batter, give it more time in the oven.
Storage, Freezing & Reheating Tips
To store your Banana Walnut Bread, wrap it tightly in plastic wrap or foil. Keeping it in an airtight container will maintain its moisture. Store it at room temperature for up to three days or in the refrigerator for up to a week.
If you wish to freeze any leftovers, slice the bread first, as this allows you to enjoy just a slice at a time without having to defrost the whole loaf. Place the slices in a freezer-safe bag or container, and make sure to remove any excess air. Properly stored, it can last up to three months in the freezer.
When you’re ready to enjoy a slice, simply remove it from the freezer and let it thaw at room temperature. To revitalize the flavors, toast the bread lightly or warm it in the microwave for a few seconds.
Frequently Asked Questions
Can I use other nuts instead of walnuts? Absolutely! While walnuts add a delightful crunch and nutty flavor, feel free to substitute with pecans, almonds, or hazelnuts. Each nut variety brings a unique character to the bread, allowing you to customize it to your preferences.
What should I do if my banana bread is too dry? A common reason for dry banana bread is overbaking or using insufficiently ripe bananas. To fix this, make sure your bananas are very ripe before baking. If the bread does turn out dry, consider serving it with butter, cream cheese, or a drizzle of honey to enhance the moisture when enjoyed!
Can I substitute the sugar in the recipe? Yes, you can use alternatives like coconut sugar, honey, or maple syrup. Just keep in mind that if using liquid sweeteners, you may need to adjust the amount of flour slightly to maintain the right batter consistency.
How do I know when my banana bread is done baking? The best way to check for doneness is by inserting a toothpick into the center of the loaf; if it comes out clean or with a few moist crumbs (not wet batter), your banana bread is ready! Keep an eye on the baking time to avoid overbaking.
Can I make this recipe vegan? Yes! For a vegan version, you can replace the butter with coconut oil or a plant-based butter substitute. Also, bananas act as a great natural binder, making this bread easy to adapt with flax eggs or unsweetened applesauce.
Conclusion: This Spring Baking: Banana Walnut Bread in 5 Ingredients is more than just a recipe; it’s a canvas for flavors and an opportunity to gather loved ones around the table. With its delightful simplicity, you’ll create cherished moments filled with warmth and joy. Happy baking!


