### Prep Time
15 minutes
### Cook Time
20 minutes
### Total Time
35 minutes
### Servings
24 sausage balls
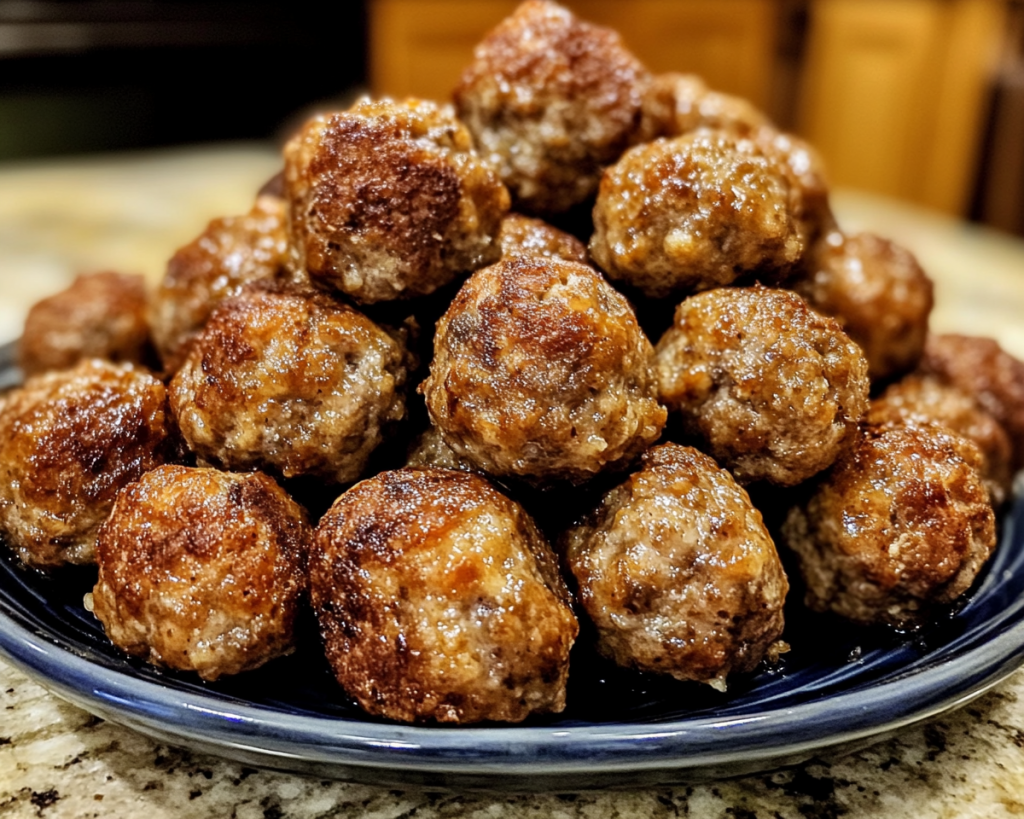
Sausage Balls with Bisquick are an incredible treat that evokes fond memories of family gatherings and cozy get-togethers. Picture this: golden, savory bites filled with rich sausage flavor, complemented by the irresistible fluffiness of cheese and the ease of preparation using Bisquick. These little mouthfuls of joy are perfect for parties, game days, or just a comforting snack any time of day. Once you make them, you’ll see why they are a staple in many homes.
In this article, you’ll learn how to create these delightful sausage balls, including tips for perfecting the recipe, variations to suit your taste, and answers to frequently asked questions. Let’s dive in!
What Are Sausage Balls with Bisquick?
Sausage balls with Bisquick are a traditional Southern appetizer that combines **mild or spicy breakfast sausage, shredded cheese, and Bisquick baking mix**. The result is a savory and hearty bite-sized snack that is perfect for any occasion. Originating in southern kitchens, these comfortable morsels are often a favorite at holiday gatherings and potlucks.
The texture of sausage balls can be described as both soft and slightly crispy on the outside, thanks to the baking process. They are easy to grab and eat without utensils, making them ideal finger food. The primary flavor comes from the sausage, which is complemented by the cheese’s richness. Depending on the cheese you choose, the flavors can range from mild cheddar to sharp, tangy varieties, enhancing the overall taste profile of the dish.
This recipe is incredibly versatile, meaning you can play around with the flavors by incorporating different ingredients, spices, or sauces. By using Bisquick, you also make the recipe super beginner-friendly, perfect for those new to cooking or busy parents looking for a quick and satisfying option.
Why You’ll Love This Sausage Balls with Bisquick
There are countless reasons to fall in love with sausage balls made with Bisquick. Here are just a few key benefits that make them a must-try:
– **Flavorful and Satisfying**: The combination of savory sausage and gooey cheese creates a wonderfully satisfying flavor that will keep you coming back for more.
– **Quick and Simple**: With just a few basic ingredients and about 35 minutes of your time, you can whip up a batch of these delicious bites. They are perfect for busy parents who need something quick to serve at a gathering.
– **Versatile for Any Occasion**: Whether you’re hosting a party, attending a potluck, or just looking for a hearty snack during the game, these sausage balls fit the bill!
– **Easily Customizable**: You can easily modify the ingredients to cater to dietary restrictions or personal preferences, like swapping out cheese, using turkey sausage instead of pork, or even adding spices for an extra kick.
One common misconception is that producing a dish stuffed with flavors requires extensive cooking skills. However, this is not the case with sausage balls; the simplicity of the preparation ensures that anyone can make them successfully.
Ingredients You’ll Need
To make the perfect sausage balls with Bisquick, you’ll need the following ingredients:
– **1 pound of breakfast sausage**: This is the heart of the dish. You can choose mild, medium, or hot sausage depending on how spicy you prefer your sausage balls. Turkey sausage can also be used for a lighter option.
– **2 cups of shredded cheese**: Cheddar cheese is a classic choice, but you can explore other varieties like pepper jack for a spicy kick or mozzarella for a creamier texture.
– **2 cups of Bisquick baking mix**: This acts as a binder and provides structure to the balls. Any substitutions should consider finding an equivalent baking mix.
– **1/2 cup of milk**: This adds moisture to the mixture, preventing the balls from becoming dry while baking. You can use any kind of milk you prefer, including non-dairy alternatives.
– **Optional seasonings**: Garlic powder, onion powder, or black pepper can boost the flavor. Feel free to get creative based on your preferences.
Each ingredient plays a crucial role in delivering the final product. The sausage brings the robust flavor, the cheese adds richness, the Bisquick provides the necessary fluffiness, and the milk ensures the mix holds together nicely during baking.
How to Make Sausage Balls with Bisquick
Now that you have all your ingredients ready, let’s dive into the step-by-step process of making these delicious sausage balls.
1. **Preheat Your Oven**: Start by preheating your oven to 375°F (190°C). This is an essential step for ensuring that the sausage balls cook evenly and achieve that golden-brown exterior.
2. **Prepare the Baking Sheet**: Line a baking sheet with parchment paper, or lightly grease it to prevent sticking. This will make cleanup a breeze and help your sausage balls come off the sheet easily.
3. **Mix the Ingredients**: In a large mixing bowl, combine the sausage, shredded cheese, and Bisquick. Use your hands or a spatula to combine everything thoroughly. The key is to make sure all ingredients are evenly distributed without overworking the mixture, which can lead to tough balls.
4. **Add Milk and Seasonings**: Gradually mix in the milk and any chosen seasonings to the sausage mixture until it forms a slightly tacky dough. If the mixture appears too dry, don’t hesitate to add a little extra milk until you reach a sticky consistency.
5. **Shape the Balls**: With clean hands, take small portions of the dough (about 1-inch in diameter) and roll them into balls. If you’re feeding a crowd, you might want to make them slightly smaller or larger according to your preference.
6. **Place on the Baking Sheet**: Arrange the sausage balls on the prepared baking sheet, making sure to leave some space between each ball to allow for good airflow and even cooking.
7. **Bake**: Place the baking sheet in the preheated oven and bake for 20-25 minutes, or until the sausage balls are nicely browned and cooked through. You can check their internal temperature with a meat thermometer; they should reach 160°F (70°C).
8. **Serve and Enjoy**: Once they are done, remove the sausage balls from the oven, and let them cool for a few minutes. Serve them warm with your favorite dipping sauces, like honey mustard or barbecue sauce, if desired.
There you have it—the perfect sausage balls ready to be enjoyed!
4 Variations & Substitutions
Spice things up with these delicious variations and substitutions of sausage balls with Bisquick:
1. **Cheesy Chive Sausage Balls**: Adding chopped fresh chives to the mixture not only adds a pop of color but also an onion-like flavor that complements the sausage perfectly. Simply fold in 1/4 cup of fresh chopped chives into the mixture. This is a great option for those who enjoy the combination of onion and cheese flavors.
2. **Turkey Sausage Balls**: For a healthier twist, substitute traditional pork sausage with lean turkey sausage. The flavor will be slightly milder, but you can spice it up by adding a teaspoon of crushed red pepper flakes to give it a nice kick. Remember to watch the baking time, as turkey sausage might cook faster than pork.
3. **Spinach and Feta Sausage Balls**: To cater to vegetarians or those who want a lighter option, consider replacing half of the sausage with cooked and chopped spinach and crumbled feta cheese. This combo not only reduces the calorie content but also infuses the sausage balls with delightful Mediterranean flavors.
4. **BBQ Sausage Balls**: For a different flavor profile, consider mixing in 1/4 cup of your favorite barbecue sauce into the sausage mixture. This adds a nice sweetness and tang and pairs excellently with the savory sausage. Just be mindful not to add too much liquid, as it can alter the final texture.
Each of these variations brings a unique flair to the classic sausage ball recipe, making it versatile enough for any meal or occasion.
Common Mistakes to Avoid
While making sausage balls is relatively straightforward, there are common pitfalls to watch out for:
– **Using the Wrong Sausage**: One critical mistake is using low-quality sausage. Opt for a good brand with flavorful spices to ensure that your sausage balls pack a punch. If the sausage isn’t tasty on its own, it won’t contribute much to the final dish.
– **Overmixing**: Mixing the ingredients too thoroughly can lead to tough sausage balls. Instead, mix until just combined; the goal is to have a cohesive dough without overworking it.
– **Underbaking**: It’s essential to allow the sausage balls to bake long enough for them to cook through. If they are undercooked, they can be greasy and unsafe to eat. Always check for a golden color and an internal temperature of 160°F (70°C) for safety.
– **Skipping the Chilling Step**: If you find the mixture is challenging to handle, consider chilling it in the refrigerator for about 10-15 minutes. Chilling helps firm up the mixture, making it easier to shape into balls.
By avoiding these common mistakes, you’ll be on your way to creating perfectly delicious sausage balls with Bisquick every time.
Storage, Freezing & Reheating Tips
Once you’ve made your sausage balls, you might have some leftovers (although they are usually devoured quickly!). Here are some storage and reheating tips:
– **Storing**: If you have leftover sausage balls, allow them to cool completely, then place them in an airtight container and store them in the refrigerator for up to three days.
– **Freezing**: To store them for longer, you can freeze the raw sausage balls before baking. Simply place them on a baking sheet in a single layer, freeze until solid, then transfer them into a freezer-safe bag. They can be stored in the freezer for up to three months. When you’re ready to cook them, bake them straight from the freezer, adding an extra 5-10 minutes to the cooking time.
– **Reheating**: To reheat cooked sausage balls, preheat your oven to 350°F (175°C). Place the sausage balls on a baking sheet and heat for about 10-15 minutes or until warmed through. You could also microwave them, but that can lead to a loss of the crispy exterior. If you microwave, try doing it in shorter intervals while checking for doneness.
Following these tips will ensure your sausage balls remain delicious and safe to eat even after cooking or freezing!
Frequently Asked Questions
1. **Can I use a different type of flour instead of Bisquick?**
Yes! If you prefer to make your own baking mix, you can use a combination of all-purpose flour, baking powder, and salt along with some butter or shortening for a similar texture. However, ease and convenience are why so many love using Bisquick.
2. **How do I know when the sausage balls are cooked thoroughly?**
The best way is to use an instant-read meat thermometer to check that the internal temperature reaches 160°F (70°C). They should also be golden brown on the outside, indicating they are cooked through.
3. **Can I make sausage balls ahead of time?**
Absolutely! You can assemble the sausage balls ahead of time and store them in the refrigerator for up to 24 hours before baking. Alternatively, you can freeze them before baking and cook them later when you’re ready.
4. **What can I serve with sausage balls?**
Sausage balls pair wonderfully with a variety of dipping sauces such as honey mustard, barbecue sauce, ranch dressing, or even a spicy aioli. You can also serve them alongside fresh vegetables for a well-rounded appetizer spread.
5. **Can I double the recipe?**
Yes, this recipe can easily be doubled! Just remember to space out the sausage balls appropriately on your baking sheet. Depending on the size of your oven, you may need to bake multiple batches or use two sheets at once.
In conclusion, sausage balls with Bisquick are a delicious solution to a snack or appetizer that is simple to make, incredibly flavorful, and easy to customize. Whether you’re serving them at a party or enjoying a quiet night at home, they’re sure to be a hit. Don’t hesitate to try your own variations and share them with friends and family. Happy cooking!


