Prep time: 15 minutes
Cook time: 25 minutes
Total time: 40 minutes
Servings: 12 servings
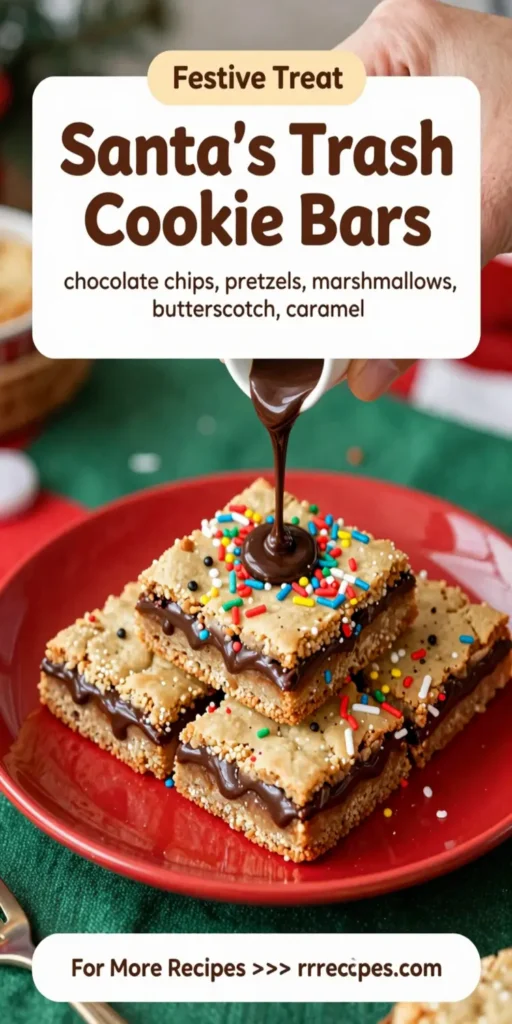
Santa’s Trash Cookie Bars are a delightful treat that combines an array of flavors and textures into one incredible dessert. These bars, packed with sweet and savory ingredients, make for a festive and fun addition to your holiday celebrations. Imagine layers of chocolate, salty pretzels, crunchy nuts, and chewy candies all baked to perfection. They are simple enough for beginners yet impressive enough to wow guests, making them a must-try for any occasion.
What Is Santa’s Trash Cookie Bars?
Santa’s Trash Cookie Bars are an indulgent layered treat that brings together various ingredients reminiscent of a holiday mix. They typically consist of a cookie base—often made from a cookie dough mix, topped with assorted goodies like chocolate chips, pretzels, nuts, and seasonal candy like M&Ms or holiday sprinkles. The sweet and salty flavor combination makes these bars a hit any time of the year, though they are particularly popular during the holiday season when you want to impress at gatherings or use up holiday baking supplies.
Why You’ll Love This
Santa’s Trash Cookie Bars are not only delicious, but they also offer a multitude of flavors and textures in every bite. Here are a few reasons to love them:
- Quick and Easy: They allow you to whip up a delicious dessert in under an hour.
- Customizable: You can substitute ingredients based on what you have or your dietary preferences.
- Perfect for Gatherings: Their festive appearance makes them ideal for parties and holiday celebrations.
- Kid-Friendly: Kids love the colorful mix of ingredients, making them a hit for family events.
Ingredients You’ll Need
To create these fantastic bars, you’ll need the following ingredients:
- 1 cup unsalted butter: Softened to room temperature, it adds richness to the dough.
- 1 cup brown sugar: Provides moisture and a deeper flavor.
- 1 cup granulated sugar: For sweetness and balance.
- 2 large eggs: They help bind the ingredients together.
- 1 teaspoon vanilla extract: Adds a delightful aroma and flavor.
- 3 cups all-purpose flour: The base of the cookie bars; it provides structure.
- 1 teaspoon baking soda: Helps the bars rise.
- 1 teaspoon salt: Enhances the overall flavors.
- 2 cups chocolate chips: For sweetness and melty texture.
- 1 cup chopped nuts: Walnuts or pecans add crunch and depth.
- 1 cup pretzel pieces: Provides a salty contrast to the sweetness.
- 1 cup seasonal candies: Use M&Ms or holiday chocolate candies for a splash of color.
How to Make
Follow these steps closely to ensure your Santa’s Trash Cookie Bars turn out perfectly:
- Preheat your oven to 350°F (175°C). Prepare a 9×13-inch baking dish by lining it with parchment paper or lightly greasing it. This prevents sticking and makes for easy removal of the bars once baked.
- In a large mixing bowl, cream together the unsalted butter, brown sugar, and granulated sugar. Use a hand mixer or stand mixer until the mixture is light and fluffy, which takes about 2-3 minutes. This step adds air, resulting in a lighter texture.
- Add the eggs, one at a time, to the butter mixture, along with the vanilla extract. Beat until fully incorporated, making sure to scrape down the sides of the bowl as needed.
- In a separate bowl, whisk together the flour, baking soda, and salt. Gradually mix this dry mixture into the wet ingredients, blending until just combined; do not overmix. The dough should pull away from the sides of the bowl, appearing slightly thicker.
- Fold in the chocolate chips, chopped nuts, pretzel pieces, and seasonal candies. Ensure their distribution is even throughout the dough.
- Pour the mixture into the prepared baking dish. Use a spatula to spread it evenly across the pan. This ensures that each bar bakes uniformly and has a pleasing shape.
- Bake in the preheated oven for about 25 minutes. The edges should be lightly golden brown, while the center looks set but slightly soft. A toothpick inserted in the middle should come out with moist crumbs.
- Allow the bars to cool completely in the baking dish. Once cool, use the parchment overhang to lift them out and slice them into squares or bars.
Variations & Substitutions
Nut-Free Version: For a nut-free alternative, simply leave out the nuts altogether or substitute with more chocolate chips or pretzels. This keeps the same great taste while accommodating allergies.
Gluten-Free Version: Substitute all-purpose flour with a 1:1 gluten-free baking blend. Ensure that all other ingredients are gluten-free, particularly the pretzels, as some brands may contain gluten.
Vegan Version: To create a vegan recipe, swap out the butter for a plant-based alternative, and replace the eggs with flax eggs (1 tablespoon ground flaxseed mixed with 2.5 tablespoons water per egg). This maintains the structure and moisture.
Common Mistakes to Avoid
One common problem is overmixing the dough once the flour is added. This can lead to tough, dense bars instead of light and chewy ones. Mixing just until combined is key for the right texture.
Another mistake is underbaking the bars. It’s tempting to take them out early if they look soft, but they will continue cooking in the pan after removing them from the oven. Make sure that the edges are set and the center is just slightly soft to achieve the perfect consistency.
Lastly, not allowing the bars to cool completely can make them crumble when cutting. Patience is a virtue here; letting them cool helps achieve clean cuts.
Storage, Freezing & Reheating Tips
To store Santa’s Trash Cookie Bars, place them in an airtight container at room temperature for up to five days. If you want to keep them longer, they can be frozen. To freeze, wrap individual bars in plastic wrap and place them in a freezer-safe bag. They can be frozen for up to three months.
To reheat, simply let them thaw at room temperature or heat them in a microwave for a few seconds until they are warm and gooey again. This rejuvenates the flavor and brings back the melted texture of the chocolate chips, making them as delightful as when they were first baked.
Frequently Asked Questions
Can I use different types of chocolate?
Absolutely! Feel free to mix in dark chocolate, white chocolate, or even caramel chips depending on your preference. The versatility of this recipe means you can tailor it to your taste.
Can I make these bars ahead of time?
Yes! These bars can be made a day or two in advance. Just be sure to store them properly in an airtight container to maintain freshness. They will actually taste even better after the flavors have melded together for a day.
Are Santa’s Trash Cookie Bars suitable for gifting?
Definitely! These bars make a wonderful homemade gift around the holidays. Simply package them in a nice box or wrap them in cellophane for a sweet personal touch. Just ensure they’re cooled and cut properly to avoid crumbling.
Can I play with the ingredients to make them healthier?
Yes! You can substitute some of the sugar for natural sweeteners like honey or maple syrup. You can also incorporate oats for added fiber or swap in whole wheat flour for a nuttier taste and more nutrients.
What should I serve with these cookie bars?
Pair these cookie bars with a glass of milk, a scoop of vanilla ice cream, or even a drizzle of chocolate sauce on top for an extra special treat. They fit perfectly into any dessert spread, offering a delightful contrast to lighter options.
Conclusion:
In conclusion, Santa’s Trash Cookie Bars are a festive and versatile treat that everyone will love. They embody the joy of holiday baking, inviting families and friends together to enjoy the magic of delicious flavors and textures. Whether you stick to the classic recipe or experiment with your variations, these bars are sure to become a favorite in your dessert repertoire. Happy baking!


