Prep time: 30 minutes
Cook time: 30 minutes
Total time: 1 hour
Servings: 12
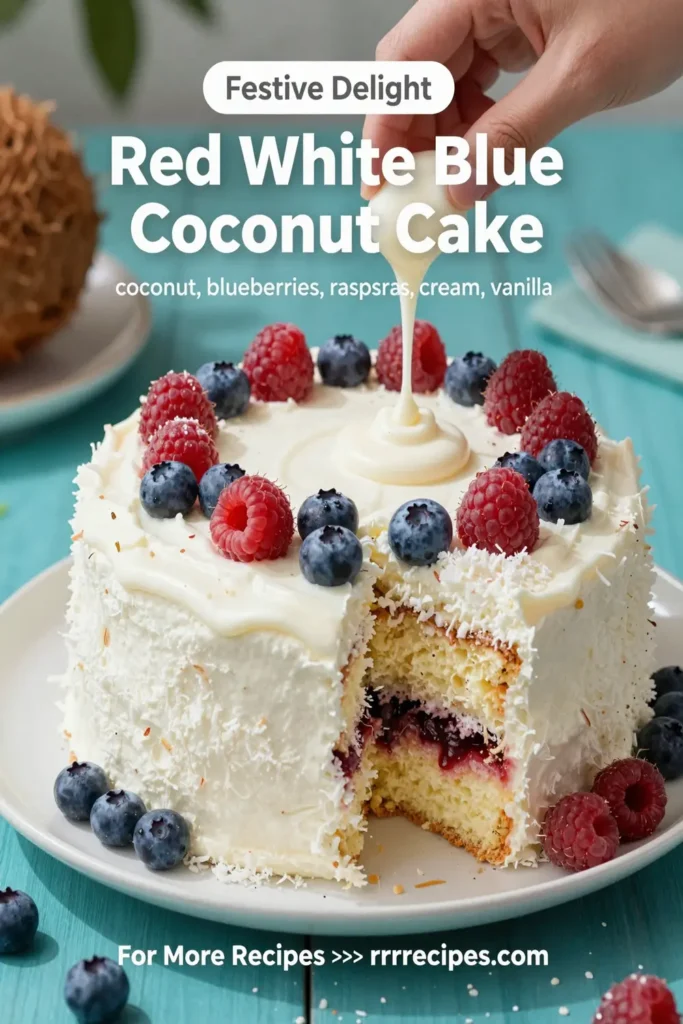
Creating a festive dessert for summer gatherings doesn’t get much better than this Red White Blue Coconut Cake. Picture a moist, flavorful cake that not only tantalizes your taste buds but also stuns with its colorful presentation. This delightful cake is perfect for Fourth of July celebrations, birthday parties, or any occasion where you want to showcase your love for all things sweet and summery!
When you slice into this cake, the layers of red, white, and blue coconut frosting will have everyone asking for seconds. Not to mention, the subtle coconut flavor enhances the sweetness, making it a crowd-pleaser. Let’s embark on your baking journey to make this stunning dessert!
What Is Red White Blue Coconut Cake?
The Red White Blue Coconut Cake is a multi-layer cake that showcases the vibrant colors associated with patriotic celebrations. This cake typically features layers that are colored red, white, and blue using food coloring or natural fruit purees, and it is generously slathered with a rich coconut frosting. The entire cake stands out not only for its aesthetic appeal but also for its moist texture and delicious flavor profile. It’s a fantastic option for anyone seeking a unique dessert that wins over hearts and taste buds alike.
Why You’ll Love This
You’ll fall in love with this cake for several reasons. Firstly, it serves as a stunning centerpiece that adds a festive flair to any gathering. The combination of moist cake and creamy coconut frosting creates a joyous flavor explosion. Additionally, if you are a fan of coconut, you’ll appreciate how this cake incorporates that delightful essence into the frosting and decoration, appealing to those who love tropical flavors. Finally, the simplicity of the recipe makes it accessible for everyone from busy parents to kitchen novices. Whether you’re preparing for a potluck or a family barbecue, this cake ensures you’ll leave with compliments and satisfied smiles.
Ingredients You’ll Need
- 2 cups all-purpose flour: This forms the main structure of the cake, providing a light, fluffy base.
- 1 ½ cups granulated sugar: Adds sweetness and moisture to the cake.
- ½ cup unsalted butter: Provides richness and helps create a moist texture.
- 1 cup buttermilk: Adds tanginess and contributes to the cake’s moistness.
- 3 large eggs: Binds the ingredients together, creating a fluffier cake.
- 1 tablespoon baking powder: Helps the cake rise.
- 1 teaspoon vanilla extract: Infuses flavor into the cake.
- Red and blue food coloring: For the vibrant color layers.
- 2 cups shredded coconut: Used in the frosting for flavor and decoration.
- 4 cups powdered sugar: For the frosting, providing sweetness and firmness.
How to Make
- Preheat your oven to 350°F (175°C). Grease and flour three 9-inch round cake pans. This ensures your cakes slide out easily once baked.
- In a mixing bowl, cream the unsalted butter and granulated sugar together until you obtain a light and fluffy mixture. This step is crucial for a soft cake texture.
- Beat in the eggs one at a time, mixing well after each addition. Then, add the buttermilk and vanilla extract, blending until smooth.
- In a separate bowl, whisk together the all-purpose flour and baking powder. Gradually add to the wet mixture, stirring until just combined to avoid lumps.
- Divide the batter evenly into three bowls. Color one bowl with red food coloring and another with blue food coloring, leaving the last bowl plain. Aim for vibrant colors that will shine through the frosting.
- Pour each colored batter into its prepared cake pan and smooth the tops. Bake for 25-30 minutes or until a toothpick inserted in the center comes out clean. Allow the cakes to cool in the pans for 10 minutes before transferring them to wire racks.
- While the cakes cool, prepare the frosting. In a large bowl, combine unsalted butter and powdered sugar, beating until well combined. Stir in the shredded coconut.
- Once the cakes are completely cool, level the tops if necessary. Place the blue layer on a cake stand and spread a generous layer of coconut frosting on top.
- Next, place the white layer on top of the blue layer, applying frosting between layers. Finally, add the red layer on top.
- Cover the entire cake with the remaining frosting and generously apply shredded coconut all over the top and sides for a beautiful and festive finish.
Variations & Substitutions
Fruit Purees: Instead of using food coloring, consider making your cake more natural by using fruit purees like raspberry or blueberry. The taste will also be enhanced, providing an extra fruity flavor to the cake while maintaining the festive colors.
Dairy-Free Frosting: For a dairy-free version, swap the buttermilk for almond milk or coconut milk, and use vegan butter in the frosting. This way, everyone at your gathering can enjoy a slice!
Gluten-Free Option: To make this cake gluten-free, substitute all-purpose flour with a gluten-free baking blend. The rest of the ingredients remain the same, ensuring those avoiding gluten can partake in the festivities without concern.
Coconut Variations: For a more pronounced coconut flavor, add coconut extract to your frosting. Alternatively, consider incorporating toasted coconut for an added crunch and rustic touch.
Common Mistakes to Avoid
One common mistake is overmixing the batter, which can lead to a dense cake. Always mix just until combined. If using food coloring, another pitfall is using too much color, resulting in a bitter taste rather than vibrant hues. Begin with a few drops and add gradually until you reach your desired shade.
Additionally, ensure your cakes are completely cool before frosting; if they’re still warm, the frosting will melt and make a mess. Lastly, if the cake layers are too domed on top, consider leveling them with a serrated knife for a neat and structured appearance.
Storage, Freezing & Reheating Tips
This cake can be stored in an airtight container at room temperature for up to three days. If you want it to last longer, store it in the refrigerator, where it can stay fresh for about a week. To freeze your cake, wrap each layer in plastic wrap, followed by aluminum foil, and freeze for up to three months. When you’re ready to enjoy it, simply remove it from the freezer and let it thaw in the refrigerator overnight. For reheating, warm individual slices in the microwave for about 15-20 seconds to enjoy that freshly-baked taste again.
Frequently Asked Questions
Can I use store-bought frosting for this cake?
Yes! If you’re short on time, store-bought frosting is a great alternative. However, homemade frosting adds a layer of flavor that often enhances the overall taste of the cake.
How do I prevent the cake from sticking to the pans?
To prevent sticking, make sure to thoroughly grease your cake pans and dust them with flour. An added step could be lining the bottom of the pans with parchment paper for extra assurance.
Why is my cake dense?
A dense cake often results from overmixing the batter or not properly measuring the flour. Be sure to gently fold the ingredients together until just combined for a lighter texture.
Can I make this cake ahead of time?
Absolutely! You can prepare the cake layers a day in advance. Just store them completely cool in the fridge and frost them the day of serving to keep them fresh.
What can I do with leftover frosting?
Leftover frosting can be stored in the fridge for up to a week. You can use it on cupcakes, brownies, or cookies for an extra treat.
Conclusion: By following these steps and using this vibrant, flavorful recipe, you’ll create a stunning Red White Blue Coconut Cake that will impress your family and friends. The moist layers and fluffy frosting make it a delightful addition to any dessert table. Happy baking!