Prep time: 30 minutes
Cook time: 25 minutes
Total time: 55 minutes
Servings: 12 servings
There’s something truly magical about warm, gooey cinnamon rolls fresh out of the oven, especially when they feature the stunning red hue of red velvet. Imagine a tender, sweet roll that melts in your mouth, topped with luscious cream cheese frosting. That’s exactly what the Red Velvet Cinnamon Rolls bring to your breakfast table, making them an irresistible treat, particularly for special occasions like Valentine’s Day. This recipe captures not just the delightful flavors of the classic cinnamon roll, but also the festive spirit of red velvet cake.
In this recipe, you’ll discover how to create these indulgent rolls with ease, making them perfect for both seasoned bakers and those just starting their culinary journey. Each step is simple to follow, and you’ll feel accomplished as your home fills with the enchanting aroma of cinnamon and frosting. Whether you’re looking to impress your loved ones, celebrate a special day, or simply treat yourself, these cinnamon rolls promise satisfaction that no one can resist.
What Is Red Velvet Cinnamon Rolls Recipe Easy Valentine’s Day Brunch Treat?
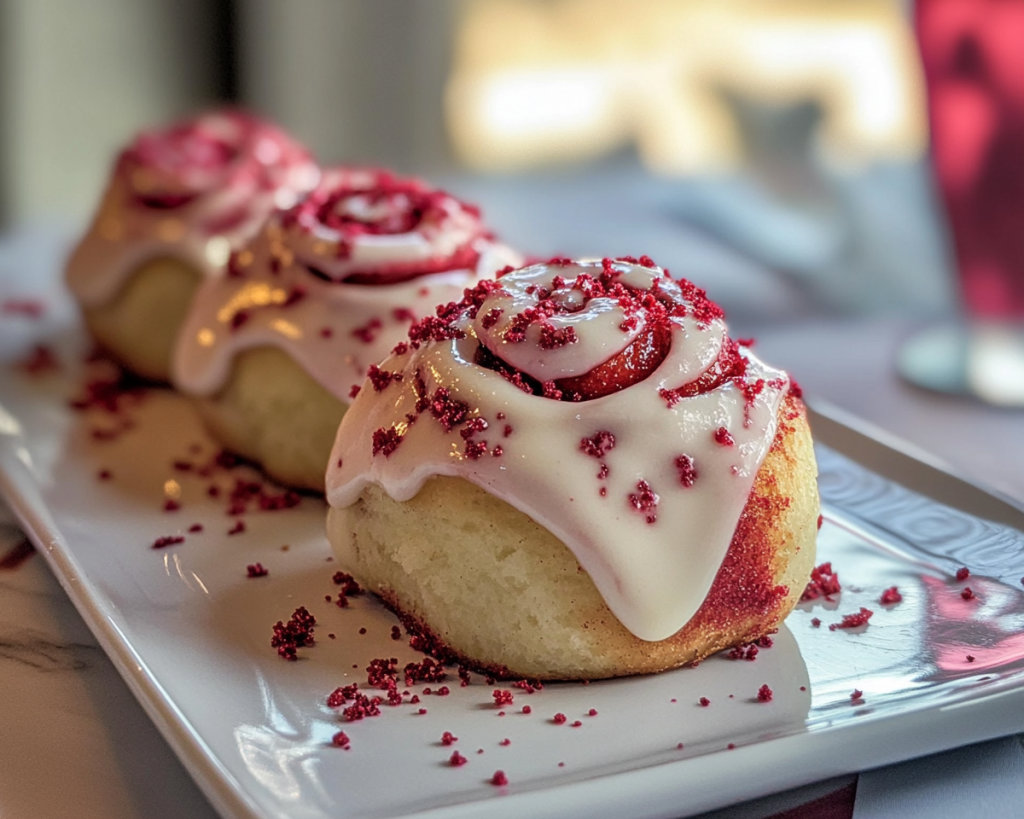
The Red Velvet Cinnamon Rolls are a delightful twist on two beloved desserts: classic cinnamon rolls and rich red velvet cake. Originating from the Southern United States, red velvet cake boasts a unique flavor profile that combines chocolate, vanilla, and a hint of acidity, thanks to the addition of buttermilk and vinegar. When transformed into rolls, this cake becomes irresistibly soft and fluffy, enveloped in a rich, buttery cinnamon filling.
The vibrant red color not only makes these rolls visually stunning but also adds a psychological layer of romance—making them an excellent choice for sharing with loved ones. The filling typically consists of cinnamon, sugar, and butter, providing that familiar flavor you crave in a traditional cinnamon roll. Top them off with a decadent cream cheese frosting, and you have a dish that is both festive and comforting for any brunch gathering.
Whether you’re hosting a cozy get-together with friends or planning a special breakfast for your family, this recipe allows for both ease and elegance. The combination of flavors and the inviting texture will make these rolls a favorite in your home, a memory shared over breakfast tables for years to come.
Why You’ll Love This
There are countless reasons to fall in love with the Red Velvet Cinnamon Rolls. For starters, the taste is nothing short of sensational; the combination of sweet cinnamon with a soft, fluffy red velvet base is heavenly. Additionally, they are easy to make, even for beginners who may not have extensive baking experience.
Moreover, the recipe is versatile, allowing you to add your personal touch by altering the spices or toppings. If you have dietary restrictions, you can even explore alternative ingredients, such as gluten-free flour or vegan butter, to accommodate your needs. Unlike many complex pastry recipes, these rolls require just a handful of ingredients readily available in your pantry, making them budget-friendly.
Common misconceptions may lead people to think that cinnamon rolls are only meant for special occasions, but by making these Red Velvet Cinnamon Rolls, you’ll find yourself indulging them more frequently during cozy weekends or holiday gatherings. With their stunning appearance and fantastic taste, there’s no doubt that these rolls will become a beloved tradition in your household.
Ingredients You’ll Need
- All-purpose flour: This serves as the base for your rolls. While it’s the standard option, you can substitute it with bread flour for a denser texture or a gluten-free blend if needed.
- Granulated sugar: Helps to sweeten the dough, enhancing the overall flavor.
- Active dry yeast: The leavening agent that makes your rolls rise. Make sure it’s fresh for best results.
- Milk: Adds moisture to the dough. Whole milk works best, but you can use non-dairy alternatives if desired.
- Unsalted butter: Contributes to the richness of the dough. Ensure it’s softened for easy mixing.
- Cocoa powder: A small amount enhances the flavor of the red velvet component without overpowering.
- Red food coloring: For that signature red velvet look. You can use gel food coloring for a deeper color.
- Salt: Balances out sweetness and enhances all flavors.
- Brown sugar: This is used in the filling for a deeper caramel flavor.
- Cinnamon: The star spice of the filling that provides warmth and sweetness.
- Vanilla extract: Adds an aromatic essence to the dough.
- Cream cheese: Essential for the frosting that gives these rolls their luxurious finish.
- Powdered sugar: For sweetness and fluffiness in the cream cheese frosting.
How to Make
1. **Prepare the Dough:** Start by warming the milk until it’s slightly warm to the touch but not boiling. In a mixing bowl, combine the warm milk, yeast, and a tablespoon of sugar. Let this mixture sit for about 5–10 minutes until it becomes frothy. This step activates the yeast, ensuring your rolls rise beautifully.
2. **Mix the Dry Ingredients:** In a separate bowl, whisk together the all-purpose flour, cocoa powder, and salt. Create a well in the center where you’ll eventually add the wet ingredients. This separation of dry and wet helps maintain a consistent texture.
3. **Combine Ingredients:** Once your yeast mixture is ready, add the egg, vanilla extract, and melted butter to it. Mix these wet ingredients until combined. Gradually add this mixture to your bowl of dry ingredients. Stir until a shaggy dough forms. You may need to use your hands at this point to combine everything fully.
4. **Knead the Dough:** Transfer the dough onto a lightly floured surface and knead it for about 8–10 minutes. You’re aiming for a smooth, elastic texture that springs back when poked. If the dough feels sticky, add a little more flour, but don’t overdo it—too much flour can result in dense rolls.
5. **Let the Dough Rise:** Shape the kneaded dough into a ball and place it in a lightly greased bowl. Cover with a damp cloth and let it rise in a warm place for about 1–1.5 hours, or until it has doubled in size. This proofing stage is crucial as it develops flavor and texture.
6. **Prepare the Filling:** While the dough rises, mix together the brown sugar, cinnamon, and a pinch of salt in a small bowl. This filling will provide that classic cinnamon flavor to your rolls.
7. **Shape the Rolls:** After the dough has risen, punch it down gently to release the air. Roll it out on a floured surface into a rectangle about 12×18 inches. Spread softened butter evenly across the dough, followed by an even sprinkle of your cinnamon sugar mixture.
8. **Roll It Up:** Starting from one long end, tightly roll the dough into a log. Pinch the seam to seal it and then cut it into 12 equal pieces. You can use dental floss or a sharp knife for this, which minimizes squashing the rolls.
9. **Second Rise:** Place the cut rolls into a greased baking dish, ensuring they have a little space in between. Cover them with a cloth and let them rise for another 30–45 minutes. This step is important for fluffy rolls.
10. **Bake:** Preheat your oven to 350°F (175°C). Once preheated, bake your rolls for 20–25 minutes, or until they’re golden brown. Keep an eye on them, as baking times may vary depending on your oven.
11. **Prepare the Frosting:** While the rolls cool slightly, beat together cream cheese, soft butter, powdered sugar, and a splash of vanilla extract until fluffy. If the frosting is too thick, add a splash of milk to reach your desired consistency.
12. **Frost and Serve:** Once the rolls have cooled for about 10 minutes, generously spread the cream cheese frosting on top while they’re still warm. This allows the frosting to melt slightly into the rolls, creating an irresistible glaze. Serve them warm for the ultimate indulgence.
Variations & Substitutions
Chocolate Chip Variation: If you want to enhance your rolls further, consider adding chocolate chips into the filling. Simply fold in 1 cup of semi-sweet chocolate chips to the cinnamon and brown sugar mixture. This will create pockets of melty chocolate throughout each roll, adding extra richness and complexity to the flavor profile. It’s perfect for the chocoholics in your life!
Nutty Variation: For those who enjoy a bit of crunch, consider adding chopped nuts, such as pecans or walnuts, into the roll’s filling. You can mix in about 1/2 cup of finely chopped nuts with the brown sugar and cinnamon. This addition not only enhances the flavor but also provides a delightful texture contrast when biting into the soft rolls.
Gluten-Free Variation: If you or your guests have gluten sensitivities, you can adapt this recipe by substituting all-purpose flour with a gluten-free flour blend that measures cup-for-cup. Be sure to check the ingredients to avoid any that may contain gluten. Additionally, using active dry yeast specific for gluten-free baking will help achieve the same rise and fluffy texture.
Vegan Variation: To turn these rolls into a vegan treat, substitute regular milk with almond or soy milk, and opt for a plant-based butter in the dough and frosting. Use a flaxseed egg (1 tablespoon of ground flaxseed mixed with 2.5 tablespoons of water, left to sit until gelatinous) in place of the egg for a plant-based binding.
Common Mistakes to Avoid
One of the most common mistakes when making cinnamon rolls is using yeast that is past its expiration date. Always ensure that your yeast is fresh and active to achieve the best rise in your dough. If your rolls don’t rise as expected, your end product might turn out dense and heavy, rather than light and fluffy.
Another common mistake is overloading the filling. While a generous amount of filling makes for delectable rolls, too much can cause the filling to ooze out while baking. This can create a mess and prevent proper rising. Instead, stick to the recommended quantities of cinnamon and sugar to keep everything intact.
Finally, avoid undercooking or overbaking. Every oven is different, and baking times can vary widely. Keep an eye on your rolls in the oven. They should be golden brown and fragrant. A toothpick inserted into the middle can be a useful tool—if it comes out clean, your rolls are likely done.
Storage, Freezing & Reheating Tips
Proper storage of your Red Velvet Cinnamon Rolls ensures they remain fresh and delicious. Once cooled, you can store them in an airtight container at room temperature for up to 3 days. If you want to keep them longer, consider freezing them. Place the unbaked rolls in the freezer on a baking sheet until set. Once hardened, transfer them to a freezer-safe bag. They can be stored this way for up to 2 months.
For reheating, simply take out the desired number of rolls, and either let them thaw in the refrigerator overnight or bake them directly from the freezer. If baking from frozen, preheat your oven to 350°F (175°C) and allow an additional 10–15 minutes of baking time.
If you have leftover frosting, store it separately in the fridge for up to a week. You can use it to top any leftover rolls post-reheating, ensuring every bite remains decadent.
Frequently Asked Questions
Can I make Red Velvet Cinnamon Rolls ahead of time? Yes, you can prepare the dough a day in advance. After shaping the rolls, place them in the fridge overnight instead of allowing them to rise at room temperature. In the morning, simply let them come to room temperature before baking.
What can I substitute for red food coloring? If you’re looking for a natural substitute, consider using beet juice or pureed beets, which will give a similar color without artificial additives. Just be cautious with the amount, as you don’t want to alter the consistency of the dough.
Why are my cinnamon rolls not fluffy? A non-fluffy texture may result from a few factors, such as using expired yeast or over-kneading the dough. Ensure that your dough is airy and double in size during the rising process; also, handle the dough gently during shaping.
Can I use a different frosting besides cream cheese? Absolutely! While cream cheese frosting pairs exceptionally well with red velvet, you can try vanilla icing, chocolate ganache, or even a simple glaze made from powdered sugar and milk.
What should I do if the dough is too sticky? If you find that your dough is too sticky during kneading, gradually add small amounts of flour until you achieve a soft, elastic consistency. However, be careful not to add too much flour, which could lead to dense rolls.
Conclusion:
These Red Velvet Cinnamon Rolls are a game-changer for any brunch or special occasion. The delightful balance of flavors and textures will win over anyone who takes a bite. Don’t hesitate to put your unique spin on this recipe—whether that’s through filling variations or frosting choices. Each step in this process is an opportunity to share love and joy through food. So gather your ingredients, roll up your sleeves, and bring these delicious rolls to life in your kitchen! You’ll find that they become a cherished recipe, perfect for sharing and creating memories together.


