Prep time: 15 minutes
Cook time: 35 minutes
Total time: 50 minutes
Servings: 12 servings
Raspberry Oatmeal Crumble Bars are a delightful fusion of sweet and tart flavors that can satisfy any sweet tooth. Imagine biting into a soft, chewy bar with a buttery crumble on top, bursting with the juicy essence of summer raspberries. This treat is not just a favorite at family gatherings, but it also embodies nostalgia for those cherished moments spent baking in the kitchen.
What makes this Raspberry Oatmeal Crumble Bars recipe so special? It’s incredibly simple to prepare, making it the ideal option for busy parents or beginners looking to impress family and friends without spending hours in the kitchen. In addition to the amazing taste and ease of preparation, you’ll discover various tips and variations that allow you to customize the bars to your liking.
What Is Raspberry Oatmeal Crumble Bars Recipe – Easy & Delicious Treat?
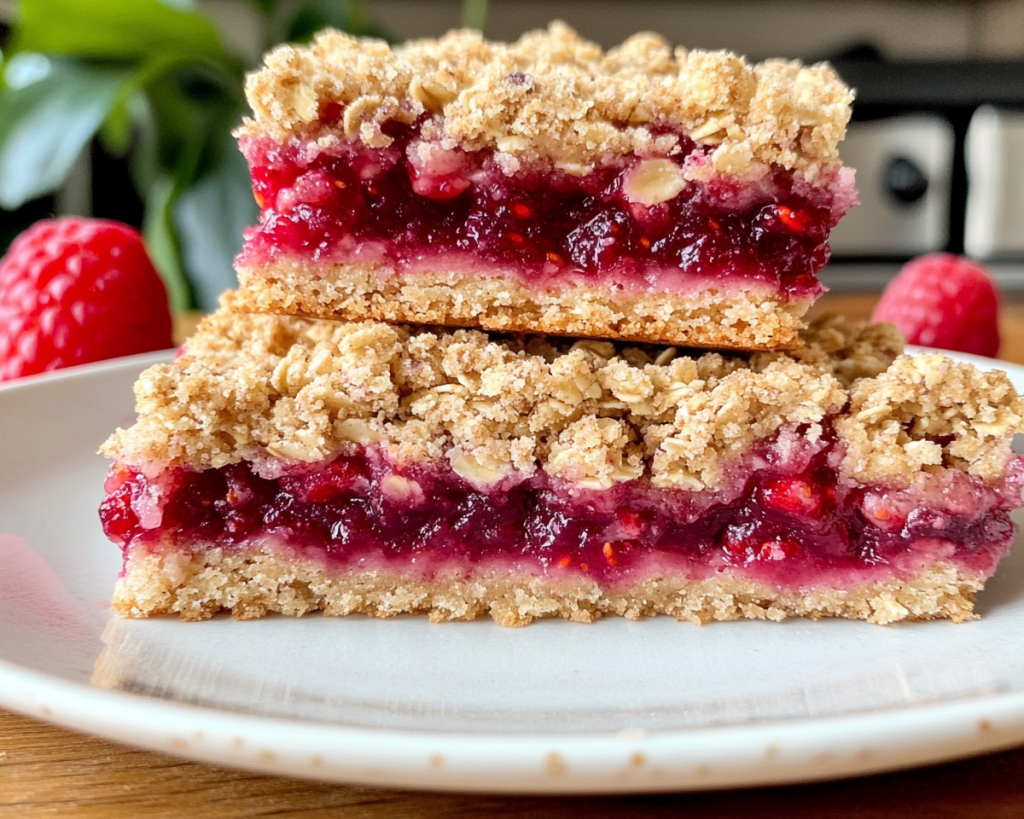
Raspberry Oatmeal Crumble Bars are a modern twist on traditional fruit bars. Originating from fruit and oat combinations often seen in different cultures, these bars are a layered dessert filled with a delicious raspberry mixture, sitting between a chewy oatmeal base and a crumbly topping. The combination of oats and flour creates a delightful texture that is both hearty and satisfying. The raspberries infuse a tangy sweetness that perfectly balances the rich, buttery elements of the crust.
The delightful contrast of the chewy base, the sweet-tart raspberry filling, and the crispy crumble topping makes this dish a standout. These bars are perfect for any occasion, whether it’s a family picnic, a dessert at a dinner party, or even a simple snack during a busy day. The vibrant color of the raspberries also makes for a visually appealing treat that is bound to impress.
Why You’ll Love This
There are numerous reasons to fall in love with Raspberry Oatmeal Crumble Bars. Firstly, the **delicious combination** of flavors is sure to become a favorite in your household. The sweetness of the crumble pairs perfectly with the tangy raspberries, creating a harmonious taste experience. Additionally, they are **easy to make**, making them suitable even for novice bakers. You don’t need fancy equipment or skills to whip up these bars.
Another advantage is the **cost-effectiveness** of the ingredients. The basic ingredients like oats, flour, and sugar are pantry staples, as are most of the foolproof fruit fillings. Plus, these bars are a great option for **meal prep** or **snack options** throughout the week. The versatility of this recipe allows you to mix and match fruits or even make them gluten-free, which opens the door to accommodate various dietary needs.
It’s also essential to recognize common misconceptions about baking fruit bars. Many people shy away from making them due to fear of a soggy bottom or uneven cooking. However, with this recipe and the tips provided, you’ll be equipped to create perfectly baked bars every time, allowing you to enjoy a homemade delight without the stress.
Ingredients You’ll Need
- Raspberries: Fresh or frozen, these are the star of the show. Fresh raspberries will provide a burst of flavor, while frozen ones can be more convenient and budget-friendly.
- Oats: Old-fashioned rolled oats provide a hearty texture, essential for the base and topping. Quick oats can work in a pinch but might alter the final texture slightly.
- All-purpose flour: This helps bind the ingredients together, giving the crust stability. For gluten-free options, use almond flour or gluten-free flour blends.
- Brown sugar: Using brown sugar adds a rich, caramel-like sweetness to the bars. You may substitute it with coconut sugar for a healthier option.
- Granulated sugar: This will sweeten your raspberry filling. Feel free to adjust the amount based on your sweetness preference.
- Butter: A key player in the crumble topping, using unsalted, melted butter will provide that rich flavor. Substitute with coconut oil for a dairy-free version.
- Baking powder: This is essential for giving your bars a slight rise, ensuring a light and fluffy texture.
- Salt: Just a pinch elevates the flavors of the bars, balancing the sweetness.
- Vanilla extract: Pure vanilla extract enhances the overall flavor profile, bringing warmth and depth.
Each ingredient plays a vital role in creating the perfect Raspberry Oatmeal Crumble Bars. Not only will these bars be delicious, but understanding what each ingredient offers can also empower you to make informed substitutions if needed.
How to Make
1. **Preheat the oven.** Start by preheating your oven to 350°F (175°C). This is crucial for ensuring even baking. Greasing your baking pan is the next step; you can use butter or cooking spray to make removal easier later. You’ll want a 9×9-inch baking dish for this recipe.
2. **Prepare the raspberry filling.** If you’re using fresh raspberries, wash them thoroughly. If they are frozen, allow them to thaw slightly. Combine your raspberries with granulated sugar in a bowl and set them aside to allow the sugar to draw out the natural juices of the berries.
3. **Combine the dry ingredients.** In a large mixing bowl, combine old-fashioned oats, all-purpose flour, brown sugar, baking powder, and salt. Mixing these dry ingredients ensures even distribution of the baking powder and prevents any clumping during baking.
4. **Mix in the wet ingredients.** Create a well in the center of the dry ingredients and pour in the melted butter and vanilla extract. Use a spatula or your fingers to mix until the mixture resembles a crumbly dough. It should hold together when squeezed but still have a gritty texture.
5. **Form the base layer.** Take about two-thirds of the crumble mixture and press it firmly into the bottom of your greased baking pan. This layer will serve as the foundation of your bars, so make sure it’s evenly distributed.
6. **Add the raspberry filling.** Spoon the raspberry mixture onto your pressed crust. Gently spread the raspberries evenly over the base, making sure they are well distributed to ensure every bite is flavorful.
7. **Top with remaining crumble.** Sprinkle the remaining crumble mixture over the raspberries. Use your fingers to break it into larger clumps, which creates a delightful topping that will crisp up beautifully as it bakes.
8. **Bake in the oven.** Place the baking dish in the preheated oven for about 30-35 minutes. The bars will be ready when the topping turns golden brown, and you can see the raspberries bubbling slightly at the sides. Be sure to keep an eye on them to prevent burning!
9. **Cool and cut.** Once baked, remove the dish from the oven and allow it to cool in the pan for at least 20 minutes. This cooling period is crucial as it allows the bars to firm up for easier slicing. After that, lift the bars out of the pan using the edges, let them cool completely on a wire rack, and then slice into squares for serving.
10. **Enjoy!** These bars can be enjoyed warm or at room temperature. They can be served plain or with a scoop of ice cream. Whether you enjoy them with a cup of tea or pack them in your child’s lunchbox, the flavors are sure to be a hit.
Variations & Substitutions
Berry Medley Variation: For a mixed berry option, substitute raspberries with blueberries, blackberries, or strawberries. A combination of berries will provide a diverse flavor profile. Blackberries add a richer taste, while blueberries offer a milder sweetness. This variation is suitable for those who may not prefer the tartness of raspberries.
Pecan Oat Topping Variation: To add a delightful crunch to your crumble, consider incorporating chopped pecans or walnuts into the topping. The nuts not only bring in additional flavor but also enhance the nutritional value of your bars. For success, roughly chop the nuts and mix them into the oat mixture before pressing it onto the base.
Dairy-Free Variation: If you’re looking to make these bars dairy-free, replace the butter with an equal measure of coconut oil. The taste will be slightly different but still delicious. You can also substitute the vanilla extract with almond extract for a nutty flavor. This variation is perfect for those with lactose intolerance or dietary restrictions.
Low-Sugar Option: For a healthier twist, reduce or eliminate the added sugars. Use mashed bananas or unsweetened applesauce to sweeten your filling naturally. You can also make use of stevia or erythritol for a low-calorie option. These alternatives are great for diabetics or anyone looking to watch their sugar intake.
Gluten-Free Option: To convert this recipe into gluten-free bars, use a gluten-free oat brand and replace the all-purpose flour with a gluten-free flour blend. Ensure that all ingredients are certified gluten-free to avoid cross-contamination. This variation makes the bars accessible for those with gluten sensitivities.
Common Mistakes to Avoid
One of the most common mistakes when making Raspberry Oatmeal Crumble Bars is using overly wet raspberries, which can result in a soggy crust. To prevent this, always drain excess liquid if using frozen raspberries. Another critical point is not pressing the base firmly enough into the pan. This can lead to a crumbly structure that falls apart when sliced. Make sure to press down until the mixture feels compact.
Additionally, be cautious about the baking time. Since ovens can vary greatly, it’s best to check the bars a few minutes early to prevent over-baking. When removed from the oven, allow them to cool in the pan before cutting. If you attempt to cut them too soon, they may crumble apart. Remember, patience is key when making these delicious bars.
Storage, Freezing & Reheating Tips
To ensure the longevity of your Raspberry Oatmeal Crumble Bars, store them in an airtight container at room temperature for up to five days. The bars can retain their delicious flavor and texture when kept sealed away from air and moisture. For extending their shelf-life, consider freezing them. Wrap each bar individually in plastic wrap and place them in a freezer-safe bag. They can be stored in the freezer for up to three months.
When you’re ready to enjoy a frozen bar, simply remove the desired amount, unwrap, and allow to thaw at room temperature for about 30 minutes. For a warm treat, you can pop them in the microwave for 10-15 seconds. Ensure you do not exceed this time, as you risk making them too soft.
Safety is always a priority. If you notice any signs of spoilage such as an off smell or change in texture, it’s better to discard them. Proper storage and handling will ensure that your homemade Raspberry Oatmeal Crumble Bars remain delicious throughout the week.
Frequently Asked Questions
Can I use other fruits instead of raspberries? Yes, you can certainly experiment with other fruits! Blueberries, strawberries, or blackberries would all work beautifully. Each fruit will bring its unique flavor and sweetness to the bars. You can even combine different berries to make a mixed berry version.
How do I know when my bars are done baking? The bars are finished when the topping is golden brown, and you may see the fruit bubbling slightly. It’s essential not to rely solely on time; every oven is different, so keep an eye on them as they bake.
What can I serve with Raspberry Oatmeal Crumble Bars? These bars pair wonderfully with a scoop of vanilla ice cream or a dollop of whipped cream. You can also enjoy them with a cup of coffee or tea for an afternoon treat. They can even serve as the perfect topping on yogurt for a healthy breakfast option.
Can I make these bars ahead of time? Absolutely! In fact, these bars are perfect for make-ahead treats. Prepare them a day in advance, allow them to cool, and store them in an airtight container at room temperature. This makes them an excellent option for events or gatherings.
Are Raspberry Oatmeal Crumble Bars healthy? While these bars are indulgent, they can be made healthier with whole ingredients and less sugar. Using oats and fresh fruit provides nutrients and fiber, making them a better snack option than many processed desserts. Adjusting sugar levels and using healthier alternatives can create a balanced treat.
Conclusion:
Raspberry Oatmeal Crumble Bars are not only delectable but also versatile enough to cater to different tastes and dietary needs. They are perfect for an easy dessert or an afternoon snack. With the detailed steps provided, you have everything you need to whip up a batch and impress everyone around you. Don’t hesitate to experiment with flavors and ingredients to make them your own. Try this recipe soon, and I promise you’ll be sharing them with friends and family in no time! Enjoy the delightful combination of flavors and the joy of homemade baking.


