Prep time: 20 minutes
Cook time: 20 minutes
Total time: 40 minutes
Servings: 12
Fall is here, and there’s something undeniably comforting about the aroma of freshly baked pumpkin scones wafting through your home. If you’ve ever taken a stroll in the crisp autumn air and felt an overwhelming urge for a seasonal treat, you’re not alone. Pumpkin scones are the perfect blend of tender, fluffy baked goods with a warm, spiced pumpkin flavor. This recipe not only satisfies your taste buds but also embodies the spirit of the season. In this article, we’re diving deep into why pumpkin scones are so special, what you’ll need, and how to make them perfectly every time. You’ll also discover variations and tips to make this recipe your own, making it accessible for both beginners in the kitchen and seasoned bakers alike.
What Is Pumpkin Scones – Fall Baking Favorite?
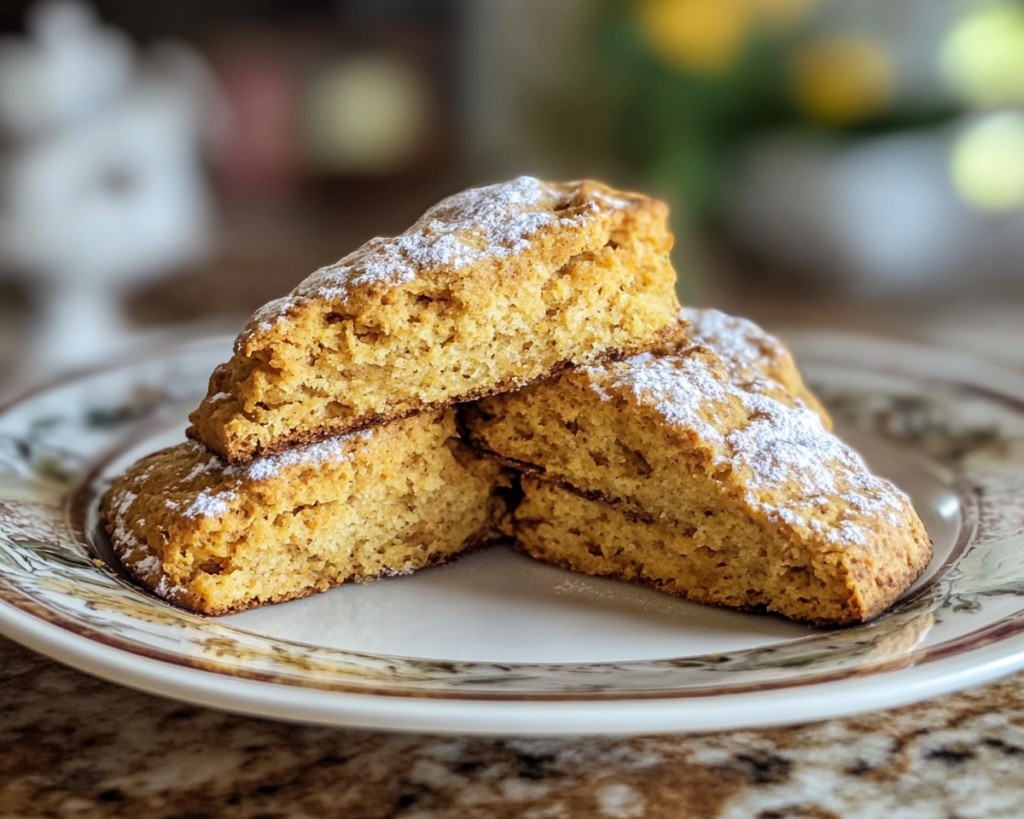
Pumpkin scones are a delightful pastry that originates from the British tradition of baking scones. Known for their rich, buttery texture, these scones often incorporate seasonal fruits and flavors, making them ideal for fall. The key ingredient in pumpkin scones is, naturally, pumpkin puree, which lends a beautiful orange color and moist texture. When combined with spices like cinnamon, nutmeg, and ginger, the result is a comforting blend of flavors that evoke memories of cozy fireside gatherings and holiday celebrations.
The texture of pumpkin scones is something to savor. They should be fluffy yet slightly crumbly, offering a delightful contrast when paired with cream cheese or clotted cream. The subtle sweetness combined with the warm spices not only enhances the flavor but also wraps you in a warm hug with every bite. This dish is not just a treat; it’s a celebration of fall itself.
Why You’ll Love This
There are many reasons to fall in love with pumpkin scones. For one, they encapsulate the essence of fall—rich, warm, and spiced just right. If you’re someone who enjoys baking as a way to unwind, this recipe offers a straightforward process without overwhelming you with complexity. It’s an excellent choice for busy parents looking for an engaging activity to share with their children, turning your kitchen into a cozy baking haven.
Moreover, pumpkin scones are incredibly versatile. You can easily customize them to suit different dietary preferences or simply your mood. They are also budget-friendly, as pumpkin puree can often be found at a reasonable price during autumn. While some might hesitate due to the perceived difficulty of making scones, this recipe breaks that myth. You’ll understand that with a few simple techniques, you can whip up these delicious morsels in no time.
Ingredients You’ll Need
- All-purpose flour: 2 cups – The base of your scone; ensures the fluffy texture.
- Baking powder: 2 tablespoons – Acts as the leavening agent for a light finish.
- Salt: 1/2 teaspoon – Enhances the flavors of the ingredients.
- Cinnamon: 1 teaspoon – Adds a warm, familiar spice perfect for fall.
- Nutmeg: 1/2 teaspoon – Provides a rich, aromatic flavor.
- Ground ginger: 1/2 teaspoon – Offers a hint of zing in every bite.
- Butter: 1/2 cup, chilled and diced – Ensures a rich, flaky texture.
- Pumpkin puree: 1 cup – The star ingredient that adds moisture and flavor.
- Brown sugar: 1/2 cup – Brings a hint of caramel sweetness.
- Egg: 1 large – Acts as a binder for the scones.
- Heavy cream: 1/4 cup – Makes the dough richer and adds moisture.
- Vanilla extract: 1 teaspoon – Enhances the overall flavor of the scones.
Understanding each ingredient’s role helps you grasp how this recipe comes together so beautifully. If you’re out of brown sugar, for instance, you can substitute granulated sugar; however, the rich flavor will be slightly altered. Similarly, if you prefer to go dairy-free, using coconut oil instead of butter could work, but keep in mind that it may change the texture slightly.
How to Make
Making pumpkin scones is an enjoyable experience that allows you to bring a piece of fall into your kitchen. Follow these steps to create scones that are sure to impress.
- Preheat your oven: Start by preheating your oven to 400°F (200°C). This is essential, as a hot oven will help your scones rise and become fluffy.
- Prepare your baking sheet: Line a baking sheet with parchment paper. This will prevent the scones from sticking and make cleanup easier.
- Mix the dry ingredients: In a large bowl, whisk together 2 cups of all-purpose flour, 2 tablespoons of baking powder, 1/2 teaspoon of salt, 1 teaspoon of cinnamon, 1/2 teaspoon of nutmeg, and 1/2 teaspoon of ground ginger. This combination not only provides flavor but also ensures an even rise.
- Add the butter: Next, add 1/2 cup of chilled, diced butter to the dry mixture. Use a pastry cutter or two forks to cut the butter into the flour until it resembles coarse crumbs. This step is crucial because the pockets of butter create that flaky, tender texture.
- In a separate bowl, mix the wet ingredients: Combine 1 cup of pumpkin puree, 1/2 cup of brown sugar, 1 large egg, 1/4 cup of heavy cream, and 1 teaspoon of vanilla extract. Whisk until smooth, ensuring all ingredients are fully incorporated.
- Combine wet and dry ingredients: Pour the wet mixture into the dry ingredients. Using a wooden spoon, stir just until combined; be cautious not to over-mix. The dough should be slightly sticky but manageable.
- Form the scones: Turn the dough out onto a lightly floured surface. Gently knead it a few times until it comes together. Pat the dough into a circle about 1 inch thick. Cut into wedges, like a pizza, or use a biscuit cutter for round scones.
- Prepare for baking: Place the scones on your prepared baking sheet, leaving space in between for them to expand as they bake. If you want a richer color, brush the tops with a little heavy cream.
- Bake: Place the baking sheet in the preheated oven and bake for 20-25 minutes, or until the scones are golden brown and a toothpick inserted in the center comes out clean.
- Cool and enjoy: Remove the scones from the oven and let them cool slightly on a wire rack. They are best served warm, with a slather of butter or your favorite cream.
The texture of these scones should be soft and slightly crumbly, not dry or overly dense. If they are too dry, it might mean you’ve overmixed the dough; remember to mix just until combined.
Variations & Substitutions
Chocolate Chip Pumpkin Scones: If you’re a chocolate lover, consider adding semi-sweet or dark chocolate chips to the dough. About 1/2 cup should suffice. The bittersweet chocolate complements the spices of the pumpkin, creating a delicious contrast. This variation is perfect for kids or anyone with a sweet tooth and offers a delightful variation to the traditional flavor.
Gluten-Free Pumpkin Scones: For a gluten-free alternative, substitute the all-purpose flour with a 1:1 gluten-free flour blend. Make sure it includes xanthan gum to help mimic the elasticity of wheat flour. The texture might be slightly different, but you’ll achieve a delicious scone that everyone can enjoy.
Spiced Pumpkin Cream Cheese Scones: To elevate the flavor further, incorporate a combination of cinnamon cream cheese in the center of the scone. Just wrap the dough around a dollop of cream cheese before baking. This results in a delightful surprise when you take a bite, creating a luscious, creamy interior that pairs beautifully with the pumpkin.
Vegan Pumpkin Scones: To make these scones vegan-friendly, replace the butter with coconut oil and use a flax egg (1 tablespoon ground flaxseed mixed with 2.5 tablespoons of water, left to sit for 5 minutes) instead of the egg. Additionally, substitute the heavy cream with almond milk. The texture may vary slightly, but the flavor will remain rich and satisfying.
Common Mistakes to Avoid
Even the most experienced bakers can make mistakes when making scones. One common issue is overmixing the dough, which can lead to dense and tough scones. Remember, less is more! Always mix until just combined; any more than that can result in a chewy texture instead of the desired tender crumb.
Another mistake is using warm butter. Always ensure your butter is chilled and cut into small cubes before adding it to the flour mixture. This helps create those lovely flaky layers that we crave in a good scone.
Lastly, make sure to measure out your pumpkin puree correctly. Too much moisture can lead to soggy scones. If your pumpkin seems too wet, you can adjust by adding a touch more flour. The goal is to achieve a dough that is workable, neither overly sticky nor too dry.
Storage, Freezing & Reheating Tips
Storing your pumpkin scones properly will ensure they maintain their texture and flavor for days. Allow the scones to cool completely before placing them in an airtight container. They can be stored at room temperature for up to 3 days. If you want to keep them longer, consider freezing them. Simply wrap each scone in plastic wrap and place them in a freezer bag. They can last in the freezer for up to 3 months.
To reheat, simply place them in a preheated oven at 350°F (175°C) for about 10 minutes. This will restore their flaky texture and warm up the wonderful spices. Alternatively, for a quick fix, the microwave works well, but be cautious as it might make them a bit chewy if overheated.
When it comes to food safety, it’s essential to follow best practices to prevent spoilage. Always check for any signs of mold or off smells before consuming leftover scones, especially if they have been stored for a few days.
Frequently Asked Questions
Can I use fresh pumpkin instead of canned? Yes, you can absolutely use fresh pumpkin. Just make sure to roast it until tender, scoop out the insides, and then puree it until smooth. However, ensure it’s not too watery by straining any excess liquid, as this can affect the texture of your scones.
Can I make the dough ahead of time? Yes, you can prepare the dough in advance. Just wrap it in plastic wrap and refrigerate it for up to 24 hours. When ready to bake, simply shape the scones and proceed with the baking instructions.
Can I add nuts or other mix-ins? Absolutely! Feel free to incorporate chopped walnuts, pecans, or even dried cranberries into the dough for added texture and flavor. Just make sure not to overdo it; too many add-ins can make it difficult for the scones to rise properly.
What do I serve with pumpkin scones? Pumpkin scones pair wonderfully with flavors like maple syrup, honey, or a delectable spiced butter. Cream cheese is another excellent option; you can make a simple cream cheese spread flavored with maple syrup or vanilla to enhance your scones further.
How do I know when my scones are done baking? Scones are typically done when they have risen comfortably and turned a beautiful golden color. A toothpick inserted into the center should come out clean. The edges may appear slightly crusty, which is perfectly fine and adds to the delightful texture.
Conclusion:
In summary, pumpkin scones are a delightful fall treat that combines the warmth of spices with the richness of pumpkin. They are a versatile recipe that can be adjusted to suit various tastes and dietary restrictions. Whether you are enjoying them at breakfast, as an afternoon snack with tea, or as a cozy dessert, you’ll find that these scones bring a taste of the season right to your kitchen. Don’t hesitate to try this recipe yourself; personalize it, and share it with friends and family. Your home will be filled with not only delicious aromas but also cherished moments spent together. So why wait? It’s time to bake and create a lovely fall memory!


