Prep time: 25 minutes
Cook time: 20 minutes
Total time: 45 minutes
Servings: 12 servings
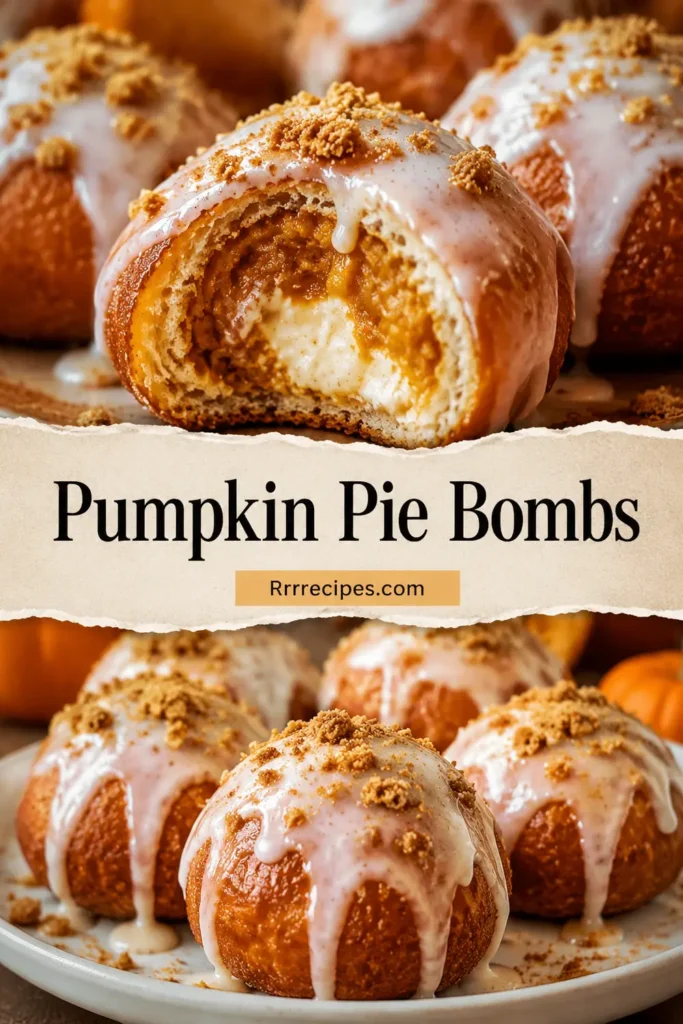
Pumpkin Pie Bombs are a delightful fusion of seasonal flavors and comforting textures. Imagine biting into a tender, flaky pastry that wraps around a luscious pumpkin filling—it’s like enjoying your favorite pumpkin pie but in a portable, bite-sized form! These delightful little treats are perfect for gatherings, snack time, or even as a fun dessert during the fall season.
What Is Pumpkin Pie Bombs?
Pumpkin Pie Bombs are essentially mini pastries filled with delicious pumpkin pie filling. They bring together the warmth of cinnamon, nutmeg, and ginger, complemented by creamy pumpkin. The outer crust is golden and flaky, much like a traditional pie crust, while the inside bursts with rich flavors that evoke the cozy feeling of autumn.
These tasty treats can be baked, providing a healthier option compared to fried pastries, and they can be served warm or at room temperature, making them versatile for different occasions. Whether served at Thanksgiving celebrations or enjoyed as an afternoon snack, Pumpkin Pie Bombs encapsulate the essence of holiday baking.
Why You’ll Love This
There are several reasons why Pumpkin Pie Bombs are sure to be a hit in your kitchen:
- Easy to Make: With a straightforward recipe, even kitchen beginners can whip these up with confidence.
- Perfectly Portable: These bombs are easy to transport, making them ideal for potlucks or parties.
- Customizable: You can easily adjust spices and fillings to suit your taste.
- Balanced Flavor: The combination of spices and pumpkin creates a rich, satisfying flavor without being overly sweet.
- Great for Meal Prep: Prepared ahead of time, they can be stored in the freezer for quick access to a delicious treat.
Ingredients You’ll Need
To make these delightful Pumpkin Pie Bombs, gather the following ingredients:
- 1 package of refrigerated pie crusts: This forms the sturdy base that cradles the pumpkin filling.
- 1 cup of pure pumpkin puree: Ensure it’s pure pumpkin and not pumpkin pie filling for optimal flavor and consistency.
- 1/2 cup of granulated sugar: This adds sweetness to balance the spices and pumpkin purity.
- 1/4 cup of packed brown sugar: Enhances the sweetness with caramel undertones.
- 1 teaspoon of ground cinnamon: A classic spice that brings warmth to the dish.
- 1/2 teaspoon of ground ginger: Adds a zesty note that complements the pumpkin beautifully.
- 1/4 teaspoon of ground nutmeg: This adds a hint of earthy richness.
- 1/4 teaspoon of salt: Balances the sweetness and enhances the overall flavor.
- 1 large egg: For egg wash, which gives the bombs a beautiful golden color.

How to Make
Creating these pumpkin delights is a simple and enjoyable process. Follow these steps:
- Prepare the Pumpkin Filling: In a medium mixing bowl, combine 1 cup of pumpkin puree, 1/2 cup of granulated sugar, 1/4 cup of packed brown sugar, 1 teaspoon of ground cinnamon, 1/2 teaspoon of ground ginger, 1/4 teaspoon of ground nutmeg, and 1/4 teaspoon of salt. Mix until well blended, ensuring all ingredients are evenly incorporated. The filling should be smooth and fragrant, ready to envelop in pastry.
- Roll Out the Pie Crusts: Unroll the refrigerated pie crusts on a lightly floured surface. Use a round cutter to cut out circles, approximately 4 inches in diameter. You can also use a large glass or bowl; this will be the base for your pumpkin filling.
- Fill the Pastry: Take one of the circles and place a generous tablespoon of the pumpkin filling in the center. Be careful not to overfill, as this could cause leakage during baking. Leave space around the edges for sealing the bombs.
- Seal the Bombs: Moisten the edges of the pastry circle with a little water, then fold the dough over the filling to create a half-moon shape. Press the edges to seal tightly, ensuring no filling escapes during baking. Use a fork to crimp the edges for a decorative touch.
- Prepare for Baking: Preheat your oven to 375°F (190°C). Place the filled pastry bombs on a parchment-lined baking sheet. Beat the egg in a small bowl and brush a thin layer over each bomb. This will give them a beautiful golden color once baked.
- Bake the Bombs: Place the baking sheet in the oven and bake for 20-25 minutes or until the bombs are golden brown and flaky. The aroma of baking will fill your kitchen, ensuring everyone is excited for the final result.
Variations & Substitutions
Spiced Pumpkin Bombs: For a warmer flavor profile, add 1/4 teaspoon of ground cloves to the pumpkin filling. This additional spice deepens the flavor and creates a more aromatic dessert.
Sweet Potato Filling: Substitute the pumpkin with sweet potato puree for a slightly different taste, but equally delightful. The sweet potato lends a creamier texture, making for a comforting bite.
Chocolate Chip Pumpkin Bombs: Add 1/2 cup of mini chocolate chips to the filling for a rich, decadent twist. The chocolate pairs wonderfully with the spices, and kids will adore this version!
Maple Pumpkin Bombs: Substitute the granulated sugar with maple syrup (adjust the moisture level of the filling accordingly). This enhances the flavor with a rich, earthy sweetness that compliments the pumpkin perfectly.
Dairy-free Option: For a vegan variant, use a dairy-free pie crust and swap out the egg wash for non-dairy milk to achieve a shiny finish.
Common Mistakes to Avoid
It’s easy to encounter a few hiccups while making Pumpkin Pie Bombs, but here are some pitfalls to watch out for:
Underfilling or Overfilling: Filling the bombs too little or too much can lead to disappointment. Always stick to about one tablespoon of filling. Too little makes them bland, while too much may lead to messy leaks.
Not Sealing Properly: If the edges aren’t crimped well, the filling can ooze out. Make sure to wet the edges and press firmly to seal each bomb tightly before baking.
Skipping the Egg Wash: Without an egg wash, the bombs will lack that beautiful, glistening finish. Don’t skip this step to ensure presentation.
Storage, Freezing & Reheating Tips
To ensure freshness and safety with your Pumpkin Pie Bombs, follow these storage guidelines:
Storage: After they have cooled completely, place the bombs in an airtight container. They can be stored in the refrigerator for up to 3 days.
Freezing: Pumpkin Pie Bombs freeze beautifully! Once baked and cooled, arrange them in a single layer on a baking sheet and freeze. Once frozen, transfer them to a zip-top bag, ensuring to label with date and contents. They can be stored for up to 3 months.
Reheating: To reheat, preheat your oven to 350°F (175°C) and place the bombs on a baking sheet. Heat for about 10-15 minutes, or until warmed through. You can also microwave for 30-60 seconds, but the oven method ensures a crisp crust.
Frequently Asked Questions
Can I make the filling ahead of time?
Absolutely! You can prepare the pumpkin filling up to two days in advance. Store it in an airtight container in the refrigerator. This not only saves time but also allows the flavors to deepen.
What should I serve Pumpkin Pie Bombs with?
They pair beautifully with a dollop of whipped cream or a scoop of vanilla ice cream. For added flair, sprinkle with cinnamon or drizzle with caramel sauce.
Can I use homemade pie crust?
Yes, homemade pie crust adds a comforting, personalized touch. If you have a favorite recipe, feel free to use it. Just ensure it’s rolled out to about 1/8 inch thick for perfect puffing.
What’s the best way to adjust the sweetness?
You can customize the sweetness by adjusting the amount of sugar to your liking or using natural sweeteners like honey or maple syrup instead. Just keep in mind the fluid adjustments if using liquid sweeteners.
Are Pumpkin Pie Bombs gluten-free?
To make this recipe gluten-free, substitute the regular pie crust with a gluten-free option available at stores. Make sure that all your other ingredients are also gluten-free.
Conclusion:
Pumpkin Pie Bombs are a scrumptious treat that embodies the essence of the fall season. Their portable nature, delightful flavors, and ease of preparation make them perfect for any occasion. With a few simple ingredients and steps, you can create an impressive dessert that will wow your friends and family alike. So gather your ingredients, roll up your sleeves, and get ready to enjoy these delightful bites of pumpkin goodness!