Prep time: 20 minutes
Cook time: 0 minutes
Total time: 20 minutes
Servings: 12 servings
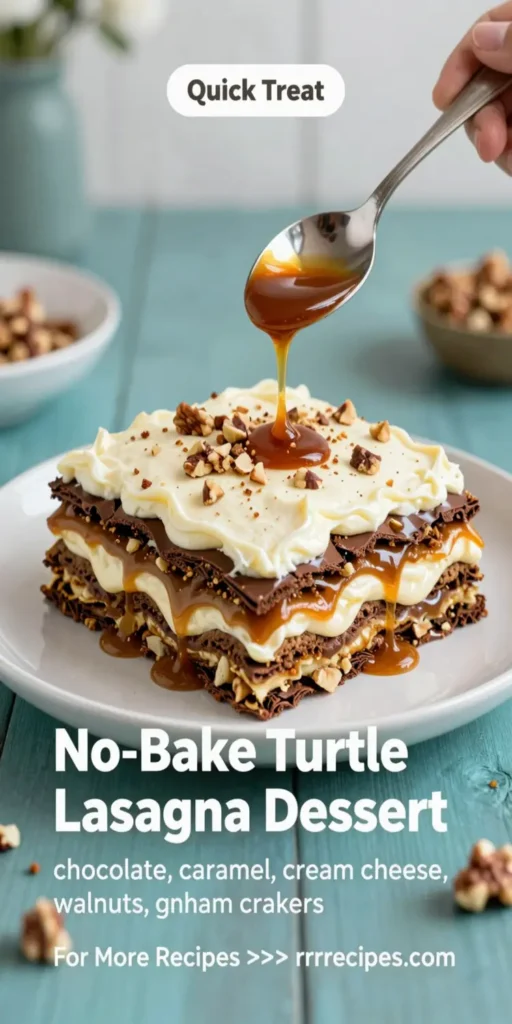
No-Bake Turtle Lasagna Dessert is a delightful twist on traditional lasagna, blending creamy layers with delightful chocolate and caramel flavors, making it a dreamy treat perfect for any occasion. This delightful dessert serves as a magnificent way to satisfy your sweet tooth without the hassle of baking. Perfect for busy parents or anyone looking for an easy yet fancy finish to a meal, this recipe will quickly become a favorite at parties and family gatherings.
What Is No-Bake Turtle Lasagna Dessert?
No-Bake Turtle Lasagna Dessert is an indulgent dessert that layers creamy ingredients reminiscent of classic lasagna but with a sweet, rich twist. Instead of pasta sheets, we use a combination of graham crackers or cookies that add crunch and texture, while layers of sweetened cream cheese, whipped cream, and chocolate add richness and flavor. Drizzled with chocolate and caramel sauces, this dessert is a feast for both the eyes and the palate.
Why You’ll Love This
This dessert is not just easy to make; it’s also incredibly versatile. Whether you’re a busy parent trying to whip up something quick for a school event or a novice in the kitchen looking to impress at a potluck, this dessert delivers. The layers of cream and crunch appeal to both children and adults, making it a guaranteed hit at gatherings. Plus, you can adjust the components to suit dietary preferences or to incorporate seasonal flavors. Who wouldn’t love a dessert that’s both delicious and easy to prepare?
Ingredients You’ll Need
- 1 package (8 ounces) cream cheese: Softened to create a smooth and creamy base.
- 1 cup powdered sugar: Sweetens the cream cheese layer and adds to the overall creaminess.
- 2 cups whipped topping: Provides lightness and volume, making the dessert airy.
- 1 package (10-12 ounces) of graham crackers or chocolate cookies: Acts as the crunchy layer, giving texture.
- 1 cup chocolate syrup: Adds richness and a chocolatey flavor throughout the layers.
- 1 cup caramel sauce: Drizzled for a sweet, gooey finish that complements the chocolate.
- 1 cup chopped nuts (optional): Pecans or walnuts for added crunch and flavor.
How to Make
- Begin by preparing your ingredients. Make sure your cream cheese is softened to room temperature to allow smooth blending without lumps. In a large mixing bowl, beat the cream cheese with an electric mixer until it’s creamy and smooth.
- Gradually add in the powdered sugar, mixing well until fully incorporated. This will sweeten the cream cheese without making it overly sugary. Gently fold in the whipped topping to integrate, creating the first layer of your dessert base.
- Now, prepare the graham crackers or chocolate cookies. If using graham crackers, you might want to crush them slightly to make layering easier, but leave them mostly intact for structure.
- In a suitable dessert dish, start layering. Place a layer of crackers at the bottom, then spread half of the cream cheese mixture over the top, smoothing it out evenly. Follow this with a generous drizzle of chocolate syrup and a sprinkle of chopped nuts if you’re using them.
- Repeat the layers, starting with another layer of crackers, followed by the remaining cream cheese mixture. This time, layer the caramel sauce on top of the cream mixture. Don’t hold back with the sauces – they’re what make this dessert heavenly!
- Finally, finish with one last layer of crackers and top off with any remaining chocolate syrup and caramel drizzles. Chill in the refrigerator for at least 2 hours to allow the layers to set and meld together beautifully.
Variations & Substitutions
Chocolate Mint Variation: For a refreshing twist, incorporate mint extract into the cream cheese filling. Crush some Andes mints or add a layer of mint chocolate chips for extra flair. The mint pairs beautifully with the chocolate and caramel, creating an entirely different flavor profile. You can also top this variation with crushed peppermint candies for a festive look in the holiday season.
Fruit Lovers Variation: Replace the chocolate syrup with fruit compote or fresh berries. Strawberries, raspberries, or blueberries can create a deliciously refreshing layer. Using a fruity component lightens the dessert, making it a perfect fit for summer gatherings. Simply layer the fruit on top of the final cream layer and let it soak into the dessert slightly before serving.
Common Mistakes to Avoid
One common issue is not allowing the cream cheese to soften adequately. This will result in a lumpy texture that affects the overall creaminess of your dessert. Make sure to leave the cream cheese out for at least 30 minutes before you start mixing. Another mistake is overfilling layers; maintaining balance in ingredient proportions is key. Avoid using too much cream or heavy layers of sauces, as this can make the dessert overly rich and difficult to cut.
Storage, Freezing & Reheating Tips
Store any leftovers in an airtight container in the refrigerator, where they will last for up to 3 days. The longer it sits, the more the flavors meld, which can be a positive! If you want to prepare it in advance, consider making it up to two days ahead of time for optimal flavor. Avoid freezing the dessert, as the texture of the whipped topping may change and become grainy when thawed. Instead, plan to keep it chilled for the best serving experience.
Frequently Asked Questions
Can I use low-fat cream cheese and whipped topping?
Yes, you can use low-fat versions of cream cheese and whipped topping. However, this may alter the texture and flavor slightly. While it can make the dessert a bit less rich, it is a great option for those looking to lighten it up.
How long should I wait before serving the dessert?
It’s best to chill the dessert for at least 2 hours before serving. This allows all the layers to set and the flavors to develop. If time allows, longer chilling can enhance the taste and structure, making it easier to slice and serve.
Can I make this dessert gluten-free?
Absolutely! You can substitute the graham crackers with gluten-free cookies or use a gluten-free crumb crust. Just ensure that all other ingredients, including sauces, are gluten-free as well.
How can I serve No-Bake Turtle Lasagna Dessert?
Serve directly from the dish using a spatula to cut into squares or wedges. For an extra touch, you can garnish individual servings with whipped cream, chocolate shavings, or a drizzle of additional sauces right before serving.
What do I do if the layers are falling apart when I cut the dessert?
If your layers start to fall apart, it may not have chilled long enough. A longer chill time helps the layers set properly, making it easier to cut clean squares. If this happens, you can still layer it back into cups for a more casual presentation.
Conclusion:
In conclusion, No-Bake Turtle Lasagna Dessert is a delightful and easy-to-make dessert that will WOW anyone who tries it. Its creamy layers and rich flavors ensure that it fits right into any gathering. The versatility in flavors and variations makes it even more appealing, allowing you to tailor it to suit your guests’ tastes or accommodate dietary restrictions. Try this quick and delectable dessert today, and watch as it becomes a show-stopper at your next event!


