Prep time: 30 minutes
Cook time: 45 minutes
Total time: 1 hour 15 minutes
Servings: 8
Imagine stepping into a sunlit kitchen, the smell of fresh strawberries mingling with the scent of buttery pastry. You cut into a beautiful tart, and the vibrant red strawberries glisten, calling your name. This is the essence of a Mother’s Day Strawberry Tart—a delightful dessert that speaks of love and celebration. Whether you are a seasoned baker or someone venturing into the kitchen for the first time, this recipe presents the perfect blend of simplicity and sophistication. In this article, you will discover the rich history of this dish, the detailed steps to create your own tart, and some helpful tips and variations to customize it to your liking.
What Is Mother’s Day Strawberry Tart?
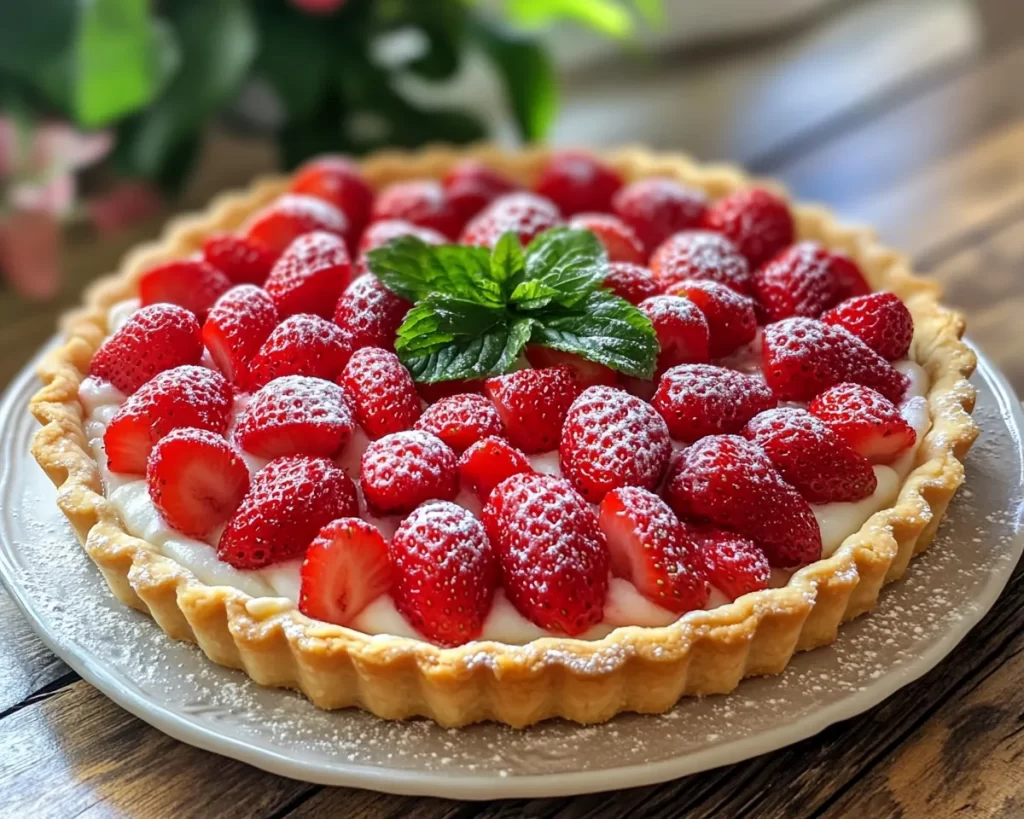
The Mother’s Day Strawberry Tart is a traditional dessert that enhances the natural sweetness of fresh strawberries with a crisp pastry shell and creamy filling. Originating from classic French cuisine, tarts offer a unique combination of textures. The buttery crust provides a satisfying crunch, while the filling offers a smooth, rich contrast, and the strawberries add juicy, refreshing bursts of flavor. The experience of savoring this tart is both delightful and nostalgic, evoking memories of family gatherings and special celebrations.
Many people associate tarts with complicated techniques, but the Mother’s Day Strawberry Tart simplifies the process while maintaining elegance. This lovely dessert is often made with a vanilla custard filling, which complements the tartness of the strawberries perfectly. It’s not merely a dish; it’s a representation of the thoughtfulness and effort put into celebrating a cherished occasion. As you prepare the tart, the delightful aroma wafting through your home will remind you of the joy and love associated with Mother’s Day.
Why You’ll Love This
There are numerous reasons to embrace this scrumptious dessert. First and foremost is the flavor. The combination of fresh strawberries, sweet custard, and a buttery crust creates a harmonious balance. Each bite is rich yet refreshing, leaving you satisfied but ready for more. You’ll also love how quick and straightforward it is to whip up, making it perfect for busy parents or beginners in the kitchen. With clear steps and accessible ingredients, you won’t feel overwhelmed.
Another advantage is the cost-effectiveness of making your own tart. Store-bought versions can be pricey, yet this homemade alternative allows you to treat your family without breaking the bank. Plus, with the versatility of the recipe, you can easily adjust it to fit various dietary preferences. Whether gluten-free or vegan options are required, this tart is your canvas for creative expression. Don’t let common misconceptions about baking deter you; this recipe aims to empower and embolden you to embrace the joy of cooking.
Ingredients You’ll Need
- 1 ½ cups all-purpose flour: The foundation of your tart crust, which provides structure. You can substitute with almond flour for a gluten-free version.
- ½ cup unsalted butter: Adds richness and flavor. Ensure it is cold for a flakier crust.
- ¼ cup granulated sugar: Sweetens the crust slightly; you can use coconut sugar for a healthier alternative.
- 1 large egg: Binds the ingredients together, providing moisture. A flax egg can be used for vegan preferences.
- 1 cup heavy cream: Essential for the custard filling, creating a luxurious texture. Whipping cream can serve as a lighter option.
- ½ cup whole milk: Balances the richness of the cream for a smoother filling. Oat milk is a suitable substitute for a dairy-free option.
- ½ cup powdered sugar: Sweetens your filling, ensuring a pleasant taste. Use less if you prefer a less sweet custard.
- 1 tsp vanilla extract: Enhances the overall flavor with its aromatic scent. Vanilla bean paste is a gourmet alternative.
- 2 cups fresh strawberries: The star of the show, offering vibrant flavor and color. Feel free to mix in raspberries or blueberries for a berry medley.
By selecting the right ingredients, you enhance the flavors and textures in your Mother’s Day Strawberry Tart. Each component plays a crucial role in crafting a memorable dessert that everyone will love.
How to Make
- Prepare the Tart Crust: In a mixing bowl, combine the flour and granulated sugar. Cut the cold, unsalted butter into small pieces and add it to the flour mixture. Using your fingers, mix until the texture resembles coarse crumbs. This technique is called “cutting in,” and it’s essential for achieving that flaky crust. Add the egg and mix until just combined. Form the dough into a disc, wrap in plastic, and refrigerate for at least 30 minutes.
- Preheat the Oven: While the dough is chilling, preheat your oven to 375°F (190°C). A well-heated oven will ensure even baking, which is crucial for the tart’s overall texture.
- Roll out the Dough: Once chilled, lightly flour your work surface and roll out the dough to about ¼ inch thick. Carefully transfer it to a 9-inch tart pan. Press it into the corners, making sure it’s even. Trim any excess dough overhanging the edges. Use a fork to poke holes in the bottom to prevent bubbling.
- Bake the Tart Shell: Place the tart shell in the preheated oven for about 15-20 minutes, or until lightly golden. Keep an eye on it to avoid overbaking, as the crust should not be too dark. This process is known as blind baking and is crucial for a crispy base.
- Make the Custard Filling: While the crust cools, whisk together the heavy cream, milk, powdered sugar, and vanilla extract in a medium saucepan. Heat the mixture over medium heat, constantly stirring until it begins to simmer. This step is essential as it prevents the sugar from sticking. In a separate bowl, whisk the eggs, then slowly pour in some of the warm cream mixture to temper them. This prevents the eggs from scrambling.
- Combine and Thicken: Gradually add the tempered egg mixture back into the saucepan while stirring continuously. Continue cooking for about 5 minutes until it thickens, and you achieve a custard-like consistency. It should coat the back of a spoon. Remove from heat and let it cool slightly.
- Assemble the Tart: Pour the custard filling into the cooled tart shell, spreading it evenly. Arrange the fresh strawberries on top, making sure they are beautifully displayed. The visual appeal of the strawberries is just as important as the taste.
- Chill Before Serving: Refrigerate the tart for at least 2 hours before serving. This allows the flavors to meld together and the custard to set. Serve chilled, and watch everyone enjoy.
These steps may seem daunting, but take your time and embrace the process. Each stage is an opportunity to draw upon your creativity, and the end result will undoubtedly be a source of pride.
Variations & Substitutions
Gluten-Free Variation: For those who cannot consume gluten, swapping all-purpose flour for a gluten-free blend can work wonders. Make sure to choose a blend that includes xanthan gum for structure. The crust may turn out slightly denser but will still hold a delightful taste.
Vegan Variation: You can make this tart fully vegan by using plant-based butter and a combination of almond or soy milk. Substitute the egg with a flax egg, made by mixing one tablespoon of ground flaxseed with three tablespoons of water, and letting it sit until it thickens. This will ensure your tart remains light and delicious without eggs.
Berry Medley Option: Instead of using solely strawberries, consider incorporating a blend of berries for a burst of flavor. Raspberries, blueberries, and blackberries can provide delightful tanginess and a beautiful color contrast. The combination will make every bite unique.
Chocolate Custard Filling: For chocolate lovers, why not integrate some melted dark chocolate into your custard filling for a richer flavor? Add about 4 ounces of melted chocolate to the cream mixture when heating it. This variation transforms the tart into a chocolate strawberry wonder.
Nutty Crust: For added texture, consider incorporating finely chopped nuts into the tart crust. Almonds or hazelnuts can impart a lovely crunch and enhance the overall flavor profile. Simply mix in about ¼ cup of finely chopped nuts to the dough before rolling it out.
These variations offer a myriad of ways to enjoy your Mother’s Day Strawberry Tart while catering to dietary needs or simply satisfying different taste preferences.
Common Mistakes to Avoid
When preparing your tart, there are several pitfalls to steer clear of. One major mistake is overworking the dough. Remember, you want flakiness; working it too much can create a tough crust. Knead gently and briefly, and be cautious about the amount of flour used during rolling.
Another common error is baking the tart shell too long. Every oven is different, so keep a close eye on the crust as it bakes. A light golden color signifies it’s ready; avoid any darker shades unless you enjoy a more burnt flavor.
Finally, not allowing the filling to cool before pouring it into the crust can lead to a soggy bottom. Be patient and let the custard cool slightly—it’s worth the wait for that perfect tart texture.
Storage, Freezing & Reheating Tips
If you have leftover tart, you can store it in the refrigerator for up to three days. Make sure it’s covered with plastic wrap or kept in an airtight container to maintain freshness. However, for the best flavor and texture, it’s advisable to consume it within the first couple of days.
Freezing is another option. Wrap the unbaked tart shell tightly with plastic wrap and store it in the freezer for up to three months. When ready to bake, you can remove it and let it thaw in the fridge overnight. As for the custard-filled tart, it’s generally not recommended to freeze it, as the texture may change when thawing.
If you must reheat already-baked tart, do so gently. Cover it with foil and warm in a preheated oven at 300°F (150°C) for about 10-15 minutes. This method prevents the crust from becoming overly brittle.
Frequently Asked Questions
Can I use frozen strawberries for the tart?
Absolutely! However, be aware that frozen strawberries can release more moisture than fresh ones. Allow them to thaw and pat them dry with paper towels before using them in your tart to prevent a soggy bottom.
How do I know when the filling is done?
You’ll know the custard is ready when it thickens and coats the back of a spoon. This usually takes around 5 minutes after you’ve added the tempered eggs back into the mix and is crucial for achieving the right texture.
Can I make this tart in advance?
Yes! You can prepare the crust and custard filling a day ahead of time and store both separately in the refrigerator. Assemble the tart just before serving for the best presentation and freshness.
What can I serve with the tart?
A dollop of fresh whipped cream or a scoop of vanilla ice cream complements the tart beautifully. For a refreshing twist, consider serving it with a sprinkle of mint leaves for added color and flavor.
Is it possible to adjust the sweetness of the custard filling?
Certainly! If you prefer a less sweet filling, feel free to reduce the powdered sugar in the custard mixture. Start with ¼ cup, taste, and gradually adjust to your liking.
Conclusion:
This Mother’s Day Strawberry Tart embodies celebration, love, and culinary creativity. By following the steps outlined here, you’ve empowered yourself to create a beautiful dessert that’s sure to impress family and friends. Don’t hesitate to customize it with variations that suit your tastes or dietary needs. The process of baking, especially for someone special, is not only about satisfying hunger but creating lasting memories. So gather your ingredients, roll up your sleeves, and let the warmth of your kitchen fill your home with the delicious aroma of strawberries. Go ahead, try it out, and watch the smiles light up the room!