Prep time: 20 minutes
Cook time: 45 minutes
Total time: 1 hour 5 minutes
Servings: 12
There’s something magical about **Mother’s Day Lemon Cheesecake Bars**. Each bite feels like a warm embrace, bringing back vivid memories of family gatherings and laughter around the table. The brightness of **fresh lemon** dances on your palate, while the creamy, smooth texture of the **cheesecake** pairs perfectly with the buttery crust. It’s a dessert that doesn’t just satisfy your sweet tooth – it connects you to cherished moments. Whether you’re celebrating with family or simply treating yourself, these bars promise to add a touch of joy to any occasion. In this article, you’ll learn how to create these delightful bars, explore important tips, and unlock variations to suit different tastes.
What Is Mother’s Day Lemon Cheesecake Bars?
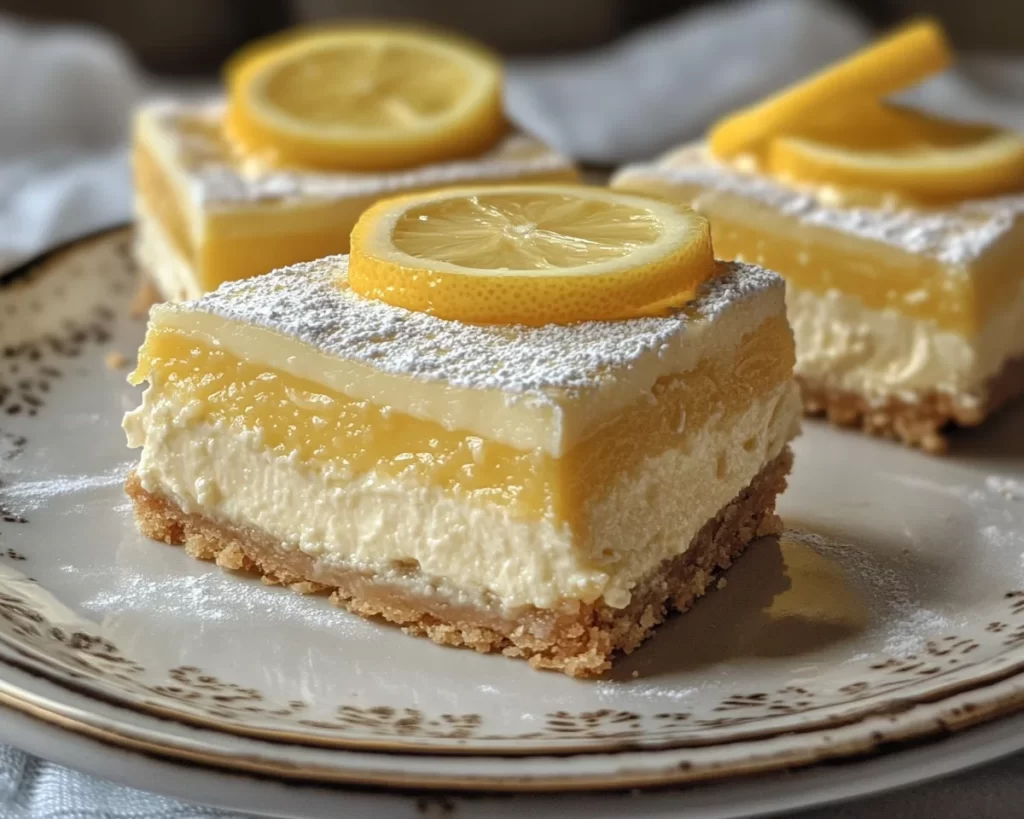
**Mother’s Day Lemon Cheesecake Bars** are a delightful twist on traditional cheesecake. Originating from typical cheesecake recipes, these bars feature a light and zesty lemon flavor that brightens up the rich creaminess of the cheesecake. The base is crunchy and buttery, often made from crushed **graham crackers** mixed with melted **butter**, providing a delightful texture contrast. The filling consists of soft cream cheese, sugar, and a generous amount of **lemon juice**, creating a flavor profile that’s both rich and refreshing.
These bars are perfect for special occasions or as a simple, yet elegant dessert any day of the week. Whether served chilled or at room temperature, they maintain a creamy consistency that melts in your mouth. Explore this recipe to find a perfect balance between tartness and sweetness, making it a unique choice for gatherings, especially during springtime celebrations.
Why You’ll Love This
You’ll love these cheesecake bars not only for their remarkable taste but also for their simplicity. They are incredibly easy to make, requiring minimal ingredients while still delivering maximum flavor. The zesty lemon adds a bright touch that’s perfect for Mother’s Day, and the rich texture of the cheesecake balances the crispiness of the crust.
Another great aspect is their **cost-effectiveness**. Unlike many upscale desserts that require fancy ingredients, the key components of these bars are affordable and readily available. They make a great addition to your dessert repertoire without breaking the bank. Additionally, they can be prepared ahead of time, making them an excellent choice for busy parents or anyone juggling multiple tasks.
It’s a common misconception that cheesecake is too complicated to make at home. Many worry about making it from scratch or assume it requires baking expertise. However, this recipe simplifies the process, providing clear steps that even a beginner can follow.
Ingredients You’ll Need
- Graham cracker crumbs: This forms the base of the bars. It’s best to use finely crushed crackers for a smoother texture. You can substitute with **vanilla wafer crumbs** or **digestive biscuits** if needed.
- Unsalted butter: Melted to bind the crust together. Unsalted provides better control over the saltiness of your recipe.
- Granulated sugar: This sweetens both the crust and the cheesecake filling.
- Large eggs: Eggs add richness and help set the cheesecake filling. For an egg-free version, you can try using flax eggs.
- Cream cheese: This is the star of the dessert, presenting a rich and creamy texture. Opt for full-fat cream cheese for the best results.
- Fresh lemon juice: The main flavor profile of the dessert, offering a zesty and refreshing element. Always use fresh lemons for the best taste.
- Lemon zest: Enhances the lemon flavor while adding a vibrant aroma. A microplane works best for zesting.
- Vanilla extract: Adds depth to the flavor of the filling.
How to Make
- Preheat your oven to 350°F (175°C). This is important for ensuring the cheesecake bars set properly. Line a 9×9-inch baking pan with parchment paper, leaving some overhang for easy removal later.
- In a bowl, combine the crushed **graham cracker crumbs** and melted butter. Mix until the crumbs are completely coated and the mixture resembles wet sand. Press this mixture firmly into the bottom of the prepared baking pan to create a solid base. You can use the back of a measuring cup to help press it down evenly.
- In a large mixing bowl, beat the softened **cream cheese** with a hand mixer until smooth and creamy. This may take about 2-3 minutes. Make sure there are no lumps remaining; this ensures a silky filling.
- Add the **granulated sugar**, **lemon juice**, **lemon zest**, and **vanilla extract** to the cream cheese. Continue mixing until everything is well combined, scraping down the sides of the bowl as necessary.
- Next, add the **eggs** one at a time. Mix just until incorporated – be careful not to over mix. You want to keep the mixture light and airy.
- Pour the filling over the crust in the prepared pan. Spread it out evenly with a spatula. Tap the pan gently on the counter to remove any air bubbles.
- Bake in the preheated oven for approximately 45 minutes. The cheesecake should be set around the edges but slightly jiggly in the center. This is critical as it will firm up while cooling. Keep an eye on it to prevent over-baking, which can lead to cracks.
- Once out of the oven, allow it to cool to room temperature, then refrigerate for at least 4 hours, preferably overnight, for the best texture.
- Before serving, lift the cheesecake out of the pan using the parchment overhang. Slice into squares and serve chilled. Enjoy the creamy, zesty goodness!
Variations & Substitutions
Berry Lemon Cheesecake Bars: Swap out the lemon topping for a layer of **mixed berries**. You can use fresh raspberries, strawberries, or blueberries. The berries add a natural sweetness and a slight tartness that complements the lemon flavor beautifully.
Gluten-Free Cheesecake Bars: For a **gluten-free** version, use certified **gluten-free graham crackers** or almond flour for the crust. This alteration ensures those with gluten sensitivities can still indulge in this delicious dessert.
Vegan Lemon Cheesecake Bars: Replace the cream cheese with a **vegan cream cheese** alternative and use flax eggs or a commercial egg replacer for the batter. This version creates a similar creamy texture without any animal products, making it perfect for a vegan diet.
Chocolate Lemon Cheesecake Bars: Incorporate a swirl of chocolate into the filling by melting bittersweet chocolate and gently folding it in before baking. This creates a rich contrast to the zesty lemon flavor and adds a decadent touch.
No-Bake Lemon Cheesecake Bars: For those hot summer days where oven use is not desirable, whip up a no-bake version. Simply use a **no-bake cheesecake filling**, which involves mixing cream cheese, lemon juice, sugar, and whipped cream, and pour it over the crust. Chill in the fridge until set, and you have a refreshing dessert ready to enjoy.
Common Mistakes to Avoid
One of the biggest mistakes is overmixing the cheesecake filling, as this can introduce too much air into the mixture, leading to cracks while baking. Always mix just until combined, particularly when adding the eggs.
Another common error is not using **room temperature** ingredients. Cold cream cheese doesn’t blend well, leaving lumps in your filling, impacting the texture. Take the time to let your ingredients reach room temperature for smoother results.
Additionally, be careful not to overbake your cheesecake bars. They should still have a slight jiggle in the center when you remove them from the oven. Overbaking can lead to a dry texture and unwanted cracks.
Storage, Freezing & Reheating Tips
To store your **Mother’s Day Lemon Cheesecake Bars**, keep them in an airtight container in the refrigerator. They can last up to 5 days; however, the flavor and texture are best enjoyed within the first couple of days.
If you want to store them for longer, consider freezing them. Wrap each square tightly in plastic wrap and then place them in a freezer-safe bag or container. They will keep well for up to 3 months in the freezer. When ready to enjoy, simply remove a bar from the freezer and let it thaw in the refrigerator overnight.
When reheating, it’s best to serve them chilled rather than warming them. **Reheating** could spoil the texture of the cheesecake.
Frequently Asked Questions
Can I use bottled lemon juice instead of fresh lemons? While bottled lemon juice can be used in a pinch, it’s always best to use fresh lemon juice for the most vibrant flavor. Fresh lemons also provide better acidity, enhancing the overall taste of the cheesecake bars.
How can I avoid cracks on the surface of the cheesecake? The key to preventing cracks is to avoid overmixing and overbaking. Ensure your filling is blended just until smooth, and remove the bars from the oven when the center is slightly jiggly. Cooling gradually in the oven with the door slightly ajar can also help.
Can I make these bars ahead of time? Absolutely! These **Lemon Cheesecake Bars** are perfect for making ahead of time. You can prepare them a day before serving, allowing the flavors to meld and enhancing the overall taste.
What’s the best way to cut the bars neatly? To achieve clean cuts, use a sharp knife and wipe it clean with a paper towel after each slice. This prevents the creamy filling from sticking to the blade, giving you neat squares.
What can I serve with these cheesecake bars? They can be enjoyed on their own, but you can also serve them with a dollop of whipped cream or a berry compote on top. A drizzle of chocolate sauce can also add an extra indulgent touch!
Conclusion:
If you’re looking to treat yourself or your loved ones to a delicious dessert that is both simple and impressive, look no further than these Mother’s Day Lemon Cheesecake Bars. The blend of tart lemon and rich creaminess creates a delightful experience that is hard to resist. Don’t hesitate to try out variations or even personalize it to your taste. Remember, cooking is as much about creativity as it is about following the recipe. So gather your ingredients, roll up your sleeves, and get ready to create something delightful that you’ll want to share with others. Happy baking!