Prep time: 20 minutes
Cook time: 25 minutes
Total time: 45 minutes
Servings: 12 rolls
There’s a certain magic in the air when Mother’s Day approaches—a time to celebrate the remarkable women who have filled our lives with love, laughter, and endless delectable meals. One way to express gratitude is through **food**, and what better way than by making these **Honey Butter Rolls**? These rolls are not just any bread; they’re pillowy soft, lightly sweetened, and bursting with rich honey flavor, making them the *perfect accompaniment* to any Mother’s Day meal. Imagine pulling warm rolls from the oven, the sweet aroma filling your kitchen, as you gather with family to celebrate. In this article, you’re going to learn how to create these delicious rolls, uncover key tips for success, and explore variations that can cater to different tastes and dietary needs.
But this isn’t just about a recipe; it’s about creating a warm moment filled with cherished memories. Whether you’re a novice in the kitchen or an experienced cook, this recipe is straightforward, using simple ingredients that have a big impact. Plus, by the end of this article, you’ll find invaluable information about the rolls’ origins, ingredient functions, storage tips, and even common mistakes to avoid!
What Is Mother’s Day Honey Butter Rolls?
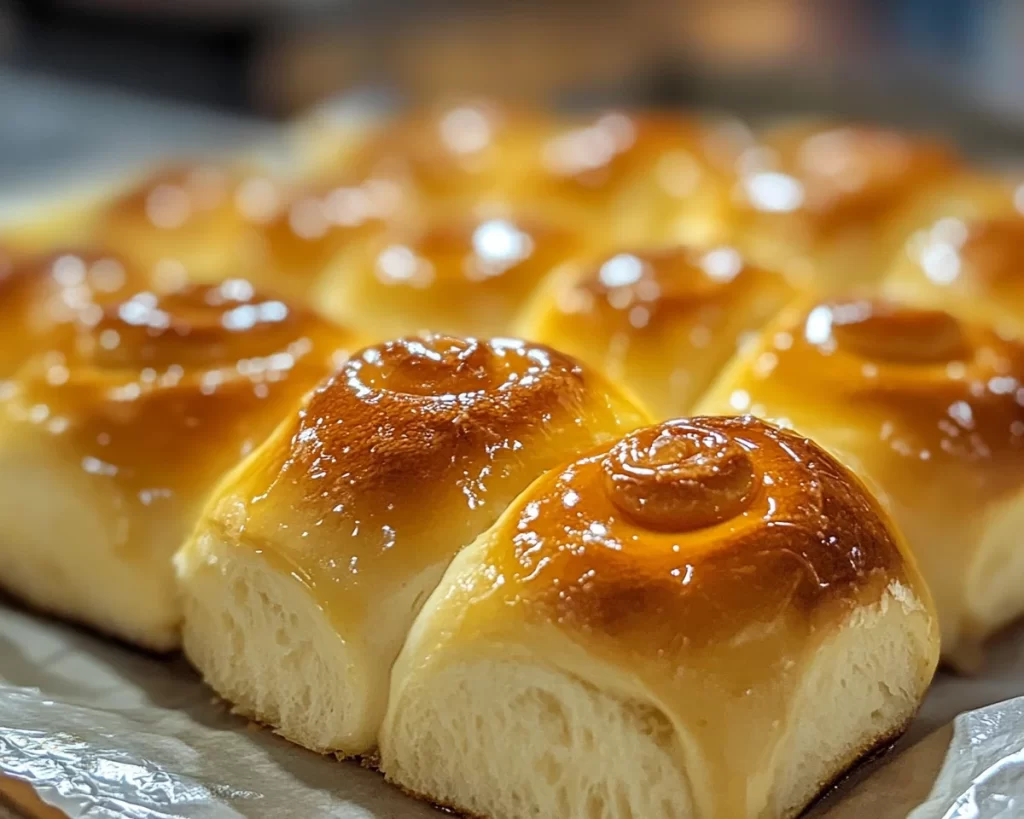
**Mother’s Day Honey Butter Rolls** are a delightful take on traditional dinner rolls, elevated by the fragrant addition of honey and butter. Originating from family kitchens across the globe, these rolls are known for their *light and fluffy* texture combined with a *hint of sweetness*. The delicate layers give each bite a satisfying chew while the rich, golden honey glaze creates an enticing appearance that draws everyone to the dining table.
These rolls are best enjoyed warm, thanks to the melting butter that enhances their flavor even more. Imagine breaking open one of these rolls, the steam rising as you spread a little more butter on top, allowing it to seep into the warm dough. The sweetness from the honey complemented by the creamy butter creates an irresistible combination that keeps your heart and stomach happy. It’s no wonder these rolls are often a family favorite during festive occasions, particularly Mother’s Day.
As you dive deeper into this recipe, you’ll discover its ease and flexibility, making it an ideal choice for busy parents or those just stepping into the culinary world. Get ready to impress your loved ones, because these rolls are destined to become a staple in your home.
Why You’ll Love This
There are so many reasons to love **Mother’s Day Honey Butter Rolls**! Firstly, the taste is extraordinary; they are subtly sweet and nutty, giving you a comforting feeling with every bite. Additionally, the recipe is incredibly easy to follow, making it perfect for beginners. You can whip these up in under an hour, which means more quality time with Mom and family.
Affordability is another attractive trait. Made with pantry staples, you won’t break the bank while showing your appreciation. These rolls can be tailored to different dietary preferences, which makes them even better. Try a dairy-free version or swap regular flour for whole wheat; the options are endless!
There’s also a misconception that homemade rolls are too difficult to master or require complex tools. This recipe demystifies that idea, showcasing that with a little patience and the right guidance, anyone can create these delightful rolls. You only need a mixing bowl, a spoon, and a baking sheet to bring this recipe to life, emphasizing that homemade goodness is not only achievable but also enjoyable.
Ingredients You’ll Need
To make these delicious **Honey Butter Rolls**, gather the following ingredients:
- All-purpose flour: The base ingredient providing structure. You can substitute with whole wheat flour for added fiber.
- Active dry yeast: Essential for helping the rolls rise, making them light and fluffy. Instant yeast can also be used.
- Warm water: Activates the yeast; ensure it’s not too hot or cold. Aim for about 110°F.
- Granulated sugar: Adds sweetness and helps to feed the yeast. You can use honey as a substitute if desired.
- Milk: Contributes to the richness of the dough. Almond or soy milk are good alternatives.
- Unsalted butter: Enhances flavor and texture; you can use coconut or olive oil for a dairy-free option.
- Salt: Vital for flavor enhancement; don’t skip it.
- Honey: This is the star ingredient that gives the rolls their signature taste. Feel free to try maple syrup for a different flavor profile.
Understanding the role of each ingredient is crucial to ensure the best outcome for your **Honey Butter Rolls**. Substituting wisely can also be beneficial depending on dietary needs or preferences, so keep that in mind as you gather your ingredients.
How to Make
Follow these straightforward steps to create your **Honey Butter Rolls**:
- Activate the yeast: In a small bowl, combine the warm water, sugar, and yeast. Let it sit for about 5-10 minutes until it becomes frothy. This indicates that the yeast is activated and ready to work its magic. If there’s no froth, the yeast may be dead, and you’ll need fresh yeast.
- Prepare the dough: In a large mixing bowl, combine the all-purpose flour and salt. Make a well in the center and pour in the activated yeast mixture, milk, and softened butter. Mix with a spoon until the dough starts to come together.
- Knead the dough: Transfer the dough onto a lightly floured surface. Knead for about 5-7 minutes, adding flour as needed, until the dough is smooth and elastic. Use your palm to push down on the dough, turning it with each push. This technique helps develop the gluten, which gives the rolls their amazing texture.
- First rise: Place the kneaded dough in an oiled bowl, covering it with a clean kitchen towel. Let it rise in a warm environment for about 1 hour, or until it has doubled in size. A good tip is to place the bowl in an oven that has been turned off but is still warm.
- Shape the rolls: After the dough has risen, punch it down to release air bubbles, then transfer it to a floured surface. Divide the dough into 12 equal portions and roll each piece into a ball. Place the balls in a greased 9×13 inch baking dish, ensuring they are evenly spaced.
- Second rise: Cover the baking dish with a towel again and allow the rolls to rise for an additional 30-45 minutes, or until they’ve puffed up and are touching each other, creating a lovely soft texture.
- Prepare for baking: Preheat your oven to 350°F (175°C). While the oven is heating, you can make the honey butter by mixing melted butter and honey in a small bowl. Brush this mixture over the tops of the rolls for added sweetness.
- Bake: Place the rolls in the oven and bake for 20-25 minutes or until they are golden brown on top. The aroma will fill your kitchen! Keep a close eye on them to avoid over-baking; they should be soft to the touch and not overly browned.
- Cool and serve: Once baked, remove from the oven and brush with any remaining honey butter. Allow them to cool slightly before serving. The rolls are best enjoyed warm, and they pair beautifully with a variety of meals.
Following these steps, you will yield delicious, fluffy **Honey Butter Rolls** that are sure to impress your family on Mother’s Day or any day!
Variations & Substitutions
Sweetened Cinnamon Honey Rolls: For a delightful twist, add ground cinnamon to the dough and sprinkle some on top of the rolls before baking. This version will transform the rolls into a dessert-like treat, ideal for sharing during special occasions or as an indulgent breakfast.
Garlic Honey Butter Rolls: If you wish to combine savory and sweet, try adding minced garlic to the honey butter mixture. This variation works wonderfully for dinner rolls that accompany roasted meats. Just be sure to bake them traditionally to keep the garlicky aroma at bay.
Gluten-Free Honey Butter Rolls: To make these rolls gluten-free, substitute all-purpose flour with a *1:1 gluten-free blend*. The texture may be slightly different, but they can still turn out delicious! In addition, be sure to use gluten-free baking powder to maintain the bun’s lightness.
Dairy-Free Honey Butter Rolls: Replace the milk and butter with almond milk or coconut milk and coconut oil. This version ensures everyone at your table can enjoy these rolls, accommodating those with lactose intolerance or a dairy-free lifestyle while still retaining flavor and texture.
Each of these variations opens a world of possibilities, allowing you to customize your rolls based on dietary needs or personal preferences while keeping that signature honey flavor intact.
Common Mistakes to Avoid
When making **Honey Butter Rolls**, keep these common pitfalls in mind to ensure success:
One common mistake is using water that’s too hot, which can kill the yeast and prevent your rolls from rising properly. Make sure to test the water temperature beforehand; it should feel warm but not scalding. If the yeast doesn’t activate, your rolls will turn out dense.
Additionally, avoid skipping the kneading process. Kneading is crucial for developing gluten, which gives the rolls their desired texture. Under-kneading will result in rolls that don’t rise adequately and have a gummy texture. A good rule of thumb is to knead until the dough is smooth and elastic.
Lastly, be mindful of the *rising time*. If you rush this process, the rolls may not have enough volume, leading to flat, dense rolls. Patience is key here—allow the dough to fully rise to achieve that fluffy texture we all crave.
Storage, Freezing & Reheating Tips
Once you’ve baked your **Honey Butter Rolls**, you may have leftovers (although they’re unlikely!). Store them in an airtight container at room temperature for up to 2 days. For longer storage, consider freezing them. To freeze, allow the rolls to cool completely and then place them in a freezer-safe bag. They can be kept in the freezer for up to three months.
When ready to enjoy, thaw at room temperature and reheat in the oven at 350°F (175°C) for about 10-15 minutes, ensuring they remain soft and warm. You can also reheat them in the microwave in short bursts, checking frequently to ensure they don’t dry out.
For best practices, always make sure muffins, rolls, and any bread-type items are properly wrapped or sealed to avoid freezer burn. It’s also wise to label your containers with the freezing date for easy tracking.
Frequently Asked Questions
Can I prepare the dough in advance? Yes, you can prepare the dough up to the first rise and then refrigerate it. This method adds flavor and can make your rolls even better. Just remember to let it come to room temperature before shaping.
Can I substitute honey with another sweetener? Absolutely! Maple syrup or agave nectar can also work. Each substitution will change the flavor slightly, so feel free to experiment based on your preferences or dietary needs.
What can I serve with these rolls? These rolls are versatile and pair wonderfully with a variety of dishes, such as roasted chicken, soups, or served with breakfast spreads like jams and cream cheese. The options are endless!
Can I use whole wheat flour instead of all-purpose flour? Yes, you can substitute whole wheat flour. However, you may need to adjust the moisture in the recipe, as whole wheat flour absorbs more liquid. It’s often best to start with a mixture of both.
How do I know when the rolls are fully baked? A golden-brown top indicates that your rolls are finished baking, but the best test is to tap them lightly on the bottom; they should sound hollow. Using an instant-read thermometer can also be helpful; an internal temperature of 190°F (88°C) means they are ready to go.
Conclusion:
These **Mother’s Day Honey Butter Rolls** are not just a recipe—they’re an experience. They invite warmth, love, and deliciousness into the home, creating moments that will be cherished. I encourage you to try this recipe, customize it to your liking, and share it with your loved ones. Whether enjoyed during a special occasion or a casual family dinner, these rolls will leave a lasting impression. Don’t forget to gather around the table, share stories, and create new memories together. Let’s bake some rolls and celebrate the beauty of family!


