Prep time: 20 minutes
Cook time: 10 minutes
Total time: 30 minutes
Servings: 12 sandwiches
If you’re craving something sweet and nostalgic, let me introduce you to the delightful world of Milk Cookies: Soft Milk Cookie Sandwiches. This recipe not only delivers on taste but also brings back those delicious childhood memories of carefree days filled with joy and indulgence. Imagine biting into a soft, pillowy cookie, filled with a luscious, creamy filling that oozes comfort and delight with every bite. Milk Cookies are perfect for busy parents who want to whip up something special without spending all day in the kitchen or beginners searching for a foolproof recipe that guarantees success.
In this article, I will take you through everything you need to know about Milk Cookies: Soft Milk Cookie Sandwiches. We’ll explore their unique texture, rich flavor, and even some clever variations that you can try to suit your preferences. Get ready to create an irresistible dessert that’s not just delicious but also incredibly easy to make. By the end, you’ll have all the knowledge to create these scrumptious treats, impressing your family and friends or simply enjoying a quiet moment with a glass of milk.
What Is Milk Cookies: Soft Milk Cookie Sandwiches?
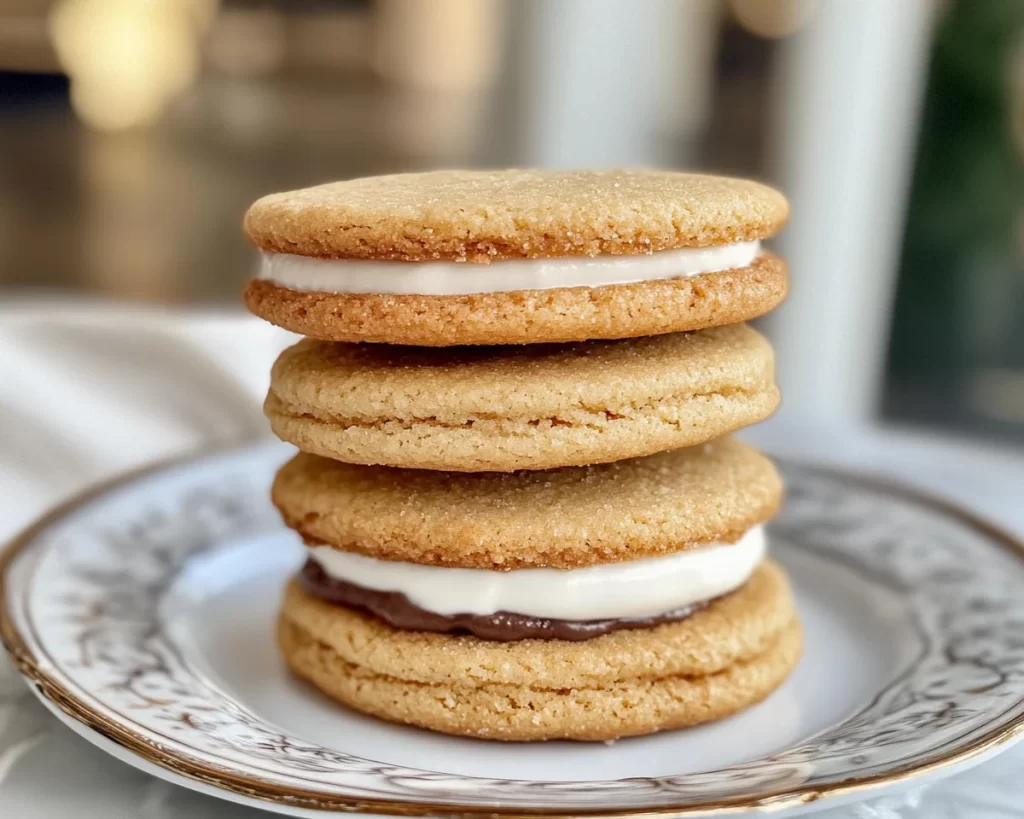
Milk Cookies: Soft Milk Cookie Sandwiches are a delightful creation that combines soft, tender cookies with a sweet, creamy filling. The origin of these cookies can be traced back to comforting home kitchens where love is often baked into every treat. They are typically made using simple ingredients like flour, sugar, and, of course, milk, giving them a unique tenderness and a hint of sweetness. The gentle flavor and soft texture make them a perfect canvas for a variety of fillings, whether you prefer traditional buttercream or a more modern whipped cream cheese frosting.
The flavor profile of Milk Cookies is reminiscent of classic sugar cookies but enhanced by the addition of milk, which contributes to their incredibly tender crumb. As the cookies bake, they develop a slightly chewy exterior while remaining soft and pillowy inside. The filling often varies from vanilla to chocolate, making each bite an adventure of creamy goodness. Overall, Milk Cookies are a delightful treat that can be enjoyed any time of the year and are especially comforting during family gatherings or cozy evenings at home.
Why You’ll Love This
There are countless reasons to fall head over heels for Milk Cookies: Soft Milk Cookie Sandwiches. First and foremost, they are incredibly delicious, with a perfect balance of sweetness and creaminess that satisfies any sweet tooth. Additionally, these cookies are simple to make, making them accessible for even the most novice bakers. You’ll hardly need to gather an army of ingredients or master advanced techniques; just a few pantry staples and a bit of love will do the trick.
When it comes to cost, this recipe is extremely budget-friendly. You probably already have most of the ingredients in your kitchen, allowing you to whip up a fabulous dessert without breaking the bank. Furthermore, Milk Cookies are versatile! Whether you’re hosting a party, preparing lunchbox treats for your kids, or even just indulging yourself, these sandwiches fit the bill perfectly. One common misconception is that soft cookies can be challenging to make; however, with this recipe, you’ll find success is just around the corner!
Ingredients You’ll Need
- 2 cups all-purpose flour: This is the base of your cookies, providing structure and texture.
- 1 teaspoon baking powder: This helps the cookies rise and become light and fluffy.
- 1/2 teaspoon baking soda: Another leavening agent that contributes to a fluffy texture.
- 1/2 teaspoon salt: This enhances the flavor by balancing the sweetness.
- 1 cup unsalted butter, softened: Adds rich flavor and the softness you crave.
- 1 cup granulated sugar: Provides the necessary sweetness.
- 1/2 cup brown sugar: This adds moisture and a deep flavor.
- 2 large eggs: Binds the ingredients together while contributing to moisture.
- 2 teaspoons vanilla extract: For that warm, comforting flavor.
- 1/2 cup milk: The star ingredient that makes these cookies extra soft.
- 1-2 cups frosting of your choice: This is for filling the sandwiches. Vanilla buttercream works wonderfully!
Each of these ingredients plays an important role in the overall success of the recipe. For example, if you don’t have unsalted butter, you can use salted butter but reduce the amount of added salt slightly. Brown sugar is essential for that chewy texture; however, if you’re watching sugar intake, using a sugar substitute might work, though it may alter texture.
How to Make
1. **Preheat the Oven**: Begin by preheating your oven to 350°F (175°C). This ensures that your cookies bake evenly and turn out perfectly golden.
2. **Combine Dry Ingredients**: In a medium bowl, whisk together the flour, baking powder, baking soda, and salt. This step helps to evenly distribute the leavening agents throughout the flour, ensuring that your cookies rise properly.
3. **Cream the Butter and Sugars**: In a large mixing bowl, beat the softened unsalted butter, granulated sugar, and brown sugar until the mixture is light and fluffy—about 2-3 minutes. This process incorporates air into the batter, giving your cookies that lovely soft texture.
4. **Add Eggs and Vanilla**: Once the butter and sugars are well combined, add the eggs and vanilla extract. Beat the mixture until everything is well incorporated, making sure to scrape down the sides of the bowl to include any bits that may have stuck.
5. **Incorporate Milk**: Gradually pour in the milk, mixing until you achieve a uniform dough. The milk is what will contribute to the tender, soft texture that makes these cookies so special.
6. **Combine Dry and Wet Ingredients**: Slowly add the dry ingredients to the wet mixture, mixing until just combined. Be careful not to over-mix! Overworking the dough can lead to tough cookies.
7. **Scoop the Dough**: Using a cookie scoop or tablespoon, drop evenly sized portions of dough onto a prepared baking sheet lined with parchment paper. Leave enough space between each scoop, as they will spread while baking.
8. **Bake the Cookies**: Place the cookie sheet in the preheated oven and bake for about 10-12 minutes, or until the edges are lightly golden and the centers are set.
9. **Cool the Cookies**: Allow the cookies to cool on the baking sheet for 5 minutes before transferring them to a wire rack to cool completely. This step is crucial because moving them too soon can cause them to break.
10. **Fill the Sandwiches**: Once the cookies are completely cooled, take your frosting and spread a generous amount on the flat side of one cookie before topping it with another cookie. Press gently to create a sandwich.
11. **Enjoy Your Treats**: Now that your Milk Cookies are ready, serve them with a glass of cold milk or your favorite beverage and indulge in the soft, creamy goodness!
Variations & Substitutions
Chocolate Chip Milk Cookies: For a delightful twist, consider adding chocolate chips to the dough. This variation introduces rich, melty morsels of chocolate, elevating the sweetness and creating a contrasting flavor. You can use semi-sweet, dark chocolate, or even white chocolate chips, depending on your personal preference. Just fold in about 1 to 2 cups of chocolate chips after mixing the dry ingredients and before adding them to the wet ingredients.
Gluten-Free Milk Cookies: If you’re following a gluten-free diet, you can substitute the all-purpose flour with a gluten-free flour blend. Ensure the blend has a 1:1 ratio for baking to maintain the texture of the cookies. Sometimes adding a little extra milk might be necessary due to differences in moisture retention in gluten-free flours.
Milk Cookie Sandwiches with Fruit Filling: Want to add a fruity twist to your cookies? Consider using fresh fruit preserves or jams as the filling. Strawberry, raspberry, or even lemon curd could brighten the flavors and pair well with the creaminess of the frosting. Make sure the jam has a thicker consistency to avoid a soggy sandwich!
Nutty Milk Cookies: You can give your Milk Cookies some crunch by incorporating nuts. Chopped walnuts or pecans add a delightful texture and rich flavor. Gently fold in about 1 cup of chopped nuts into the dough to ensure every bite has a bit of crunch.
Vegan Milk Cookies: For a dairy-free version, use plant-based butter and substitute eggs with flaxseed meal (1 tablespoon of flaxseed mixed with 2.5 tablespoons of water for each egg). You can also use almond milk instead of regular milk. This way, you can enjoy the deliciousness of Milk Cookies while fitting into a vegan lifestyle.
Common Mistakes to Avoid
While making Milk Cookies: Soft Milk Cookie Sandwiches may seem straightforward, there are common pitfalls that could affect the outcome. First, be careful with measurements. Using too much flour can lead to dense cookies, whereas not enough flour can make the cookies too sticky. Always level your flour with a knife to achieve accurate measurements.
Another critical mistake is overbaking the cookies. They might appear set at the edges but can become hard if left in the oven for too long. Aim for a lightly golden edge while the center remains soft, as they will continue to cook slightly as they cool on the baking sheet.
Also, ensure that all your ingredients, especially the butter, are at room temperature before starting. Cold ingredients do not mix well, affecting the texture and spreading of the cookies. Lastly, don’t skip the cooling process. Cooling the cookies properly will preserve their softness and make them easier to work with when assembling the sandwiches.
Storage, Freezing & Reheating Tips
To store your Milk Cookie Sandwiches, place them in an airtight container in a cool, dry place. They can stay fresh for about 3-5 days, but do note that the texture might slightly change over time. If you want them to last longer, consider freezing them. To freeze your milk cookies, ensure they are adequately cooled, then separate each layer with parchment paper, place them in a freezer-safe bag or container, and they’ll keep well for up to three months.
When you’re ready to enjoy a frozen or refrigerated cookie, allow it to reach room temperature. If you’ve frozen the cookies, you can reheat them in a microwave for 10-15 seconds or in a preheated oven at 300°F (150°C) for about 5 minutes. Just be mindful about not letting them get too warm, as this can compromise their delightful soft texture.
Always practice food safety by ensuring that the cookies are cooled completely before storing. This prevents condensation from forming inside the container, which could lead to sogginess.
Frequently Asked Questions
Can I make Milk Cookies less sweet?
Absolutely! If you’re looking to reduce the sweetness, you can decrease the sugar in the recipe by about a quarter cup. Alternatively, you could opt for sugar substitutes, but make sure to follow the conversion ratios as indicated on the product label to achieve the right texture and sweetness balance.
What type of frosting works best for the filling?
You can use any frosting you prefer, like vanilla buttercream, cream cheese frosting, or even whipped cream. Vanilla buttercream typically works well because its sweetness balances the soft cookie and complements it beautifully. If you want something lighter, whipped cream can be a delightful alternative, but it should be served immediately to prevent sogginess.
Can I use milk alternatives for this recipe?
Yes! If you’re lactose intolerant or prefer non-dairy options, you can easily substitute regular milk with almond milk, oat milk, or any other plant-based milk. Just ensure that the alternative you choose is unsweetened to maintain the flavor balance.
How do I prevent my cookies from spreading too much while baking?
To prevent excessive spreading, make sure that your butter is not overly soft; room temperature is ideal. Chilling the dough for about 30 minutes before scooping can also prevent spreading during baking, ensuring you retain the desired thickness and softness of the cookie.
Can I double this Milk Cookie recipe?
Yes, you can double the recipe if you want to make a larger batch for gatherings or to have extra for later. Just make sure you have plenty of space on your baking sheets and successfully adjust the cooking times, potentially making a couple of batches, as overcrowding can affect even baking.
Conclusion:
In summary, Milk Cookies: Soft Milk Cookie Sandwiches are the perfect combination of nostalgia and deliciousness. Their soft texture and sweet fillings offer comfort in every bite, making them an ideal treat for kids and adults alike. Whether you are indulging yourself or sharing with family, these cookies fit every occasion. Why not try your hand at whipping up a batch today? Don’t forget to experiment with the variations to make them uniquely yours. Your kitchen awaits this delightful adventure!


