Prep time: 15 minutes
Cook time: 25 minutes
Total time: 40 minutes
Servings: 16 bars
Imagine biting into a sweet, tangy, and utterly refreshing dessert just as the warm breeze of spring starts to wrap around you. That’s the magic of homemade lemon bars. Whether you’re planning a backyard barbecue, a simple family gathering, or just an afternoon tea, these delightful treats never fail to impress. The bright flavor of lemons combined with a buttery crust makes Lemon Bars a perennial favorite among families. They’re easy to make, pleasing to the palate, and a perfect way to utilize the citrus fruits in season. In this recipe, you will discover the secrets to achieving the optimal balance of sweetness and tartness, making every bite a slice of sunshine!
You will learn not only how to create this classic dish from scratch, but also how to tweak it to suit your taste with various variations and substitutions. Furthermore, I will share great tips to ensure success on your first attempt, making this recipe perfect for both seasoned bakers and beginners alike. By the end of this, you’ll not only understand how to make the perfect lemon bars but also hope to inspire you to get creative in your kitchen!
What Is Lemon Bars (Easy + Bright)?
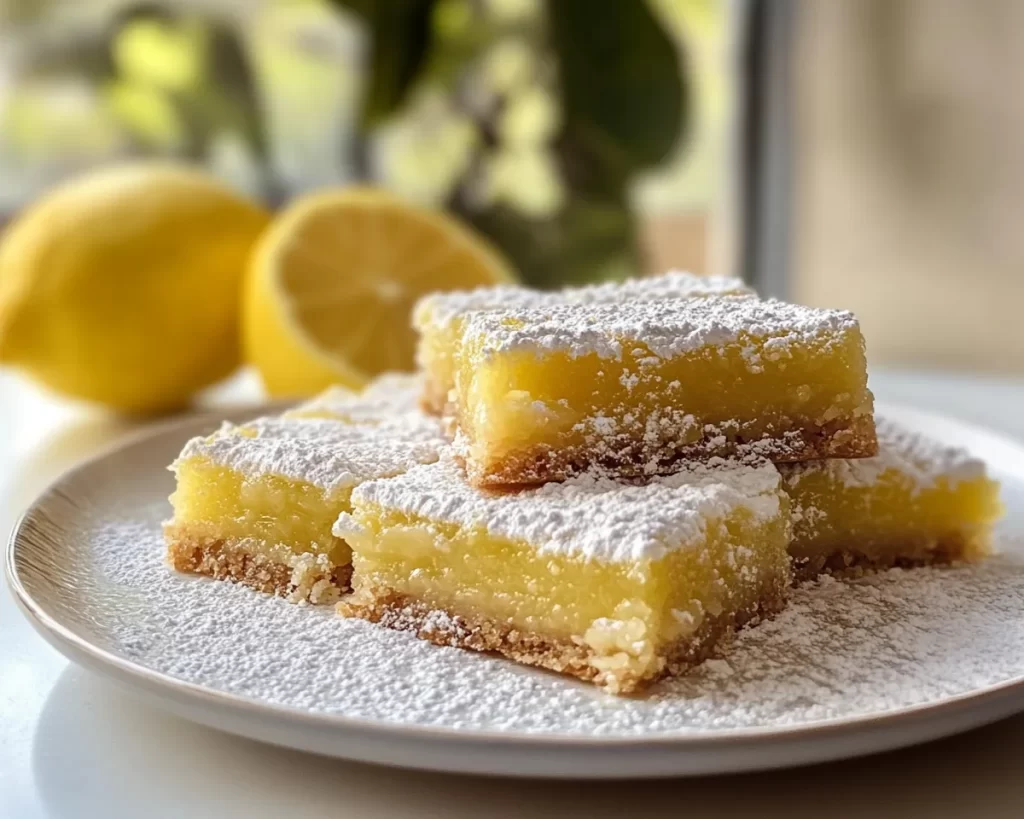
Lemon bars are a delectable dessert known for their striking contrast between a rich, buttery crust and a silky-smooth lemon filling. Originating in the United States, they have become an iconic treat, often served at gatherings, potlucks, and picnics. The base is typically made from flour, sugar, and butter, providing a crumbly texture that complements the **tartness** of the lemon filling. This pleasing textural contrast is what makes lemon bars irresistibly delicious.
The filling consists of fresh lemon juice, zest, eggs, and sugar, which creates a **tangy** experience that dances on your taste buds. This combination gives the bars their signature lemony flavor while delivering a refreshing taste that is both satisfying and uplifting. Each bar is often dusted with powdered sugar, which adds a touch of sweetness that beautifully offsets the tangy filling. Overall, the intricate layers of flavor and texture make lemon bars a delightful pastry that has kept dessert lovers coming back for more.
Why You’ll Love This
You’ll adore these lemon bars not just for their stunning appearance, but also for their vibrant flavor and ease of preparation. They strike a balance between being effortless to make while still impressing anyone who bites into them. With minimal ingredients, you can create a dessert that feels luxurious and special, perfect for any occasion. Additionally, lemon bars are relatively low in cost, making them an accessible treat for budget-conscious bakers.
Many people believe that creating lemon bars requires extensive baking skills or complex techniques, but the reality is far from that. By following a few simple instructions, beginners can also achieve bar perfection. You don’t need to worry about making a pie crust or intricate decorations; it’s about simple ingredients coming together to create something wonderful. If you’ve ever had a slice that was too gooey or overly sweet, don’t worry. This recipe aims to rectify those common mistakes, allowing you to produce lemon bars that are just right every time.
Ingredients You’ll Need
- Flour: All-purpose flour creates the perfect structure for the crust, yielding a tender and crumbly base.
- Sugar: Granulated sugar helps sweeten both the crust and filling, essential for balancing the tartness of the lemons.
- Butter: Unsalted butter adds richness and flavor to the crust; it’s important to have it at room temperature for easy mixing.
- Eggs: Large eggs help in binding the filling, creating a smooth custard texture.
- Lemon juice: Freshly squeezed lemon juice is ideal for flavor; it brings the **tartness** that lemon bars are known for.
- Lemon zest: The zesty outer layer of the lemon adds an extra kick that amplifies the lemon flavor in the filling.
- Powdered sugar: This is often used for dusting before serving; it adds a sweet finish that enhances the presentation.
Having these ingredients on hand makes it incredibly straightforward to whip up a batch when cravings hit. If you’re in a pinch, lemon juice can be substituted with bottled lemon juice, but fresh juice provides a much richer flavor profile. Similarly, if you’re looking for a gluten-free option, consider using almond flour or a gluten-free flour blend.
How to Make
- Preheat your oven: Begin by preheating your oven to 350°F (175°C). This step ensures that your lemon bars bake evenly and thoroughly. While the oven heats, you can prepare the crust, which will allow for a seamless transition to baking.
- Prepare the crust: In a mixing bowl, combine 1 cup of flour and ½ cup of granulated sugar. Next, cut in ½ cup of softened unsalted butter using a fork or pastry cutter until the mixture resembles coarse crumbs. The goal is to develop a crumbly texture that will hold together when pressed into your baking dish.
- Press the crust into a dish: Grease a 9×9-inch square baking dish and evenly distribute the crust mixture across the bottom, pressing it down firmly. This will form the base of your lemon bars, providing a sturdy foundation for the filling.
- Bake the crust: Place the crust in the preheated oven and bake for about 20 minutes or until lightly golden. You want to take it out before it becomes too dark, as it will continue to cook slightly after removal.
- Make the filling: In another bowl, whisk together 2 large eggs, 1 cup of granulated sugar, ⅓ cup of freshly squeezed lemon juice, and 1 tablespoon of lemon zest. Ensure that the eggs are well incorporated into the mixture for a smooth consistency.
- Add to the baked crust: Once the crust is done, carefully remove it from the oven and pour the lemon filling over the hot crust. This helps the two layers meld together beautifully.
- Bake again: Return the dish to the oven and bake for an additional 20-25 minutes. You’ll know it’s done when the edges are set, and the center has a slight jiggle. Don’t overbake, as the filling may become rubbery.
- Cool and dust: After baking, let the lemon bars cool completely to room temperature before cutting them into squares. Once cooled, dust the top with powdered sugar for an elegant finish.
- Serve and enjoy: Your lemon bars are ready to be devoured! These bars are best enjoyed fresh but can be delicious for several days stored in the fridge.
With this straightforward method, you’re on your way to enjoying a batch of delightful lemon bars that are sure to impress!
Variations & Substitutions
Gluten-Free Lemon Bars: If you or someone you know has gluten sensitivities, fear not! You can easily make gluten-free lemon bars by substituting the all-purpose flour with a 1:1 gluten-free flour blend. The texture may be slightly different, but the delicious flavor will remain intact. Additionally, ensure that all other ingredients, especially baking powder, are certified gluten-free.
Vegan Lemon Bars: To make a vegan version of lemon bars, you can replace the eggs with a flaxseed egg. For each egg required, mix 1 tablespoon of ground flaxseed with 2.5 tablespoons of water and let it rest for a few minutes until it thickens. Use coconut oil instead of butter. This variation maintains the **bright** flavor and creamy texture while adhering to vegan dietary restrictions.
Berry Lemon Bars: If you’re looking for a pop of color and added flavor, why not incorporate some berries? Feel free to add a layer of fresh blueberries or raspberries on top of the lemon filling just before baking. This will add not only a lovely hue but also a sweet-tart element that complements the lemon beautifully.
Matcha Lemon Bars: For those who enjoy experimenting with flavors, consider adding matcha powder to your lemon bars. Simply incorporate 1-2 teaspoons of culinary-grade matcha into the lemon filling to give it a vibrant green hue and a unique earthy flavor that pairs surprisingly well with the tartness of lemon.
Common Mistakes to Avoid
Every recipe has its pitfalls, and lemon bars are no exception. One common mistake is **overbaking** the bars. If you leave them in the oven for too long, the filling can become rubbery, transforming your velvety masterpiece into a disappointing dessert. Always keep an eye on the bars as they approach the end of the baking time, removing them from the oven when the edges are set but the center still has a slight jiggle.
Another issue can arise from using bottled lemon juice instead of fresh. While convenient, bottled juice lacks the depth of flavor found in fresh lemons, resulting in a less vibrant taste. For the best lemon bars, opt for fresh lemons whenever possible. Lastly, ensure that your butter is at room temperature instead of melted; this helps create that desirable crumbly texture in the crust and allows for even mixing.
Storage, Freezing & Reheating Tips
Storing your lemon bars properly is essential for keeping them fresh and delicious. Once cooled, cover the lemon bars with plastic wrap or transfer them to an airtight container. They can be stored in the refrigerator for up to one week. The flavors will actually intensify, making them even more enjoyable after a day or two!
If you want to make these bars ahead of time or have leftovers, consider freezing them. Cut the cooled bars into squares and place them in a single layer on a parchment-lined baking sheet. Freeze until solid, then transfer them to a freezer-safe container, separating layers with parchment paper to prevent sticking. They can be stored in the freezer for up to three months. When you’re ready to enjoy them, simply thaw in the refrigerator overnight or at room temperature for a couple of hours.
Always be cautious about food safety. Remember that lemon bars, like many baked goods, should not be left out at room temperature for extended periods. Make sure to refrigerate any leftovers after a couple of hours. This keeps them safe to eat and helps maintain their texture and flavor.
Frequently Asked Questions
Can I use bottled lemon juice instead of fresh?
While it’s tempting to use bottled lemon juice for convenience, I highly recommend using fresh lemons for the best flavor. Fresh lemon juice offers a bright, aromatic quality that bottled alternatives simply cannot replicate. If you’re short on time, though, look for a high-quality bottled juice with no additives for a better flavor.
How do I know when the lemon bars are done baking?
The key to perfectly baked lemon bars is recognizing the signs that they’re ready to be taken out of the oven. The edges should be set, but the center will still have a slight jiggle. If the filling appears firm and you insert a toothpick into the center, it should come out mostly clean, but it’s okay if it has a bit of filling on it.
Can I make lemon bars ahead of time?
Absolutely! Lemon bars are an excellent dessert to prepare ahead of time. They actually taste better after chilling in the refrigerator for a day or two, allowing the flavors to meld and intensify. Just be sure to store them properly in an airtight container to maintain freshness.
What can I do if my lemon bars are too tart?
If you find your lemon bars too tart for your liking, you can balance the flavors by adding more powdered sugar while preparing the filling. Alternatively, consider pairing them with a sweetened whipped cream when serving to offset the tartness and enhance the overall flavor.
Can I add other flavors to lemon bars?
Certainly! Lemon bars can be customized in a multitude of ways. Adding ingredients like fresh berries, coconut, or even nuts can create exciting variations. You could infuse herbs like basil or thyme into the filling for a unique twist. The possibilities are endless!
Conclusion:
Lemon bars are a delightful way to celebrate the spirit of spring and summer with their vibrant flavors and comforting textures. With their bright, tangy filling and buttery crust, they are sure to be a hit at your next gathering or family dinner. I encourage you to try this recipe, adapt it to your preferences, and share it with friends and family! Don’t forget the joy of baking; it isn’t just about the end product but the experience you create along the way. Now, gather your ingredients, preheat that oven, and let the sweet aroma of lemon fill your kitchen! Your homemade lemon bars await, ready to take you on a refreshing culinary journey.


