Prep time: 15 minutes
Cook time: 20 minutes
Total time: 35 minutes
Servings: 4
Imagine a snack that is not only *satisfying* but also *healthy* and guilt-free. Kale chips are your answer! If you’ve ever craved something crispy and delectable while munching on chips, then you’re in for a treat with this recipe for Super Crispy Kale Chips. This innovative snack is not only efficient to prepare but also bursting with essential nutrients and flavor. You’ll learn how to transform ordinary kale into crispy, savory chips while avoiding the pitfalls many home cooks encounter along the way.
These chips are perfect for anyone – whether you’re a busy parent looking for a quick snack, a health-conscious individual, or just someone who loves experimenting with flavorful ingredients. In this guide, I’ll walk you through my favorite way of making kale chips, share variations, answer common questions, and provide tips that make the entire process seamless!
What Is I’M Obsessed With Super Crispy Kale Chips!?
Kale chips are an exciting twist on your traditional tortilla or potato chips, offering a *light, crunchy texture* that makes them incredibly *satisfying*. Originating from a health-conscious culinary world, kale has risen to fame as a superfood for its *nutritional benefits*. The process involves baking kale leaves until they achieve a crispiness that you often find in regular chips but with none of the added calories and unhealthy fats.
The flavor profile of kale chips is versatile: when seasoned correctly, they can take on savory, spicy, or even sweet notes, making them a *dynamic snack* option. The secret lies in how you prepare them; using moderate heat for longer periods ensures that they stay crispy without burning. Pair them with your favorite dips, or enjoy them on their own – the possibilities are endless. Kale chips have an amazing ability to satisfy even the most intense snack cravings while contributing to your daily vegetable intake!
Why You’ll Love This
There are countless reasons to fall in love with Super Crispy Kale Chips. First off, they offer *explosive flavor* combined with a *nutritional punch*. Rich in vitamins A, C, and K, kale is known for its numerous health benefits. Additionally, this recipe is incredibly *easy to follow* and can be prepared in under an hour. For those who are mindful of their **budget**, this recipe will save you money compared to buying processed snacks.
Many people believe that healthy foods can’t be *tasty*, but this recipe shatters that myth. If you think kale chips may taste bitter or bland, you will be pleasantly surprised. The *magic* happens when you season them just right and roast them to a *perfect crunch*, bringing out the natural flavors. Often, newcomers are apprehensive about making them and worry that they might burn or lack texture. With the proper guidance and a few tips, you’ll be serving up delicious kale chips in no time.
Ingredients You’ll Need
To make Super Crispy Kale Chips, here are the ingredients you’ll need:
- Kale: The star of the recipe! Look for kale that is dark green, fresh, and fairly firm. You can substitute with other leafy greens, but the texture may vary.
- Olive oil: This helps achieve that mouthwatering crispness. You can substitute with avocado oil for a neutral flavor.
- Salt: Essential for enhancing flavor. Experiment with sea salt or Himalayan pink salt for a unique twist.
- Seasonings (optional): Garlic powder, paprika, or nutritional yeast are great options to elevate flavor. Nutritional yeast can give a cheesy taste if you prefer.
Understanding the role of each ingredient will help you master this recipe. Kale provides fiber and vitamins; olive oil assists in the cooking process while giving a *crispy texture*, and salt elevates everything by providing balance. Feel free to make adjustments to fit your *taste preferences* or dietary needs.
How to Make
Ready to make your very own Super Crispy Kale Chips? Follow these detailed steps for the best results:
- Preheat your oven: Start by preheating your oven to 350°F (175°C). This temperature is ideal for getting that perfect crunch without burning the leaves. While your oven heats up, it’s time to wash and prepare your kale leaves.
- Wash and dry the kale: Rinse the kale leaves under cold water to remove any dirt or residue. After washing, dry them thoroughly using a salad spinner or by patting them down with paper towels. It’s crucial that your kale is completely dry; any water left on the leaves can make them soggy instead of crispy.
- Remove stems and tear leaves: Once your kale is dry, remove the tough stems (the stalks). You can do this by holding the base of the stem in one hand and pulling the leafy part upwards. After that, tear the leaves into bite-sized pieces; this makes for easier snacking later on!
- Drizzle olive oil: Place the kale leaves in a large mixing bowl and drizzle about 1-2 tablespoons of olive oil. Using your hands, massage the oil into the leaves. This ensures that all the leaves are evenly coated, and it helps them crisp up evenly in the oven.
- Add seasoning: Sprinkle on salt and any additional seasonings you desire. Toss the kale again to distribute the seasoning evenly. Pay close attention to not over-salt, as the flavor will concentrate as they bake. You want to enhance the taste, not overwhelm it!
- Arrange on a baking sheet: Spread the kale in a single layer on a baking sheet lined with parchment paper. Avoid overcrowding the leaves, as this can lead to uneven cooking. If you have too much kale, consider baking in batches. You want each piece to have room to breathe and crisp up.
- Bake: Place the baking sheet in the preheated oven and bake for about 15-20 minutes, or until the leaves are crispy. Keep a close eye on them! Oven temperatures vary, and it’s easy for the edges to burn if left unattended. Halfway through, give them a gentle stir to ensure even crispiness.
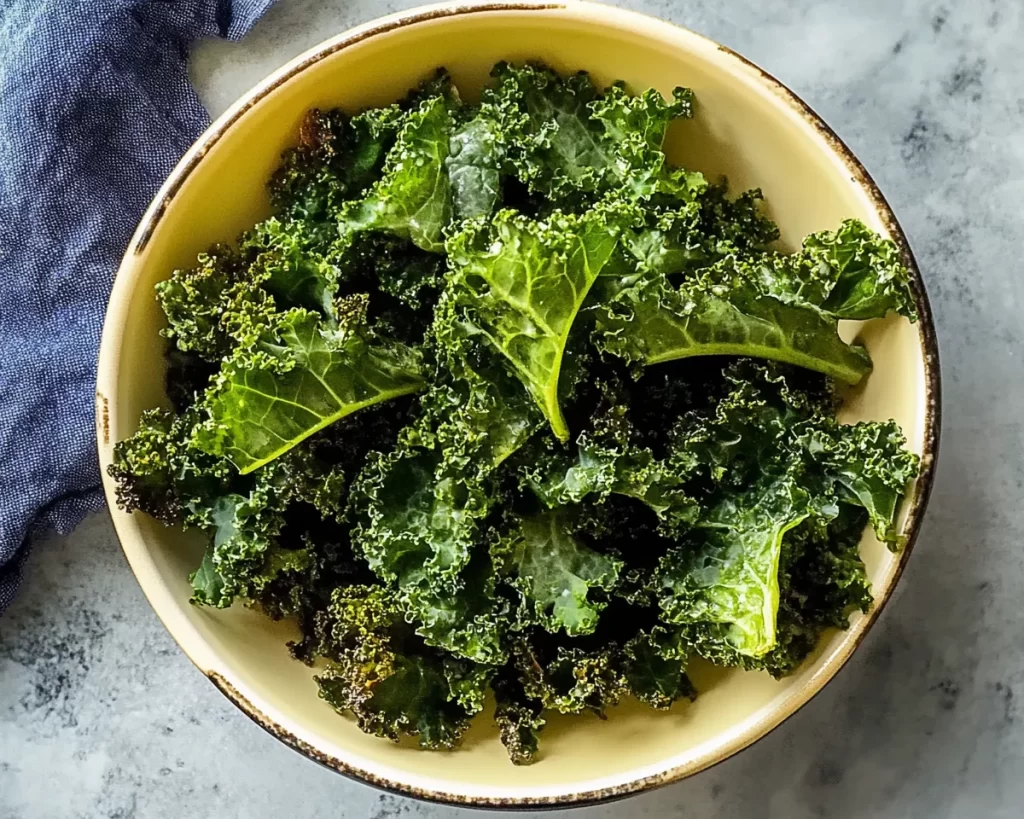
- Cool and enjoy: Once perfectly crispy, remove the baking sheet from the oven and let the kale chips cool for a few minutes. They will continue to crisp up as they cool. Serve immediately or store them in an airtight container for later enjoyment!
Each step is a crucial part of the process and builds toward transforming ordinary kale into something extraordinary. As you mix and bake, you’ll begin to smell the delightful aroma of *seasoned greens* wafting through your kitchen.
Variations & Substitutions
Spicy Kale Chips are a fantastic twist for those who love heat! To achieve this variation, simply add a pinch of cayenne pepper or red pepper flakes to the seasoning mix. This will lend a *spicy kick* to your chips that is both exciting and flavorful. If you are serving these chips at a party, the spice can definitely be a conversation starter!
Cheesy Kale Chips are another popular option for those who miss the flavor of cheesy snacks. You can sprinkle nutritional yeast over the kale after drizzling it with olive oil for a *savory, cheesy flavor* without any dairy. This is particularly appealing for those following a vegan lifestyle. Keep in mind that nutritional yeast also has additional health benefits, including B vitamins!
Balsamic Kale Chips offer a refreshing twist on the classic flavor. Simply drizzle a teaspoon of balsamic vinegar over the kale before baking. This will give your chips a tangy flavor that is both *unique* and *sophisticated*. To balance the acidity of the vinegar, do not forget to add an appropriate amount of salt!
Garlic and Herb Kale Chips can be a nostalgic choice if you enjoy using garlic in your cooking. You can add garlic powder along with Italian herbs like oregano and thyme to produce a much *bolder flavor*. This variation will make your chips smell incredible while they roast in the oven, attracting everyone around to ask for a taste.
Each variation offers a unique flavor profile and allows you to experiment based on your preferences, dietary restrictions, or seasonal ingredients.
Common Mistakes to Avoid
When embarking on your journey to make the perfect kale chips, it’s essential to avoid some typical pitfalls. One of the most prevalent issues is failing to dry the kale thoroughly. If the leaves retain any water, they can result in *soggy chips* instead of the desired crisp. Always give them a good wash and dry them completely before adding oil.
Another common mistake is overcrowding the baking sheet. If the kale leaves overlap, they won’t roast evenly, and you may end up with *some crispy and some chewy*. A single layer is key to achieving that irresistible crunch.
Also, keep an eye on them as they bake. It’s incredibly easy for kale chips to burn! Check them frequently, especially towards the end of the baking time, to ensure they’re cooked just right.
Lastly, don’t skimp on the seasoning. Baked kale can taste bland if not seasoned well. Remember, a little goes a long way! A sprinkle of *salt* and flavor enhancers can make a world of difference, so don’t be afraid to get generous!
Storage, Freezing & Reheating Tips
Once you’ve enjoyed your delicious kale chips, it’s important to know how to store any leftovers. To keep your Super Crispy Kale Chips fresh, store them in an airtight container. They are best enjoyed within a few days, as they can lose their crunch over time. You can also use a mason jar to keep them sealed tightly; the harder the seal, the longer they last.
Freezing isn’t recommended for kale chips, as they will lose their crispy texture once thawed. If you have an abundance of kale, consider preparing the chips fresh instead of freezing leftovers.
If you’ve made a large batch and want to revive any soft chips, you can pop them back in a low oven (about 300°F) for a few minutes. Keep a close eye on them to prevent burning as they heat up.
Always ensure your kale chips are completely cooled before sealing them, as this prevents moisture build-up, which can lead to sogginess.
Frequently Asked Questions
Can I use other types of greens besides kale for chips?
Absolutely! You can use other leafy greens like spinach, Swiss chard, or collard greens. However, be aware that they may not hold up as well in the oven. Kale is favored due to its sturdiness and ability to achieve that desired crisp texture.
How can I get my kale chips to taste less bitter?
The bitterness of kale can depend on the specific variety you’re using. To reduce bitterness, opt for younger, tender kale leaves, or try massaging the leaves with oil and salt before roasting. Adding sweet or savory toppings can also help balance the flavor.
Can I make these chips in an air fryer?
Yes, you can! Cooking in an air fryer can yield even faster results. Use a similar approach: season your kale and set the air fryer to around 300°F, cooking for approximately 10-15 minutes. Shake the basket halfway through to ensure even cooking!
What is the best way to enjoy kale chips?
Kale chips are great on their own as a healthy snack, but you can also pair them with dips like hummus, yogurt-based dips, or even guacamole! Using them as a crunchy topper on salads or soups is also a creative way to enjoy them.
How should I season my kale chips for the best flavor?
Experimentation is key! You can start with simple salt and olive oil, then expand to include garlic powder, onion powder, or nutritional yeast. Mixing dried herbs or spices can also create unique flavor profiles. Tailor the seasonings to suit your personal taste!
Conclusion:
Super Crispy Kale Chips are not just a trendy snack; they offer a delicious way to enjoy healthy greens while satisfying your cravings. With a simple preparation process, you can customize the flavors to your liking and explore a variety of variations. I encourage you to try this recipe and share it with your friends and family. You’ll be amazed at how simple, flavorful, and enjoyable this snack can truly be! Your journey into the world of healthy snacking is just beginning, so take the plunge and give yourself the gift of crunchy kale goodness!


