Prep time: 20 minutes
Cook time: 15 minutes
Total time: 35 minutes
Servings: 24 cookies
Creating delicious memories during the holiday season often starts in the kitchen. One of the most cherished treats that can sprinkle joy and warmth in your home is a batch of **Hot Chocolate Christmas Cookies**. These cookies combine the rich, creamy flavor of hot chocolate with the comforting texture of soft-baked cookies, making them an irresistible dessert. Whether for holiday parties, family gatherings, or a cozy night in, these cookies are perfect for everyone, from busy parents to kitchen novices.
What Is Hot Chocolate Christmas Cookies?
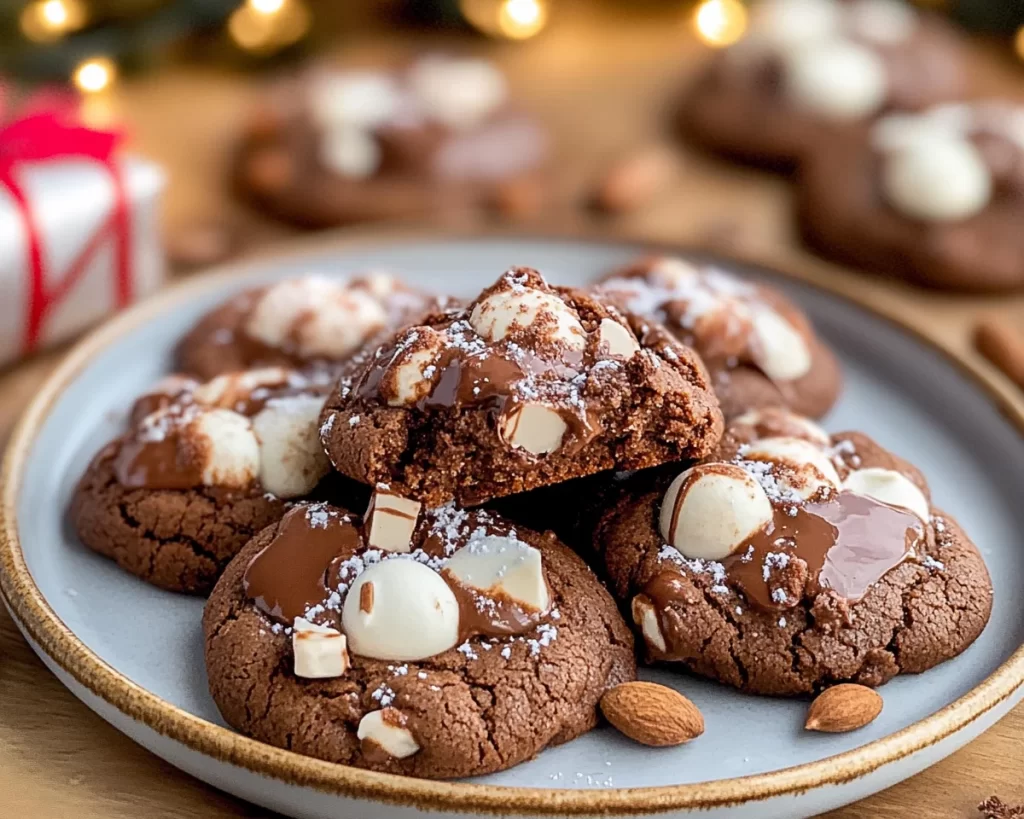
Hot Chocolate Christmas Cookies are a delightful dessert inspired by the classic beverage we all love. They are chewy, chocolatey cookies often decorated with marshmallows or a drizzle of melted chocolate. The warm flavors of cocoa, complemented by hints of vanilla and a sprinkle of festive spices, make them a favorite for many during the chilly winter months. These cookies are not just sweet treats; they carry the nostalgic essence of childhood holidays, evoking memories of snowy evenings, cozy blankets, and sweet, hot beverages.
Why You’ll Love This
You’ll love making and enjoying these cookies for several reasons. First, they are incredibly easy to prepare, perfect for those who might feel intimidated in the kitchen. The ingredient list is straightforward, utilizing pantry staples while allowing room for creativity. Second, their delightful combination of textures and flavors offers a little something for everyone, making them an excellent choice for gatherings. Finally, they fill your home with an endearing aroma that celebrates the spirit of the season. There’s something special about baking cookies that brings friends and family together, and these Hot Chocolate Christmas Cookies are no exception.
Ingredients You’ll Need
- All-purpose flour: Provides structure to the cookies.
- Cocoa powder: Select high-quality cocoa for a rich chocolate flavor.
- Baking soda: Acts as a leavening agent, keeping the cookies soft.
- Salt: Enhances the chocolate flavor.
- Unsalted butter: Adds richness and helps with tenderness.
- Granulated sugar: Sweetens the batch.
- Brown sugar: Contributes moisture and depth of flavor.
- Eggs: Binds all ingredients together.
- Vanilla extract: Adds aromatic sweetness.
- Chocolate chips: Sprinkle throughout for gooey goodness.
- Mini marshmallows: Perfect for topping and mimicking hot chocolate!
How to Make
- Preheat your oven to 350°F (175°C). Line two baking sheets with parchment paper. This will prevent the cookies from sticking and ensure they bake evenly.
- In a medium mixing bowl, whisk together the all-purpose flour, cocoa powder, baking soda, and salt until well combined. This step helps distribute the elements evenly and avoids clumping.
- In a separate large bowl, cream the unsalted butter, granulated sugar, and brown sugar together until the mixture is light and fluffy. This should take about 3-5 minutes. The air whipped into the butter helps the cookies rise beautifully.
- Add the eggs, one at a time, mixing well after each addition. Stir in the vanilla extract. The batter will become smoother and more cohesive at this stage.
- Gradually add the dry ingredients to the wet mixture, mixing just until combined. Be cautious not to over-mix, as this can affect the cookie’s texture, making it denser.
- Fold in the chocolate chips gently, allowing them to distribute evenly throughout the batter. Little pockets of melted chocolate are a delightful surprise in every bite!
- Using a cookie scoop or tablespoon, drop dough onto the prepared baking sheets, spacing them about 2 inches apart. This spacing allows for even spreading while baking.
- Bake in the preheated oven for 12-15 minutes, or until the edges are set. The center should look soft, which is perfect for a chewy cookie.
- Once baked, remove from the oven and immediately sprinkle mini marshmallows on top. Return to the oven for an additional 1-2 minutes to allow the marshmallows to soften without browning.
- Let the cookies cool on the baking sheets for 5 minutes before transferring them to wire racks to cool completely. This helps maintain their chewy texture.
Variations & Substitutions
Nutty Delight: Add 1 cup of finely chopped nuts, such as walnuts or pecans, for a crunchy contrast to the chewy cookie base. The nutty flavors complement the chocolate beautifully and add a heartiness to the treat. You could also toast the nuts before mixing them in for an added depth of flavor.
Minty Chocolate: Incorporate ½ teaspoon of peppermint extract into your dough for a festive twist. Pair this with either dark or white chocolate chips for a holiday-inspired cookie that brings warmth and cheer. The refreshing mint flavor combined with chocolate will evoke memories of peppermint hot chocolate, making every bite feel like a winter wonderland.
Gluten-Free Option: Substitute all-purpose flour with a gluten-free blend. Ensure that the blend has xanthan gum to maintain the cookie’s structure. This version will be just as delicious and allow gluten-intolerant friends and family to enjoy the same festive spirit safely.
White Chocolate Raspberry: Mix in white chocolate chips and toss in some freeze-dried raspberries for a fruity burst of flavor. The sweetness of white chocolate contrasts beautifully with the tartness of raspberries, creating a delectable treat perfect for the holiday season. This variation will not only taste amazing but also add a festive color to your cookie tray.
Common Mistakes to Avoid
Overmixing the Dough: Mixing too much after adding the flour can result in dense cookies. Achieving a light, airy texture is key, so mix just until combined.
Incorrect Oven Temperature: Always preheat your oven to ensure even baking. If the oven is too hot, you risk the cookies burning on the edges while remaining raw in the center. Use an oven thermometer if you doubt your oven’s accuracy.
Not Measuring Ingredients Properly: Baking is a science, and accurate measurements are crucial. Always spoon and level flour instead of scooping directly from the bag to achieve the proper ratio for perfect cookies.
Storage, Freezing & Reheating Tips
To maintain the freshness of your Hot Chocolate Christmas Cookies, store them in an airtight container at room temperature for up to one week. When freezing, ensure the cookies are completely cooled. Place them in a single layer in a freezer-safe container or zip-top bag, separating layers with parchment paper to prevent sticking. They will retain their goodness for up to three months in the freezer.
When it’s time to enjoy your frozen cookies, simply thaw them at room temperature for about 30 minutes. If you prefer a warm cookie, you can pop them in the microwave for about 10-15 seconds to bring back that fresh-baked warmth. Always check that reheating doesn’t dry them out; gentle warming will ensure they stay chewy and delightful.
Frequently Asked Questions
Can I use cocoa powder instead of melted chocolate in these cookies? Yes, cocoa powder can be used, as it adds that essential chocolate flavor. However, using melted chocolate can deepen the flavor and texture of your cookies. Both options work well, so it really depends on your preference!
What should I do if my cookie dough is too sticky? If your dough is too sticky to handle, it may require additional flour. Add a tablespoon at a time until the dough is manageable but avoid overworking it. You can also refrigerate the dough for about 30 minutes to make it easier to scoop and shape.
Can I make the dough ahead of time? Absolutely! This dough can be made ahead and stored in the fridge for up to three days. To freeze, wrap the dough tightly in plastic wrap and then place it in a freezer-safe bag. When ready to bake, let it thaw in the refrigerator overnight before proceeding with your cookie preparations.
How do I know when my cookies are done? The cookies are done when the edges appear set and the tops look slightly puffy. They will continue to cook a bit more with carryover heat after you remove them from the oven. Always be cautious with underbaking, as you want that soft center to remain chewy!
Can I substitute ingredients, such as vegan butter or non-dairy milk? Yes! The recipe can easily be adapted to fit dietary preferences. Use vegan butter and substitute eggs with a flaxseed mixture or applesauce for egg-free options. Replace regular milk with non-dairy alternatives, and enjoy a delicious batch that suits your dietary needs without compromising flavor!
Conclusion: Creating the perfect batch of Hot Chocolate Christmas Cookies takes just a bit of time, but the rewards are immeasurable. Your kitchen will fill with delightful aromas, and your loved ones will savor each chocolaty bite. Follow the guidelines and variations provided, and you’ll create something magical that embodies the spirit of holiday cheer. Happy baking!