Prep time: 20 minutes
Cook time: 10 minutes
Total time: 30 minutes
Servings: 12
When you think of sweet treats, nothing quite captures the heart like a homemade peanut butter cup. These delightful confections blend the smoothness of rich chocolate with the creamy texture of peanut butter, creating a heavenly combination that never fails to evoke nostalgia. Whether you’re a fan of the classic store-bought version or you’re new to peanut butter cups, making them at home gives you complete control over the ingredients, flavor, and even the sweetness. Plus, there’s something incredibly satisfying about crafting your sweet treats from scratch.
In this article, I will walk you through the process of creating homemade peanut butter cups that not only taste incredible but are also simple to make. You’ll learn about the essential ingredients, steps to achieve the perfect texture, and variations to personalize your treats. Whether you’re preparing them as a gift, a snack, or a dessert, these cups will undoubtedly impress everyone who takes a bite.
What Is Homemade Peanut Butter Cups?
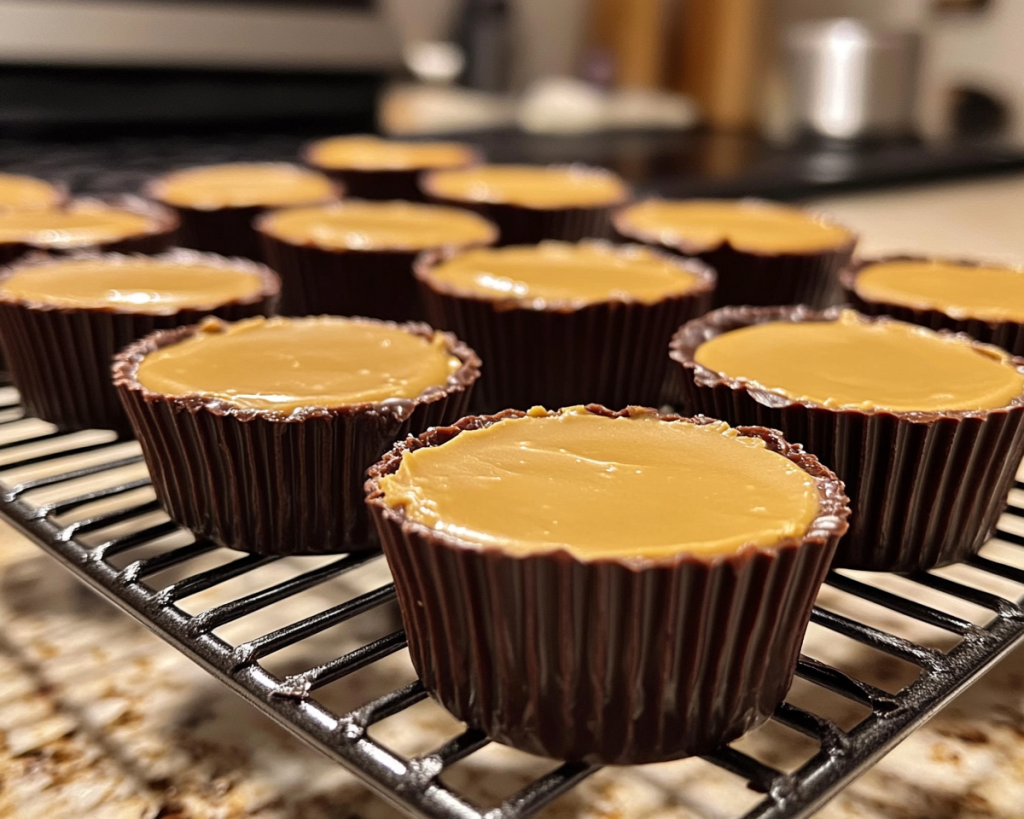
Homemade peanut butter cups are a decadent treat that combines two beloved flavors: chocolate and peanut butter. Typically formed as small cups or discs, the outer layer is made from chocolate that hardens around a rich, creamy peanut butter filling. Originating in the United States, these treats have become a household favorite, especially popular around Halloween and during festive gatherings. The texture is a striking balance between smooth and crunchy, with that signature snap of chocolate as you bite into it.
The flavor profile is what truly sets homemade peanut butter cups apart. The chocolate is deep and slightly bittersweet, perfectly balanced by the savory, nutty flavor of the peanut butter. The use of high-quality chocolate enhances the overall richness of the dish, making every bite a little piece of heaven. The beauty of making them at home is that you can customize everything according to your palate, from the type of chocolate to the sweetness level of the filling.
Why You’ll Love This Homemade Peanut Butter Cups
There are countless reasons to fall in love with homemade peanut butter cups. First and foremost, the taste is simply unbeatable. With the option to use high-quality chocolate and natural peanut butter, you have control over the richness and flavor intensity. Secondly, these treats are easy to make and require minimal cooking skills, making them perfect for beginners or busy parents looking for a fun and simple activity with their children.
Another advantage is the cost-effectiveness. Making your peanut butter cups at home is often much cheaper than purchasing them pre-packaged, especially if you enjoy treating friends and family. You can make a large batch and cheat your sweet tooth without breaking the bank. Not only are they delicious, but they’re also surprisingly versatile. You can swap peanut butter for various nut butters, add flavorings like vanilla or sea salt, or even mix in ingredients like shredded coconut or chopped nuts.
Furthermore, making peanut butter cups at home allows you to address common dietary concerns. You can choose gluten-free chocolate and natural peanut butter, ensuring the treats fit specific dietary needs. For those who are health-conscious, using dark chocolate can offer a more robust taste while providing antioxidants. No more settling for mediocre store-bought options; you can whip up a batch of peanut butter cups that suit your desires!
Ingredients You’ll Need
To make homemade peanut butter cups, you will need the following ingredients:
- Chocolate chips (dark or milk) – The primary ingredient for the outer layer. Choose high-quality chocolate for the best flavor. Dark chocolate provides a richer taste, while milk chocolate is sweeter and creamier.
- Natural peanut butter – The star of the filling. Opt for a brand that uses peanuts and salt without added sugars or hydrogenated oils. The peanut butter can be smooth or crunchy, depending on your texture preference.
- Powdered sugar – This adds sweetness to the peanut butter filling while achieving a smooth consistency. If you prefer a healthier alternative, consider using coconut sugar or a sugar substitute.
- Butter or coconut oil – A small amount ensures that the chocolate adheres smoothly and contributes to a glossy, appealing finish. If you’re dairy-free, coconut oil is a great substitute.
- Vanilla extract – Just a splash for additional depth of flavor in the peanut butter filling, enriching the overall taste of the cups.
- Sea salt – A pinch in the filling enhances the flavors and balances the sweetness. This is especially important if you’re using chocolate that’s on the sweeter side.
Each of these ingredients plays a vital role in constructing delicious peanut butter cups. You can also experiment with flavored chocolates, such as white chocolate or even colored melts for special occasions!
How to Make Homemade Peanut Butter Cups
Creating homemade peanut butter cups is a delightful process that involves a few straightforward steps. Follow these numbered instructions to craft your perfect treats:
- Prepare the molds: Start by lining a muffin tin or mini cupcake pan with paper liners. This will make it easier to remove your peanut butter cups once they set and create a neat finish.
- Melt the chocolate: In a microwave-safe bowl, add the chocolate chips and butter or coconut oil. Microwave in 30-second increments, stirring in between, until fully melted and smooth. If using a double boiler instead, make sure the water doesn’t touch the bowl to prevent seizing the chocolate.
- Fill the molds: Using a spoon or a small ladle, pour a thin layer of melted chocolate into the bottom of each mold, just enough to cover the bottom. Use the back of your spoon to spread it evenly. Place it in the freezer for 10 minutes until set, ensuring that the chocolate hardens properly.
- Prepare the filling: In a separate bowl, mix the peanut butter, powdered sugar, vanilla extract, and a pinch of sea salt. Stir until all the ingredients are well combined and the mixture is smooth and spreadable.
- Add the filling: Remove the muffin tin from the freezer once the chocolate layer is firm. Using a small scoop or spoon, distribute the peanut butter mixture into each cup, filling until just below the rim.
- Top with chocolate: Pour another layer of melted chocolate on top of each peanut butter-filled mold, making sure to completely cover the filling. Tap the tin gently to remove any air bubbles and smooth the surface with a spatula if needed.
- Chill until set: Return the filled molds to the freezer for about 15-20 minutes or until the chocolate has fully set. If you’re in a rush, the refrigerator will also work, just allow for an extended chilling time.
- Serve and enjoy: Once set, remove the peanut butter cups from the liners. You can serve them immediately or store them in an airtight container in the refrigerator. If you’d like to present them gifts, consider wrapping them up in a decorative box!
Making homemade peanut butter cups may seem like a labor of love, but each step brings you closer to a delightful treat that worth the wait! You’ll love the sweet aroma wafting through your kitchen as the chocolate melts, and the end product will be the perfect combination of flavor and texture.
5 Variations & Substitutions
Dark Chocolate Peanut Butter Cups: If you’re a fan of bold flavors, try swapping out the milk chocolate for rich dark chocolate. This change not only adds complexity to the taste but also provides additional health benefits, like antioxidants. Dark chocolate’s slight bitterness balances the sweetness of the peanut butter filling, ensuring a delightful treat that’s packed with flavor.
Flavored Peanut Butter Cups: Consider experimenting with various nut butters, such as almond or cashew butter, in place of peanut butter. Each nut butter brings its unique taste and texture. Adding a teaspoon of cinnamon or a dash of maple syrup can give your filling a delightful twist that suits your preferences.
White Chocolate Variations: For those who adore white chocolate, use it instead of traditional chocolate for the outer layer. The creamy sweetness of white chocolate complements the savory filling beautifully. To enhance the flavor, consider adding crushed graham crackers or shredded coconut to the peanut butter mixture for added texture.
Vegan Peanut Butter Cups: If you’re looking for a vegan option, simply choose dairy-free chocolate chips and substitute coconut oil for any butter. Ensure your peanut butter is vegan-friendly as well, and consider adding a tablespoon of agave or maple syrup to sweeten your filling as needed.
Granola Peanut Butter Cups: For a fun crunch, incorporate granola or crushed pretzels into your peanut butter filling. The added texture complements the creaminess of the peanut butter without detracting from the overall flavor. This variation is perfect as an energy-boosting snack!
Common Mistakes to Avoid
Making peanut butter cups at home should be a fun experience, but certain pitfalls can lead to subpar results. One common mistake is overheating the chocolate, which can cause it to seize and become grainy. To prevent this, always melt the chocolate in short increments, stirring frequently. Adding a teaspoon of coconut oil can also provide a smoother consistency.
Another mistake is using a low-quality peanut butter. You want a natural peanut butter that is creamy and flavorful. Avoid brands that contain added sugars, preservatives, or hydrogenated oils, which can alter the texture and flavor of your treats.
Finally, ensure that you allow the cups enough time to chill to set properly. Rushing the process can lead to a gooey mess instead of delightful, firm peanut butter cups. Be patient, and allow those layers to firm up fully to enjoy the right balance of texture!
Storage, Freezing & Reheating Tips
Storing your homemade peanut butter cups correctly is essential to maintain their delicious flavor and texture. After making your cups, allow them to cool completely before placing them in an airtight container. These treats will keep well in the refrigerator for up to two weeks, but they can also be stored at room temperature for a shorter time.
If you’d like to prep in advance or have leftovers, consider freezing them for extended storage. Place the cooled peanut butter cups in a freezer-safe container with parchment paper between layers to prevent sticking. When you’re ready to indulge, allow them to thaw in the refrigerator for a few hours or enjoy them straight from the freezer for a colder treat!
When it comes to reheating, it’s best to avoid microwaving the entire batch. If you want to enjoy a warm, gooey treat, you can microwave individual cups for just 10-15 seconds. Keep a close eye on them to prevent melting the chocolate completely.
Frequently Asked Questions
Can I use crunchy peanut butter instead of smooth? Absolutely! Using crunchy peanut butter will give your cups a delightful texture. The added crunch can elevate the experience, providing more contrast between the creamy filling and the smooth chocolate coating.
How do I know if my chocolate has seized? Chocolate can seize when it comes into contact with moisture. If you notice that your chocolate has turned grainy and thickened, it has seized. To fix this, you can try warming it gently while adding a small amount of vegetable oil or coconut oil to help restore its smoothness.
Can I customize the sweetness level in the filling? Yes, customize the sweetness to your liking! If you prefer a less sweet filling, reduce the amount of powdered sugar. Alternatively, you can add flavored syrups, like maple or honey, to enhance the filling while adjusting the sweetness to your preference.
Are homemade peanut butter cups gluten-free? Yes! As long as you choose gluten-free chocolate and ensure all other ingredients are gluten-free, your homemade peanut butter cups will be gluten-free. Double-check labels when purchasing chocolate chips, as some brands may process in facilities that handle gluten.
How can I make my peanut butter cups healthier? You can make your peanut butter cups healthier by using dark chocolate with a high cocoa content, natural peanut butter, and reducing the amount of sugar in the filling. Adding ingredients like chia seeds or chopped nuts can also enhance the nutritional profile without compromising flavor.
Conclusion:
Homemade peanut butter cups are not just a sweet treat but a special creation that you can tailor to your personal taste. With a simple recipe, you can whip up these delights for family gatherings, movie nights, or just to satisfy your sweet cravings. Don’t hesitate to experiment with the various ingredients and techniques covered here to make the recipe your own. I invite you to try these homemade peanut butter cups yourself and discover the joy of crafting your delicious desserts. Once you experience the rich flavors and satisfying textures of your own creations, you won’t want to go back to store-bought versions!


