Prep time: 20 minutes
Cook time: 10 minutes
Total time: 30 minutes
Servings: 12 pieces
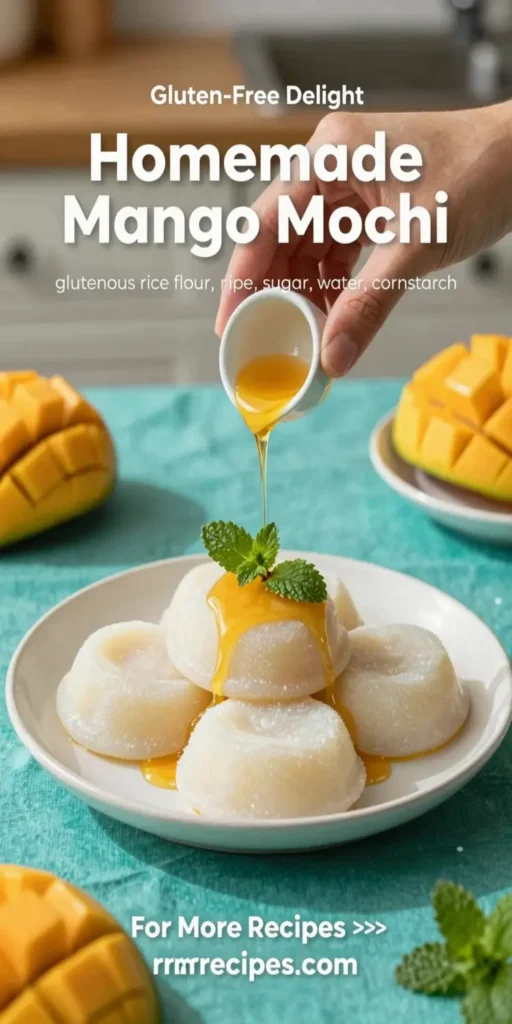
Homemade Mango Mochi is a delightful Japanese treat that combines sweet, ripe mango with a chewy, glutinous rice exterior. This dessert is not only visually stunning but also incredibly satisfying. The blend of tropical fruit and the satisfying texture of mochi makes it a favorite among dessert lovers. Whether you’re celebrating a special occasion or simply indulging in a sweet craving, this homemade treat is sure to impress!
What Is Homemade Mango Mochi?
Homemade Mango Mochi is a traditional Japanese confection made from glutinous rice flour, also known as sweet rice flour. This versatile dessert usually contains a sweet filling, which in this case is luscious, ripe mango. The mochi itself provides a chewy texture that pairs perfectly with the creamy sweetness of the mango. It’s a light yet indulgent dessert that is perfect for any time of year.
Why You’ll Love This
There are plenty of reasons to fall in love with Homemade Mango Mochi. First and foremost, it’s a unique and exotic treat that you can create right in your kitchen. The combination of the chewy mochi with the juicy mango creates a perfect balance of flavors and textures.
Moreover, making your own mochi allows you to control the ingredients and flavors. You can experiment with different fillings or adjust the sweetness according to your personal preference. This dessert is also gluten-free, making it suitable for those who have dietary restrictions. Plus, it’s a fun dessert to make, great for involving the whole family in the kitchen!
Ingredients You’ll Need
To make **Homemade Mango Mochi**, gather the following ingredients:
- 1 cup glutinous rice flour: This flour gives the mochi its characteristic chewy texture.
- ¾ cup water: Necessary to moisten the rice flour for the perfect dough.
- ¼ cup sugar: Adds sweetness to the mochi shell.
- A pinch of salt: Enhances the sweetness.
- 1 ripe mango: The star ingredient, providing a delicious, juicy filling.
- Potato starch or corn starch for dusting: Prevents the mochi from sticking.

How to Make
Creating Homemade Mango Mochi is a delightful process! Follow these easy steps:
- Prepare the mango: Begin by peeling and slicing the ripe mango into small cubes. Ensure that the mango is sweet and ripe for the best flavor, as this will be the primary filling of your mochi. Set the mango pieces aside, allowing them to chill in the refrigerator while you prepare the mochi dough.
- Mix the mochi dough: In a mixing bowl, combine the glutinous rice flour, sugar, and salt. Gradually add the water while stirring until you form a smooth batter. Make sure there are no lumps as this will affect the texture of the finished mochi.
- Steam the dough: Transfer the mochi mixture into a steaming dish lined with parchment paper. Steam the mixture over boiling water for about 10 minutes. You will know it’s ready when the dough becomes translucent and firm. Make sure to cover the steamer with a lid during cooking.
- Cool the mochi: Once steamed, remove the dish from the steamer, but be careful as it will be hot. Allow the mochi dough to cool down for a few minutes until it is comfortable to handle. Dust your hands and a clean surface with potato starch to prevent sticking.
- Shape the mochi: Once cool, divide the dough into small pieces (about the size of a golf ball) and flatten each piece into a disc. Place a mango cube in the center and carefully fold the mochi around it, pinching to seal. Repeat this process for the remaining pieces of dough and mango.
- Dust and serve: After shaping all your mochi, dust them lightly with potato starch to prevent sticking. Serve the Homemade Mango Mochi fresh, or store them in an airtight container in the refrigerator for up to three days. Enjoy your chewy, fruity dessert!
Variations & Substitutions
There are many ways to customize your **Homemade Mango Mochi**:
Coconut Mango Mochi: Incorporate shredded coconut into the mochi dough for an additional tropical flavor. Simply add about ¼ cup of sweetened shredded coconut to the dough mixture. This variation adds a lovely texture and taste that complements the mango beautifully.
Mixed Fruit Mochi: Instead of using only mango, mix in other fruits like strawberries, kiwi, or pineapple. Chop the fruits into small pieces and use them as fillings along with the mango. This adds variety and a splash of color to your mochi dish.
Chocolate Mochi: For chocolate lovers, blend cocoa powder into the mochi dough to create a chocolate base. You can also use chocolate ganache as a filling instead of mango. This sweet treat will have a rich flavor that’s perfect for special occasions or chocolate cravings!
Matcha Mochi: Adding matcha powder to the dough creates a unique flavor profile and a beautiful green color. Mix in about 1-2 tablespoons of matcha to the flour mixture before adding water. Keep in mind that matcha has a slightly bitter taste, which pairs well with the sweetness of mango.
Common Mistakes to Avoid
Making **Homemade Mango Mochi** can be tricky, but avoiding these common mistakes can lead to a successful outcome:
Using regular flour instead of glutinous rice flour: This is critical; using the wrong type of flour will affect the texture. Glutinous rice flour is necessary for that signature chewy consistency.
Not steaming long enough: Ensure the dough is fully cooked by steaming for the full time. Undercooked dough can become gummy and unpleasant to eat.
Overfilling the mochi: While it’s tempting to add more mango, overfilling can cause the mochi to burst during handling. Stick to a manageable amount to prevent mess and maintain structure.
Storage, Freezing & Reheating Tips
Storing your Homemade Mango Mochi is simple. Keep mochi in an airtight container at room temperature for up to a day or in the refrigerator for about three days. If you want to store it longer, consider freezing it.
To freeze, place the mochi in a single layer on a baking sheet and freeze until firm. Then transfer them to a freezer-safe bag or container. The mochi will keep well in the freezer for about one month. When ready to eat, thaw them in the refrigerator or at room temperature.
Do not microwave mochi to reheat as it can become tough. Instead, leave out for a few minutes to regain its chewy texture before serving.
Frequently Asked Questions
Can I use other fruits in the filling?
Absolutely! While mango is a fantastic choice, you can use other fruits like strawberries or peaches. The key is to ensure the fruit is ripe and not too watery to prevent the mochi from becoming soggy. Experimenting with different fillings can yield delicious results!
Is glutinous rice flour the same as regular rice flour?
No, they are not the same. Glutinous rice flour is made from short-grain sticky rice and is essential for making mochi, giving it the chewy texture. In contrast, regular rice flour lacks the same properties and won’t give you that authentic mochi experience.
Can I make the mochi dough ahead of time?
Yes, you can prepare the dough ahead! Just make sure to store it in an airtight container to prevent it from drying out. When you’re ready to use it, just steam it again to ensure the texture is right.
What should I serve with Homemade Mango Mochi?
Mochi can be enjoyed on its own, but it pairs wonderfully with green tea or a light fruit salad. You can also serve it alongside a drizzle of chocolate sauce for an extra indulgent touch!
Why is my mochi tearing while I am shaping it?
If your mochi is tearing, it may be too dry or not cooked properly. Dusting your hands and the work surface with starch can help prevent stickiness, making it easier to handle. If the dough is too dry, you may need to add a tiny bit of water to achieve the ideal texture.
Conclusion: Homemade Mango Mochi is not just a treat, but an experience that brings a touch of Japanese culture to your kitchen. With its simple ingredients and straightforward method, creating your own mochi can be a fulfilling venture. Enjoy the delicious results with family and friends, or keep them all to yourself — we won’t judge! Try this recipe today, and you’ll find yourself making it again and again!


