# Hissy Fit Dip
Are you on the lookout for a crowd-pleasing appetizer that will leave your guests craving more? Look no further than Hissy Fit Dip! This creative and rich dish, perfect for parties, game nights, or simply snacking at home, packs a flavorful punch that tantalizes the taste buds. It’s a delightful blend of flavors that comes together effortlessly, making it a hit with both family and friends.
In this article, not only will you learn how to whip up this luscious dip, but I’ll also share tips on serving, storing, and even customizing it to suit your taste. So, if you’re ready to elevate your snacking experience, let’s dive into this exciting recipe!
What Is Hissy Fit Dip?
Hissy Fit Dip is essentially a layered, baked dip, combining creamy and savory elements into a perfect blend that packs a flavor punch. Originating from the idea of putting everything delicious together in one dish, this dip usually includes cream cheese, shredded cheese, various spices, and often a mix of vegetables or meats, giving it that extra level of flavor and texture.
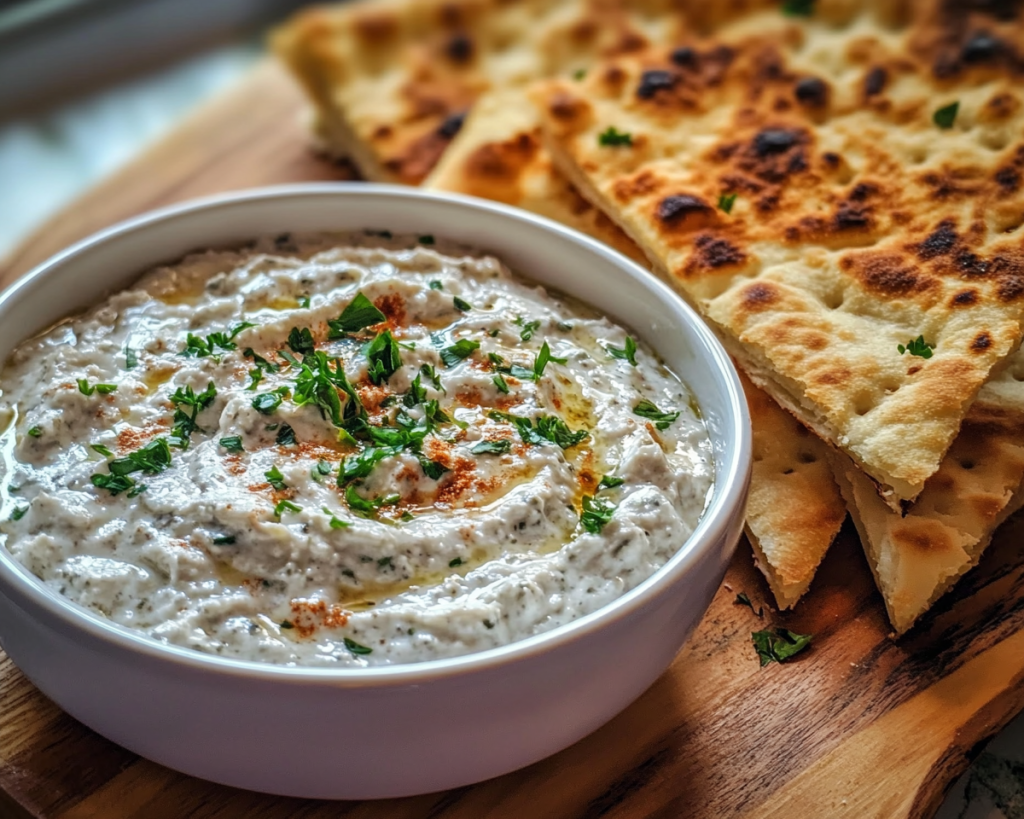
Texture is a key element of Hissy Fit Dip. As you dig into the dip, you’ll first encounter a creamy layer topped with gooey melted cheese, providing a warm, luscious experience. The added toppings, often including things like bacon, jalapeños, or olives, give it a satisfying crunch or spice that contrasts beautifully with the smooth base.
As for flavor, you’re looking at a combination of creamy, cheesy goodness with hints of tanginess from the cream cheese and zest from spices. The profile can range from mild to spicy, depending on how you customize it, making it an adaptable dish that’s sure to be a hit at any gathering.
Why You’ll Love This Hissy Fit Dip
There are numerous reasons why Hissy Fit Dip should find its place on your appetizer menu. For starters:
– **Flavorful and Addictive**: With creamy, cheesy goodness at its core and a variety of toppings, each bite is bursting with flavor. It’s easy to lose track of how much you’re eating and before you know it, the entire dish may be gone!
– **Quick and Easy to Prepare**: This dip requires minimal cooking skills and comes together in just a few simple steps. Perfect for busy parents or those new to cooking, it’s ideal for last-minute gatherings.
– **Versatile Ingredients**: One of the best parts of Hissy Fit Dip is that you can customize it to fit your preferences. Whether you want it vegetarian, spicy, or loaded with meat, there’s a version out there for everyone.
– **Crowd-Pleaser**: Regardless of the occasion, this dip tends to be a hit. It’s an excellent option for sporting events, holiday parties, or even a casual movie night at home.
– **Budget-Friendly**: Many of the ingredients can be found at your local grocery store without breaking the bank. You can create a spectacular dip that is both delicious and affordable.
By opting for Hissy Fit Dip, you can sidestep the common misconception that fabulous appetizers must be complex or expensive. Instead, you can impress your guests without a lot of fuss.
Ingredients You’ll Need
To create your own perfect Hissy Fit Dip, you will need the following ingredients:
– **8 ounces cream cheese**: This creamy base is essential for a rich texture. For a lighter option, consider using reduced-fat cream cheese.
– **1 cup sour cream**: Adds tanginess and creaminess to balance the flavor. Greek yogurt can also be used for a healthier variation.
– **1 cup shredded cheddar cheese**: Offers flavor and that melty goodness as it bakes. Feel free to substitute with Monterey Jack or Colby cheese for a different flavor profile.
– **1 cup shredded mozzarella cheese**: This cheese provides a stringy texture. You can mix this up with a cheese blend or use a dairy-free version if necessary.
– **1 cup cooked and crumbled bacon**: Adds a salty, savory hit. For a vegetarian option, you could swap this with sautéed mushrooms or roasted red peppers.
– **1 tablespoon ranch seasoning mix**: This will enhance the flavor of your dip. If you prefer a homemade seasoning, combine dried dill, garlic powder, onion powder, and pepper.
– **Hot sauce (optional)**: For an added kick! Use your favorite brand depending on how spicy you want your dip.
– **Green onions or chives**: Finely chopped, to sprinkle on top as a garnish for added flavor and color.
– **Tortilla chips, crackers, or veggies**: For serving alongside. This allows your guests to scoop up all the creamy goodness in a fun and enjoyable way.
How to Make Hissy Fit Dip
Here’s a simple step-by-step guide to create the ultimate Hissy Fit Dip. Trust me; once you try it, it will quickly become your go-to appetizer!
1. **Preheat Your Oven**: Start by preheating your oven to 350°F (175°C). This ensures that your dip cooks evenly and gets that perfectly golden top.
2. **Prepare the Creamy Base**: In a mixing bowl, combine the softened cream cheese, sour cream, and ranch seasoning mix. Use a hand mixer or a spatula to mix everything until it’s creamy and uniform. Make sure there are no lumps for the best texture.
3. **Add Cheeses**: Fold in both the shredded cheddar and mozzarella cheese into the creamy mixture. This step is essential to ensure every bite is cheesy and delicious.
4. **Incorporate the Bacon**: If you’re using bacon, now is the time to fold in the cooked and crumbled pieces. This will distribute the savory flavor throughout the dip. For a vegetarian version, add your choice of sautéed mushrooms or other veggies.
5. **Transfer to a Baking Dish**: Pour the mixed ingredients into a baking dish or oven-safe skillet. Spread it out evenly to ensure that it cooks thoroughly.
6. **Top with More Cheese**: If you’re feeling indulgent, throw a bit more shredded cheese on top. This will create a wonderful cheesy crust as it bakes.
7. **Bake**: Place the dip in the preheated oven and bake for about 25–30 minutes, or until the top is bubbly and golden brown. This is where your kitchen will start to smell incredible!
8. **Garnish**: Once out of the oven, allow it to cool for a few minutes. Sprinkle finely chopped green onions or chives over the top for added color and flavor. This will enhance the presentation.
9. **Serve Warm**: Serve your Hissy Fit Dip warm with tortilla chips, crackers, or cut vegetables. Enjoy the cheesy, creamy goodness while it’s still fresh from the oven!
With these simple steps, you’ll have a fantastic dish that’s bound to impress.
5 Variations & Substitutions
Hissy Fit Dip is amazing as is, but what if you want to switch things up? Here are five fun variations to consider:
1. **Buffalo Chicken Hissy Fit Dip**: For those who love a spicy kick, add shredded cooked chicken mixed with your favorite buffalo sauce into the base mixture. This will create a perfect balance of creamy and zesty. Top with additional cheese and serve with celery sticks alongside chips for a true wings experience.
2. **Spinach Artichoke Adventure**: Add a cup of frozen spinach (thawed and drained) and a can of chopped artichokes to the base mixture for a Mediterranean twist. This provides a delightful earthy flavor while also increasing the nutritional value of the dip.
3. **Veggie-Packed Hissy Fit**: Fancy a healthier version? Incorporate finely diced bell peppers, onions, or zucchini into the mix. You can even swap half of the cream cheese for a low-fat alternative or add a healthy bean layer for added nutrition and fiber.
4. **Southwestern Style**: Give your dip a south-of-the-border vibe by mixing in some black beans, corn, and diced tomatoes. You can also add taco seasoning for a flavor boost. This variation pairs beautifully with tortilla chips and fresh cilantro as a garnish.
5. **Breakfast Dip**: For a unique morning or brunch experience, replace the bacon with crumbled sausage and blend in some scrambled eggs. Add a layer of shredded cheese on top before baking so it can melt beautifully. This is perfect served with bagel chips or toast.
Each variation gives you the opportunity to explore new flavors while maintaining the essence of the original Hissy Fit Dip.
Common Mistakes to Avoid
While making Hissy Fit Dip is straightforward, a few missteps can impact your final product. Here are some common pitfalls and how to avoid them:
– **Using Cold Cream Cheese**: One of the biggest mistakes is using cold cream cheese straight from the fridge. Always let your cream cheese sit out to soften before mixing; this will ensure that your dip has a smooth, creamy texture instead of lumps.
– **Overcooking the Dip**: Keep an eye on your dip while it bakes. Overcooking can lead to a dry texture, which isn’t enjoyable. Once you see bubbling cheese and a slight golden color on top, it’s time to pull it out.
– **Skipping the Seasoning**: Don’t overlook the importance of seasoning. The ranch seasoning is what brings the flavors together. If you’re using substitutes or variations, ensure you maintain flavor depth with herbs and spices.
– **Not Allowing to Cool Slightly**: Although it’s tempting to dive right into the dip straight out of the oven, let it sit for about five minutes. This not only allows the flavors to meld but also avoids potential burns while eating.
– **Using Ingredients at Different Temperatures**: Mixing cold ingredients can lead to an inconsistent texture. Ensure all ingredients are at room temperature before mixing them together for the best results.
By avoiding these mistakes, you’ll ensure that your Hissy Fit Dip turns out decadent and delicious every time.
Storage, Freezing & Reheating Tips
Planning to make Hissy Fit Dip ahead of time? Here’s how to store and reheat it properly:
– **Storage**: If you have leftovers, allow the dip to cool completely. Transfer it to an airtight container and refrigerate. It should be consumed within 3–4 days.
– **Freezing**: If you want to preserve your dip for longer, you can freeze it. Make sure it’s cooled and in an airtight container. It can be frozen for up to 2 months. To reheat, thaw it overnight in the fridge before baking.
– **Reheating**: When you’re ready to enjoy, spoon out your desired portion into an oven-safe dish. Reheat at 350°F (175°C) until warmed through, approximately 20-25 minutes. You can also microwave small portions in 30-second intervals until heated, but the oven method will preserve texture best.
Following these guidelines will help maintain taste and quality.
Frequently Asked Questions
**1. Can I make Hissy Fit Dip ahead of time?**
Absolutely! You can prepare the dip up to a day in advance. Just assemble the dip in the baking dish and cover it with plastic wrap. When ready to serve, bake it as instructed. This makes it a great option for parties or busy weeknights.
**2. Is Hissy Fit Dip suitable for vegetarians?**
Yes! To make it vegetarian-friendly, simply omit any meats like bacon. You can replace meat with sautéed vegetables like mushrooms or additional toppings of your choice, such as spinach or artichokes.
**3. Can I use low-fat ingredients?**
Certainly! You can substitute lower-fat versions of cream cheese and sour cream without significantly affecting the overall flavor. This way, you can still enjoy a delicious dip while being mindful of calories.
**4. How do I adjust the spiciness of the dip?**
You can control the heat by adjusting the amount of hot sauce added or using mild ingredients. If you’re unsure, start with a small amount and gradually add more until you reach your desired level of spice.
**5. What can I serve with Hissy Fit Dip?**
There are numerous options for serving alongside Hissy Fit Dip. Some of the most popular choices include tortilla chips, pita chips, sliced vegetables (like carrots and cucumbers), or breadsticks. Get creative to discover your favorites!
In conclusion, Hissy Fit Dip is a remarkable blend of flavors and textures that can quickly become a staple at your gatherings. Its creamy and cheesy goodness, paired with countless variations, ensures that everyone can enjoy it, regardless of dietary preferences. So why not give it a try? Customize it to your liking, gather your loved ones, and watch your Hissy Fit Dip disappear before your very eyes!
Happy cooking, and don’t forget to share your experience! Your guests will be asking for your secret recipe!