**Meta Title:** Spooktacular Graveyard Dirt Cake: A No-Bake Halloween Dessert
**Meta Description:** Create the ultimate Halloween party treat with this no-bake Graveyard Dirt Cake! Layered chocolate goodness with fun decorations makes it a hit.
—
You know that enchanting chill in the air when October arrives, the leaves turn crisp, and Halloween approaches? It’s the perfect time for spooky gatherings, ghostly decorations, and of course, treats that both frighten and delight! Today, I want to share a recipe that combines childhood nostalgia, a bit of creativity, and the joy of no-bake desserts: the Graveyard Dirt Cake. It’s a signature Halloween treat that will be the centerpiece of your spooky soiree, leaving your guests exclaiming, “This is to die for!”
Imagine a rich, velvety chocolate cake, layered with creamy pudding and topped with crushed cookies that mimic dirt, all arranged in a way that’s frighteningly fun. What sets this cake apart is not just its taste, but the playfulness of its haunted presentation. Let’s take a dive into the world of Graveyard Dirt Cake, and I promise, at the end of this journey, you’ll be eager to whip up this delightful dessert.
What is Graveyard Dirt Cake?
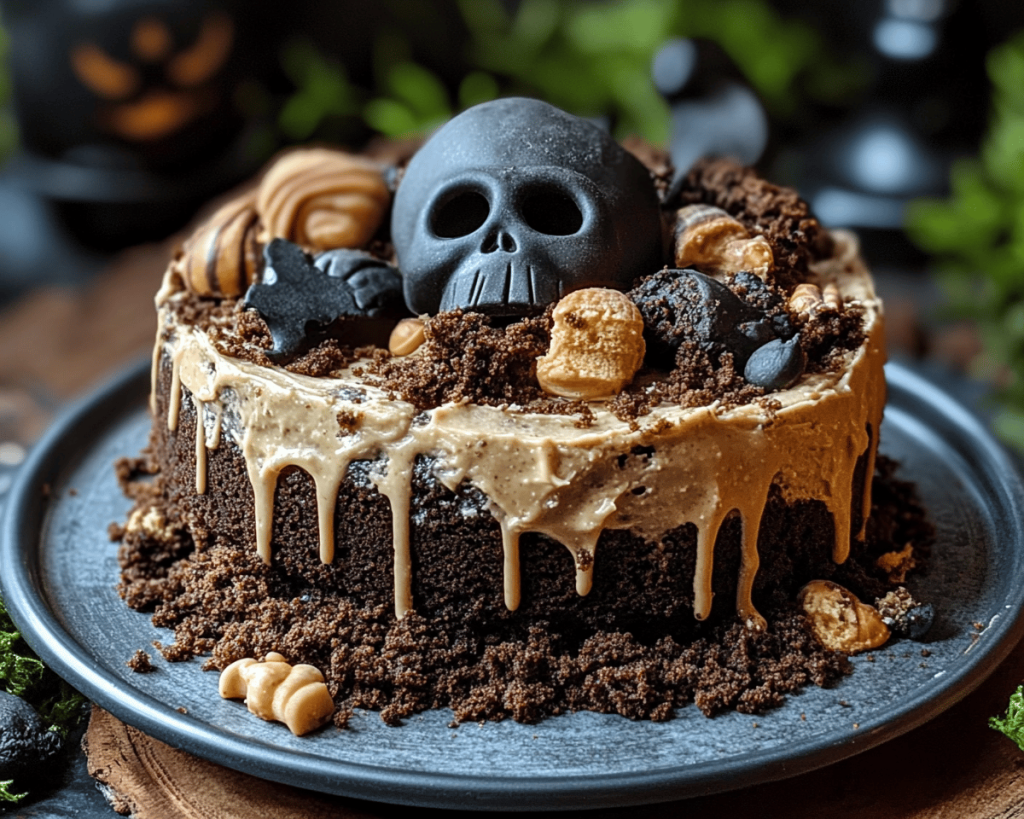
Graveyard Dirt Cake is a whimsical Halloween dessert that combines **chocolate pudding**, **cream cheese**, and **crushed cookies** to create a visually spooky dish. Originating in the United States, it brings together classic childhood flavors and the thrill of Halloween. The “dirt” is created from crushed chocolate sandwich cookies, typically **Oreos**, while the “tombstones” can be made from graham crackers or store-bought candies.
This dessert boasts a rich, creamy texture paired with a crunchy topping, making each bite an exciting experience. The interplay of chocolate and cream is a nostalgic taste that always brings joy, and when styled in a graveyard theme, it simply oozes seasonal charm. The vivid contrast of dark chocolate and the ghostly white cream cheese makes it visually appealing—perfect for a Halloween bash!
Why You’ll Love This Graveyard Dirt Cake
There’s a bit of magic in this recipe that makes it a must-try for Halloween: it’s as easy as it is fun! Here’s why you’ll fall in love with making Graveyard Dirt Cake:
1. **No-Bake Convenience:** Who wants to turn on the oven when the weather is cooling down? This dessert allows you to keep your kitchen cool while still creating a delicious treat.
2. **Family Fun:** This recipe is a great opportunity for family bonding. Kids love getting their hands sticky with pudding or helping to decorate the cake with gummy worms and candy tombstones.
3. **Versatile Decoration:** You can customize your decorations to suit your party theme, whether it’s spooky, cheeky, or seasonal. The toppings are endless, from edible glitter to gummy skeletons.
4. **Feed the Crowd:** This cake serves a generous number of people, making it perfect for larger gatherings or potluck parties. No one leaves without a hearty serving!
5. **Deliciously Decadent:** The rich flavors of chocolate and cream cheese create a dessert that feels indulgent but is easy to put together, making it the perfect treat for all ages.
Ingredients You’ll Need
Let’s gather our supplies! Here’s what you’ll need for your Graveyard Dirt Cake, along with some tips for selecting the best ingredients.
1. **Chocolate Sandwich Cookies (like Oreos)** – *These will be crushed for the “dirt.” Choose fresh cookies for the best texture and flavor.*
2. **Cream Cheese (8 ounces)** – *Softened to room temperature, this will help create a fluffy layer; opt for full-fat for a richer taste.*
3. **Chocolate Pudding Mix (3.9 oz box)** – *Instant pudding mix is your best friend here. It’s easy to work with and sets perfectly, yielding a shake and stir consistency that’s just right.*
4. **Milk (2 cups)** – *Whole milk will give the creamiest texture, but you can use low-fat if you wish.*
5. **Cool Whip (8 ounces)** – *This will fold into the cream cheese mixture to lighten it. If you’re feeling adventurous, try making your own whipped cream!*
6. **Gummy Worms** – *These classic candy worms are essential for the full graveyard effect! You could also use gummy spiders or other creepy candies.*
7. **Tombstones (Graham crackers or candy tombstone decorations)** – *Get creative here! Grahams can be decorated with frosting to resemble tombstones, or you can buy pre-made candy ones for ease.*
8. **Chocolate Sprinkles (optional)** – *For an extra touch of “dirt.” They can elevate the dessert’s look, adding texture and flavor.*
How to Make Graveyard Dirt Cake
Let’s get started! This no-bake dessert comes together in just a few easy steps:
1. **Crush the Cookies:**
Start by placing your chocolate sandwich cookies in a zip-top bag. Use a rolling pin or a heavy mug to crush them into fine crumbs. You want the texture to resemble dirt but avoid turning them into powder. Set aside about one cup of these crumbs for the topping later.
2. **Prepare the Pudding:**
In a large mixing bowl, combine the chocolate pudding mix with 2 cups of milk. Whisk it together until smooth and well combined. Follow the package instructions to allow it to set up—usually about 5 minutes of stirring until it begins to thicken.
3. **Make the Cream Cheese Mixture:**
In another bowl, beat the softened cream cheese until fluffy. Gradually fold in 1 cup of *Cool Whip* until well mixed. Adding a bit of *vanilla extract* enhances the flavor if you have it on hand.
4. **Combine Mixtures:**
Gently fold the prepared chocolate pudding into the cream cheese mixture until evenly blended. You want to keep that fluffy lightness!
5. **Layer the Cake:**
In a large trifle dish or any deep bowl, start layering your dessert. Begin with a layer of the chocolate pudding mixture at the bottom, followed by a layer of crushed cookies to create the “dirt.” Alternate between the pudding mixture and crushed cookies, finishing with a layer of the pudding mixture on top.
6. **Decorate:**
Here’s where you can truly unleash your creativity! Spread the remaining *Cool Whip* on top and sprinkle with the reserved cookie crumbs to create a “dirt” effect. Stick the gummy worms and tombstone decorations into the top of the cake to give it a haunted look.
7. **Chill:**
Cover the dessert with plastic wrap and put it in the refrigerator for at least 2 hours, allowing the flavors to meld and the cake to set.
8. **Serve:**
When it’s time for your Halloween gathering, scoop generous portions into bowls and watch your friends and family delight in this deliciously spooky treat.
Tips, Tricks & Variations
Creating your Graveyard Dirt Cake can be as simple or as elaborate as you want. Here are some expert tips for perfecting your dessert:
1. **Make it Ahead:** This dessert can be made a day in advance, allowing the flavors to deepen. Just keep it covered in the refrigerator.
2. **Gluten-Free Adaptation:** If you or your guests are gluten-sensitive, look for gluten-free chocolate cookies and pudding mixes to make a safe version.
3. **Add Layers:** For a more colorful “graveyard,” add layers of different-flavored pudding, like vanilla or banana, to create visually delightful layers.
4. **Include Fruit:** For a slightly healthier twist, layer in sliced strawberries or raspberries between the pudding and cookie layers for a burst of color and fruity sweetness.
5. **Presentation Hacks:** Serve in clear cups for individual servings. These are cute and allow everyone to see the “dirt” layers.
What to Serve With Graveyard Dirt Cake
This spooky dessert pairs well with a variety of foods and drinks that complement its rich flavors:
– **Hot Chocolate or Pumpkin Spice Lattes:** The warmth and sweetness of these drinks are a match made in heaven for the layered richness of the cake.
– **Spooky Snack Board:** An assortment of Halloween-themed snacks like themed cookies, deviled eggs, or spider-shaped cheese balls would make for a great addition to your party table.
– **Fruity Salads:** A light, refreshing fruit salad can cleanse the palate beautifully after indulging in the rich chocolate cake.
– **Candied Apples:** These sweet, crunchy treats would offer a delightful contrast to the smoothness of the dirt cake.
Nutrition & Health Benefits
While Graveyard Dirt Cake is primarily a treat for indulgence, it does provide some nutritional considerations. Each serving contains around 350 calories, with a mix of carbohydrates from the cookies and sugars from the pudding and Cool Whip.
Chocolate, particularly dark chocolate, is known for its antioxidant properties, while dairy products like *cream cheese* and *milk* provide calcium and protein. But remember, this dessert is decadent, so it’s best enjoyed in moderation!
For more in-depth nutrition information, you can refer to trusted sources like [Healthline](https://www.healthline.com/nutrition) for insights into the health benefits and caloric information of ingredients used .
Frequently Asked Questions
1. **Can I make this cake vegan?**
Absolutely! Substitute regular pudding with a plant-based alternative, use vegan cream cheese, and opt for dairy-free whipped topping. Make sure your cookies are also vegan-friendly.
2. **How long does Graveyard Dirt Cake last in the fridge?**
This dessert can last for about 3-4 days in the refrigerator when stored properly in an airtight container. However, for best results, it’s best enjoyed within 2 days.
3. **Can I freeze Graveyard Dirt Cake?**
While freezing is possible, the texture may change upon thawing. If you choose to freeze it, do so without any decorations. Thaw in the refrigerator overnight before serving.
4. **What can I use instead of Cool Whip?**
You can easily substitute *Cool Whip* for homemade whipped cream. Simply whip heavy cream with a bit of sugar until stiff peaks form. For a non-dairy option, there are coconut whipped creams available.
5. **Can I make it gluten-free?**
Yes! Make sure to choose gluten-free chocolate sandwich cookies and pudding mix. Many brands offer naturally gluten-free options nowadays.
—
This Graveyard Dirt Cake is the ultimate start to your Halloween festivities, combining the nostalgia of childhood treats with a fun and spooky twist. So gather your ingredients and bring this delightful dish to life! Prepare for compliments (and maybe a few friendly screams) as you serve this cake at your next Halloween party. If you loved this recipe, leave a comment below or tag me on Instagram with your Halloween creations. Happy cooking!


