Let’s Get Real
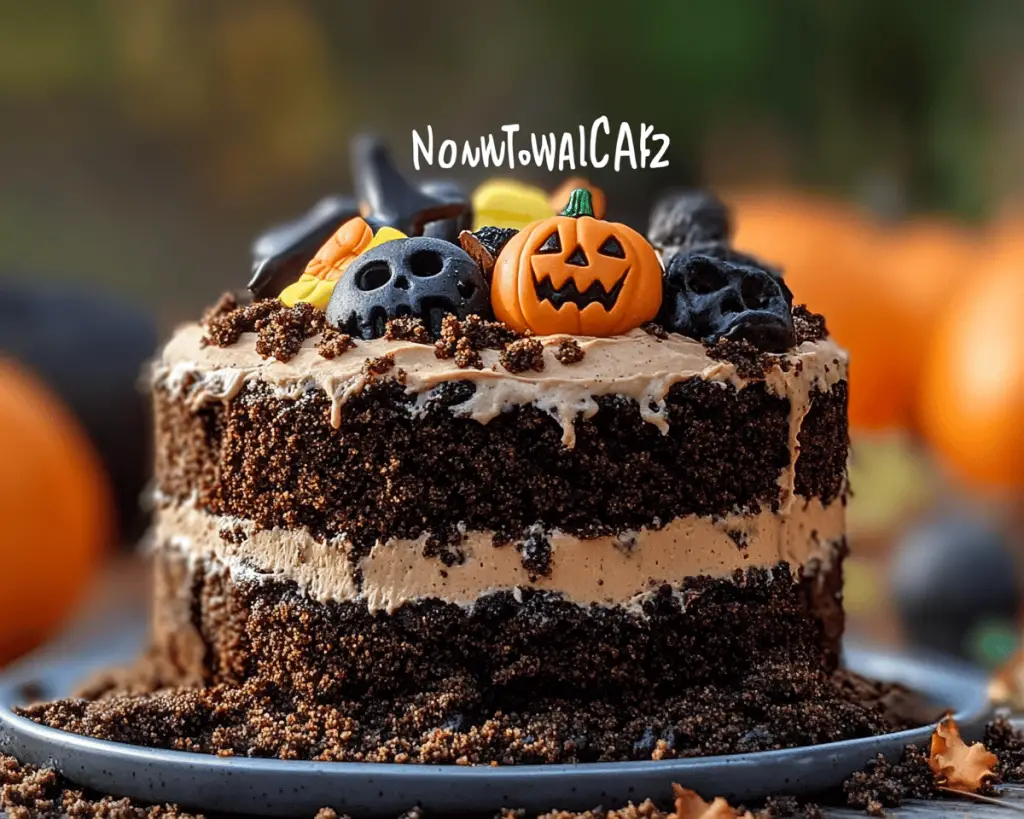
Okay, so this may sound a little weird, but I was never a cake person as a kid. I know, shocker, right? Everyone around me was drooling over chocolate cake, and I was over here like, “Can I have an extra slice of broccoli, please?” Okay, that’s a lie; I wasn’t that good. But I certainly wasn’t down with the cakes. Fast forward to adulthood, and guess what? I’m obsessed with this no-bake Graveyard Dirt Cake. I mean, what isn’t to love about a dessert that involves crushed Oreos, creamy layers, AND a Halloween theme? It’s the kind of cake that screams “party time!” while simultaneously making your inner child giggle with glee because, let’s be honest, who doesn’t want to dig into a cake that looks like dirt?
Let’s just say I made this cake for a Halloween bash last year at my place, and it pretty much stole the show, even from my Cousin Larry’s questionable costumes. I had already conquered adulting with homemade pumpkin spice lattes, but this Graveyard Dirt Cake? It solidified my position as the reigning dessert champion in the family. I mean, it’s like you’re serving a spooky treat that marries the elegance of a layered cake with the whimsical fun of Halloween. You’ll impress your friends, frighten your family with ghoulish delight, and have a killer dessert that requires zero baking. I think we can agree it’s a total win-win.
And let’s face it: the weather isn’t doing us any favors right now. One minute you’re sweating like a sinner in church because it’s 80 degrees in October, and the next it feels like the Arctic has moved in. I’m ready for cozy sweaters and pumpkin spice everything, okay? I might even add a few candles, turn down the lights, and start a Simon & Garfunkel playlist just to get in the vibe. The big idea here is to celebrate Halloween in style, running barefaced (sans makeup and barn clothes) to the nearest store in search of gory decorations and ingredients for this spine-chilling treat.
Ingredients, Unfiltered
Now let’s get to the nitty-gritty of this Graveyard Dirt Cake. Here’s what you’ll need:
What’s Really in Graveyard Dirt Cake
Crushed Oreos: We’re starting strong with the backbone of this masterpiece. You can use generic brands if you want to save a buck (I won’t tell). I usually go for the double stuff because we all know they have the best ratio of cream to cookie. Plus, they look prettier when crushed because the cream mixes in all nice and gooey.
Instant pudding mix: The magical little powder that thickens your middle layer and gives it that luscious creaminess. I’m all about the chocolate flavor here, but if you’re feeling adventurous, you can try vanilla! Just remember, the end goal is to make your cake taste divine, which, spoiler alert, it does.
Milk: Not just for cereal, folks! This helps bring out the best in your pudding mix. Use whole milk if you want it extra creamy, but really, I’ve used almond milk in a pinch, and no one’s the wiser.
Cream cheese: This adds depth and tang to your cake that keeps it from being one ginormous sugar bomb. Seriously, if you don’t put it in your cake, what’s the point of living? Just kidding… kind of.
Cool Whip: Now, if you’re one of those “I-make-my-own-whipped-cream-from-scratch” folks, bless your heart. But for the sake of this no-bake cake, we’re doing Cool Whip. It’s fluffy, it’s fun, and it’s ready to go—just like your aunt Brenda after two glasses of wine at Thanksgiving.
Gummy worms: Because nothing says “I’m an adult” like putting gummy worms on a cake you made. They’re not just for kids anymore! These little guys add an instant Halloween vibe to your sweet creation. I like to go wild—if you’re going to be ghoulish, you might as well make it fun.
Chocolate sprinkles or edible grave markers: You can get creative here! I love the idea of using chocolate sprinkles for an added ‘dirt’ effect, or you could whip up some adorable little tombstone cookies if you’re feeling particularly crafty. Just know: whatever you choose will make your cake look on-point… or at least point in a Halloween kind of way.
Let’s Talk Health (or Not)
Is This Even Healthy? Let’s Discuss
Is this cake going to win you any health awards? No! But guess what? No-bake cakes aren’t about health; they’re about indulgence, celebration, and frankly, the sheer joy of dessert!
Sure, there are a few questionable ingredients in here. I mean, there’s sugar, Oreos, and enough dairy to drown a horse, but let’s be honest: if I wanted to eat quinoa and kale, I wouldn’t be here stalking dessert recipes. Maybe this is my bias speaking, but I sleep just fine at night knowing I enjoyed a slice of Graveyard Dirt Cake with a side of unapologetic glee. Besides, Halloween is not the time for healthy choices; it’s a time for tricks and treats! If you’re aiming for health on Halloween, you might want to rethink your priorities, my friend.
Your Grocery List
Here’s What You’ll Need
– 24 Oreo cookies, crushed
– 1 package (3.9 oz) of instant chocolate pudding mix
– 2 cups of milk
– 8 oz of cream cheese, softened
– 1 cup of powdered sugar
– 1 container (8 oz) of Cool Whip
– Gummy worms (as many as your heart desires)
– Chocolate sprinkles or edible grave markers (optional, but recommended)
This recipe serves about 12 hungry souls, so if you plan to eat it all by yourself, well, I won’t judge. We’ve all been there… or at least I have.
The Actual Cooking Part
Okay, Let’s Make This
Alright, hopefully, you have your spookiest playlist queued up because we’re diving into this no-bake wonder!
1. **Crush those Oreos**: Grab a ziplock bag and go to town on your Oreos. If you need this to be therapy, do it. I also find that rolling them over a cutting board with a heavy rolling pin is extremely satisfying (and a great way to release pent-up rage). No need to be precise; we want a mix of crumbly bits and larger pieces for texture. Just remember: you’re not making a science experiment here.
2. **Mix the pudding**: Grab a mixing bowl and combine the instant pudding mix with the milk. Whisk it all together until it thickens—this part should take about 2 minutes of your life. Set it aside.
3. **Create the cream cheese layer**: In a separate mixing bowl, blend the softened cream cheese with the powdered sugar until it’s smooth and creamy. This should ideally be done with a hand mixer unless you want muffins for arms. Then, fold in the Cool Whip until it’s all nice and fluffy like a marshmallow cloud.
4. **Layer it up**: Grab your serving dish—a trifle bowl, a rectangular dish, or, if you’re me, whatever you can find. Start with a layer of your crushed Oreos at the bottom, then a layer of the cream cheese mixture, followed by a layer of chocolate pudding. Repeat until you reach the top. You can finish with a layer of crushed Oreos to get that authentic “dirt” look.
5. **Decorate**: Now it’s time for the fun part! Sprinkle chocolate sprinkles on top and arrange those gummy worms like they’re coming out of their graves (or, ya know, just lying around like they’re on spring break).
6. **Chill out**: Cover your masterpiece with plastic wrap and let it chill in the fridge for at least 2 hours before serving. Honestly, if you can hold off for a good six hours, you’ll enjoy the layers melding together like a beautiful marriage.
7. **Serve it up**: Get your spookiest serving spoon, and delve into the delicious layers. People might be hesitant seeing “dirt” in a cake, but once they taste it, they’re instant converts.
Side Notes & Sassy Hacks
Bonus Tips You Didn’t Ask For
– **Oreo alternatives**: If you’re feeling funky or have a dietary restriction, switch out those Oreos for gluten-free cookies or sandwich cookies. Just keep it chocolatey to maintain that “dirt” aesthetic.
– **Pudding fun**: Try using different pudding flavors. But remember: you might lose the “dirt” effect, and that may cause a mini disaster in your Halloween theme.
– **Serving suggestion**: Want to make this a little more sophisticated? Serve it in individual cups. You can layer them up in clear plastic cups, and it makes for an adorable dessert station at your Halloween party.
– **Gummy toppings**: If gummy worms aren’t your thing (they should be, but I’m not here to judge), you could add mini chocolate skulls or gummy body parts (yes, they sell those—you can’t argue with the internet). The spookier, the better!
Final Words of (Culinary) Wisdom
If you’ve made it this far, you’re officially ready to make the most ridiculous and fun Halloween dessert ever. Not only does it taste ridiculously good, but it’s easy enough for anyone to whip up! Plus, it makes you the star of the party, and who doesn’t want that title? Imagine the conversations that’ll spark when you bring this beauty out. “What’s that? Oh, just my Graveyard Dirt Cake. Want to try some?”
If you try this recipe, tag me on social media because I want to see your creations! Or just send me a mental high-five. Either way, get ready for a Halloween filled with treats, giggles, and some deliciously spooky vibes! I’m cheering you on from my cozy kitchen (or couch, let’s be real). Enjoy, friends!