Prep time: 10 minutes
Cook time: 15 minutes
Total time: 25 minutes
Servings: 4
Golden Skillet Flatbread No Yeast Needed is a delightful indulgence that appeals to both seasoned home cooks and beginners alike. Imagine a warm piece of bread, perfectly golden and crisp on the outside, yet soft and fluffy on the inside. Picture yourself biting into it, the aroma enveloping your senses, reminiscent of family gatherings or cozy dinners. With this recipe, you won’t need to wait hours for the dough to rise or hunt for elusive ingredients. It’s the ultimate solution for those spontaneous meal-making moments when you crave fresh bread but want to skip the fuss.
In this article, you will discover the ins and outs of crafting this beautiful bread from scratch. You will learn tips for achieving that delightful texture, variations that cater to different taste preferences, and how to troubleshoot any hiccups along the way. Let’s embark on this culinary journey together, ensuring that your kitchen is filled with the warm, inviting scent of freshly made flatbread!
What Is Golden Skillet Flatbread No Yeast Needed?
Golden Skillet Flatbread No Yeast Needed is a straightforward yet incredibly flavorful bread that originates from various cultures across the globe. Unlike many traditional bread recipes, this flatbread doesn’t rely on yeast, which can be a lifesaver for those who are short on time or ingredients. The absence of yeast means there’s no need for long rising times, making it a quick and easy option for any meal.
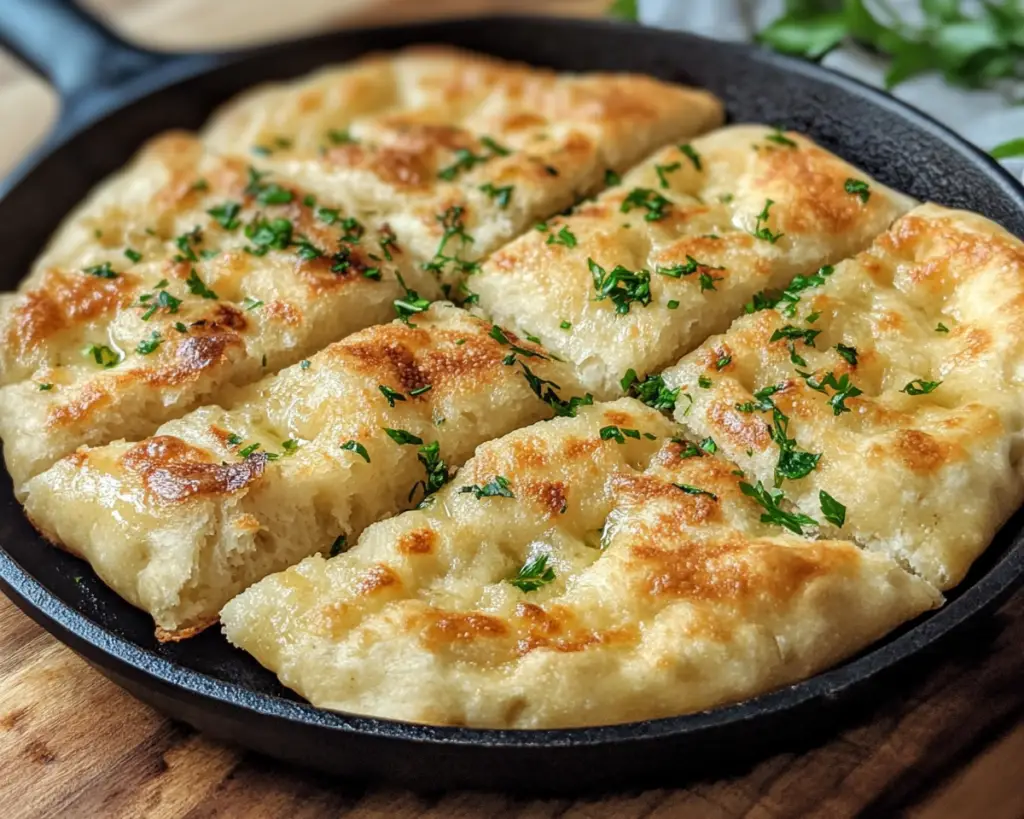
The texture of this flatbread is simply delightful. It’s golden brown on the outside, thanks to the skillet method of cooking, and soft on the inside, ideal for scooping up your favorite dips or serving alongside savory stews. When prepared with simplicity, its flavor leans towards neutral, allowing it to complement a wide range of dishes, from rich curries to fresh salads. The beauty of this flatbread lies not only in its flavors and textures but also in its versatility as it can be paired with various ingredients for different occasions.
You can serve it as a base for hearty toppings, use it to wrap around fillings for a delectable sandwich, or enjoy it with just a smear of butter or a drizzle of olive oil. The possibilities are endless, which makes this flatbread not just a recipe, but an essential skill for any home cook.
Why You’ll Love This
The appeal of Golden Skillet Flatbread No Yeast Needed stretches beyond just flavor. One of the top reasons you’ll fall in love with this recipe is its simplicity. With only a handful of ingredients needed, you can whip up warm, fresh bread without the hassle of traditional methods, making it perfect for busy weeknights or last-minute gatherings.
Additionally, this flatbread is cost-effective. Most of the ingredients can be found in your pantry, meaning you won’t have to shell out extra cash for fancy baking supplies. It’s a fantastic way to stretch your food budget while still impressing your family with delicious homemade bread.
Don’t let the lack of yeast deter you; you won’t be sacrificing on taste or texture. In fact, this method often leads to a denser and more satisfying product, especially if you enjoy a hearty flatbread that stands up to dips and toppings. Plus, there’s something incredibly satisfying about creating something from scratch that makes you feel accomplished, even if you’re just a beginner in the kitchen!
Ingredients You’ll Need
- All-purpose flour: The main ingredient that provides structure. You can substitute with whole wheat flour for a nuttier flavor.
- Baking powder: This acts as the leavening agent in place of yeast, helping the bread to rise and become fluffy.
- Salt: Essential for seasoning; it enhances the overall flavor of the bread.
- Olive oil: Adds richness and moisture to the dough. You can use other oils, but olive oil provides a pleasant flavor.
- Water: Binds the ingredients together; ensure it’s warm to help activate the baking powder. You can also use milk for a richer dough.
How to Make
- Mix the dry ingredients: In a large bowl, combine 2 cups of all-purpose flour, 2 teaspoons of baking powder, and 1 teaspoon of salt. Whisk them together until they are well blended. This step ensures that the baking powder and salt are evenly distributed throughout the flour, vital for even rising and flavor. It’s a great way to incorporate air into your mixture and also helps to break up any flour lumps that may exist.
- Add in the wet ingredients: Create a well in the center of the dry mixture and pour in 2 tablespoons of olive oil followed by ¾ cup of warm water. Use a spatula or your hands to gradually mix the wet ingredients with the dry ingredients. The key here is to bring the dough together without overworking it, which can lead to a tough flatbread. Aim for a slightly shaggy dough that holds together but is not sticky.
- Knead the dough: Transfer the dough onto a lightly floured surface. Knead it gently for about 1-2 minutes until it is smooth and elastic. Be cautious not to over-knead, as this can cause the bread to be dense due to gluten development. At this stage, the dough should feel soft and slightly tacky. If it’s too sticky, add a sprinkle of flour, but avoid dumping excessive flour as you might alter the intended texture.
- Divide the dough: Once your dough reaches the desired consistency, divide it into 4 equal pieces. Roll each piece into a ball, ensuring they are uniform in size for even cooking. This step not only portion controls but also allows you to create individual servings that are convenient for sharing or meal prep.
- Roll out the flatbreads: On a floured surface, take one ball of dough and flatten it slightly with your hands. Using a rolling pin, roll it out into a circle about ¼ inch thick. Aim for it to be even all around to ensure it cooks uniformly. The thinner you roll it, the crispier it will get; if you prefer a softer flatbread, roll it slightly thicker.
- Cook the flatbreads: Heat a skillet over medium-high heat and add a teaspoon of olive oil. Once the oil is hot, place the rolled flatbread into the skillet. Cook for about 2-3 minutes on one side until you see bubbles forming, then flip it over and cook for another 2-3 minutes. The flatbread should be golden brown and slightly puffed. Adjust the heat if the bread is browning too quickly to avoid burning.
- Keep them warm: After cooking each flatbread, transfer it to a plate and cover it with a kitchen towel to keep warm. This step helps maintain their soft texture. You can keep stacking them and cover with the towel until all are cooked, ensuring they’re serve-ready for your meal!
- Serve: Enjoy your Golden Skillet Flatbread No Yeast Needed warm. You can pair them with dips, use them to wrap fillings, or simply enjoy them with a spread of butter or jam. The flavor will be so delightful that you might find it hard to resist enjoying them straight from the skillet!
Variations & Substitutions
Herbed Flatbread: For added flavor, consider mixing in dried herbs like oregano, rosemary, or thyme directly into the dry ingredient mixture. This can elevate the taste and provide a fragrant experience, perfect for those who enjoy herbed breads. You can also sprinkle some fresh herbs on top while they cook for a beautiful presentation.
Cheesy Flatbread: If you want a richer and more indulgent flatbread, fold in shredded cheese (such as mozzarella or cheddar) into the dough during the mixing process. This variation melts to create a gooey interior and adds extra flavor. It’s especially popular with kids or cheese lovers, making it a perfect meal prep option for packed lunches!
Stuffed Flatbread: For a more filling option, you can create stuffed flatbreads by rolling out the dough and placing a savory filling in the center, such as sautéed vegetables, meats, or cheese. Fold the dough over the filling and seal it before cooking. This variation allows you to experiment with your favorite ingredients or leftovers!
Whole Wheat Version: To pack in more nutrition, you can use whole wheat flour instead of all-purpose flour. While this will give the flatbread a slightly denser texture, it adds fiber and nutrients, making it a healthier choice. You may need to adjust the water slightly as whole wheat flour can absorb more liquid than white flour.
Common Mistakes to Avoid
One common mistake is not measuring the flour accurately, which can lead to a dry dough. Always spoon the flour into a measuring cup and level it off with a knife rather than scooping directly from the bag, as scooping can compact the flour and lead to using too much.
Another mistake is over-kneading the dough. While it may be tempting to work the dough until it’s super smooth, overworking it can lead to a tough flatbread. Remember that you want it to be just combined and slightly elastic for the perfect texture.
Lastly, ensure your skillet is at the right temperature. If it’s not hot enough, the flatbread can become soggy, while too hot can cause it to burn on the outside without cooking properly inside. A medium heat is best; if you’re unsure, test with a tiny piece of dough first.
Storage, Freezing & Reheating Tips
To store your Golden Skillet Flatbread No Yeast Needed, allow them to cool completely before placing them in an airtight container. They can be stored at room temperature for up to two days. If you want to keep them fresh longer, consider freezing them. Place parchment paper between each flatbread, wrap them tightly in plastic wrap or aluminum foil, and store them in a freezer-safe bag. They can last for up to three months.
When you’re ready to enjoy, simply take out a flatbread, thaw it in the refrigerator overnight, and reheat it in a skillet over medium heat. This method ensures the flatbreads regain their soft texture without becoming hard. Alternatively, you can microwave them for about 15-20 seconds, but be cautious not to overdo it, as microwaving can dry them out.
Always remember food safety best practices! Ensure that the flatbreads are placed in clean containers and are consumed within appropriate time frames to avoid spoilage.
Frequently Asked Questions
Can I use whole wheat flour instead of all-purpose flour?
Yes, you can use whole wheat flour, but be aware that the texture may change to be slightly denser. It may also require more water due to the higher fiber content. Just add the water gradually until you achieve the right consistency.
What if I don’t have baking powder?
If you find yourself without baking powder, you can make a substitute using a mixture of cream of tartar and baking soda. Use 1 part baking soda to 2 parts cream of tartar. This will replicate the leavening effect and still yield a great flatbread.
How can I enhance the flavor of the flatbread?
There are numerous ways to enhance the flavor! Adding herbs, spices, or incorporating garlic powder into the dry ingredients can elevate the taste significantly. You can also brush the cooked flatbreads with garlic or herb-infused oil for an extra layer of flavor before serving.
Can this recipe be doubled or halved?
Absolutely! You can easily adjust the quantities to suit your needs. Just remember that the cooking time may vary slightly if you’re cooking batches at once, so keep an eye on them to avoid burning.
How can I use the flatbreads in meals?
The possibilities are endless! You can use them as a base for pizzas, scooping up dips like hummus, or serving alongside soups and stews. You can even make a quick wrap with leftover meats and veggies for lunch – the perfect versatile addition to your meals!
Conclusion:
Golden Skillet Flatbread No Yeast Needed is more than just a flatbread; it’s a gateway to delightful meals, creative toppings, and wonderful memories. Its simplicity and versatility make it a must-try recipe for any home cook, whether you’re short on time or looking to impress at your next gathering. I encourage you to customize this recipe to your taste and explore the various ways it can complement your dining experiences. Now, it’s time to roll up your sleeves, gather your ingredients, and create something delicious! Share your creation with family and friends, and relish the joy of baking together!


