French Crullers are delightful doughnuts that bring a touch of elegance and indulgence to your breakfast or dessert table. These light and airy pastries are a French classic, known for their unique shape and crispy exterior, which perfectly contrasts with the soft, fluffy interior. The irresistible blend of flavors and textures, combined with their stunning appearance, makes French Crullers a must-try for any home baker looking to impress family and friends.
In this comprehensive guide, you will learn everything necessary to create mouthwatering French Crullers at home. From mastering the basic recipe to exploring variations and substitutions, we cover it all. By the time you’re finished reading, you’ll be ready to whip up a batch of these exceptional treats with confidence.
What Are French Crullers?
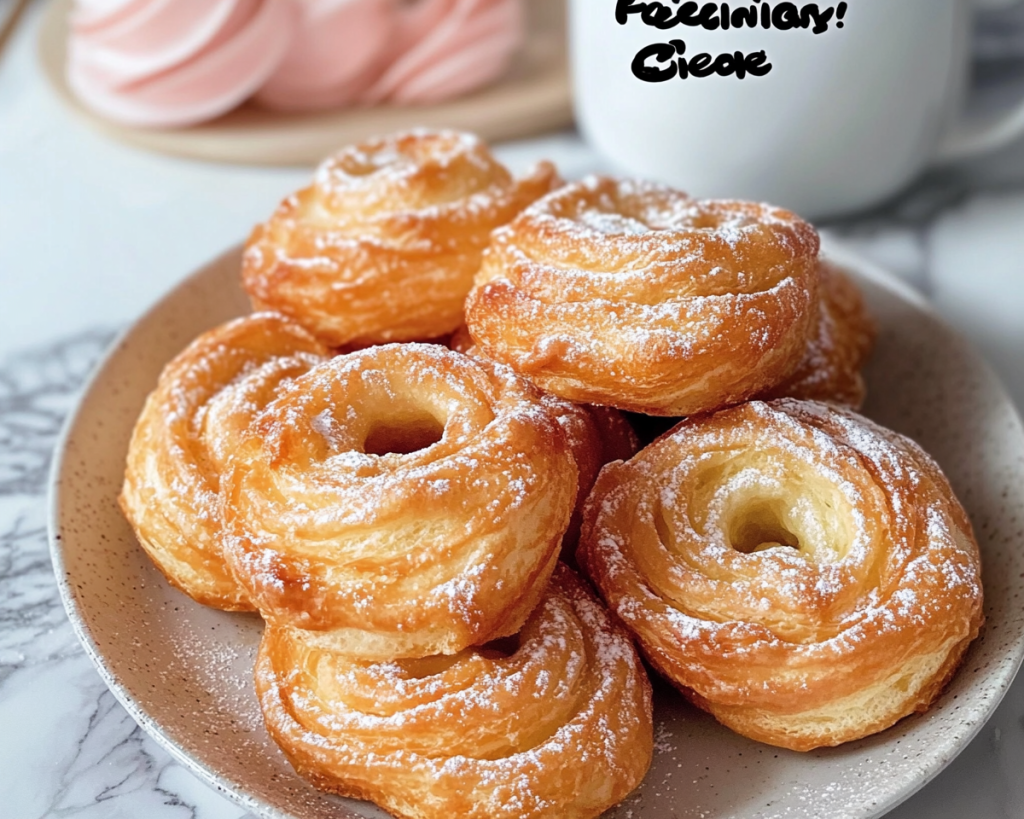
French Crullers, also known as *crêpes suzette* or *choux pastry doughnuts*, are a type of deep-fried pastry that typically derives from *pâte à choux* (choux pastry). The unique feature of French Crullers is their twisted, ring shape, which is created by piping the dough through a star-shaped tip. This piping method gives them their characteristic ridged lines, which not only enhance their aesthetic appeal but also help to create a crunchy texture on the outside.
In terms of flavor, these crullers are usually sweet and can be flavored with vanilla, lemon zest, or nutmeg for added depth. The dough itself is primarily made from water, butter, flour, eggs, and sugar. After deep frying, they’re often coated in a sweet glaze or dusted with powdered sugar, making them even more delectable. The experience of biting into a French Cruller reveals a light and fluffy body that melts in your mouth – it is indeed a heavenly treat.
Why You’ll Love This French Cruller Recipe
There are numerous reasons to fall in love with French Crullers. Firstly, their distinctive texture is unmatched – the crispy outer shell gives way to a soft and airy interior, creating a delightful mouthfeel. Secondly, they are surprisingly easy to make at home, especially once you grasp the concept of choux pastry.
Another significant advantage of this recipe is its versatility. You can customize your crullers with various flavorings and glazes to suit your taste. Popular flavor combinations include chocolate, maple, or citrus glazes, making these pastries perfect for any occasion. Plus, they are relatively budget-friendly to make, requiring simple pantry staples like flour, sugar, and eggs.
There’s a misconception that making pastries like French Crullers is reserved for professional bakers. However, you’ll soon discover that this recipe is approachable, even for beginners. With step-by-step instructions provided, you can enjoy the process of creating these exquisite treats.
Ingredients You’ll Need
To create these stunning French Crullers, you will need the following ingredients:
– **Water (1 cup)**: Essential for hydrating the dough and ensuring it becomes light and fluffy.
– **Unsalted Butter (1/2 cup)**: Adds richness and flavor while also allowing the dough to stretch without breaking.
– **All-Purpose Flour (1 cup)**: The base of your choux pastry; it provides the structure needed for the crullers.
– **Granulated Sugar (2 tablespoons)**: Enhances the flavor and sweetness of the crullers.
– **Large Eggs (4)**: These provide moisture and create the desired light and airy texture.
– **Salt (1/4 teaspoon)**: Balances the sweetness and enhances the overall flavor of the crullers.
– **Vanilla Extract (1 teaspoon)**: This flavoring elevates the taste of the crullers.
– **For the Glaze (optional)**: You can use powdered sugar, milk, and additional flavorings like maple or chocolate to create a delectable topping.
Each ingredient plays a pivotal role in ensuring that your French Crullers rise beautifully and provide the ideal balance of flavors.
How to Make French Crullers
Making French Crullers may sound labor-intensive, but with a bit of practice and patience, you’ll find it quite manageable. Here’s a step-by-step guide to help you along the way.
1. **Prepare the Pâte à Choux**: In a medium saucepan, combine the water, butter, sugar, and salt. Bring the mixture to a boil over medium heat, stirring until the butter has completely melted. Once boiling, remove the saucepan from the heat and quickly add the flour, stirring vigorously with a wooden spoon until the mixture pulls away from the sides of the pan and forms a cohesive ball of dough.
2. **Incorporate the Eggs**: Allow the choux dough to cool for a few minutes; this step helps prevent the eggs from cooking prematurely when added. Gradually incorporate the eggs, one at a time, mixing well after each addition. It’s essential to mix thoroughly, ensuring that the dough is smooth and slightly sticky. When you lift the spoon, the batter should create a thick ribbon that slowly falls back into the bowl.
3. **Piping the Crullers**: Transfer the dough to a large piping bag fitted with a star-shaped tip. Prepare a baking sheet lined with parchment paper or a silicone mat. Pipe the dough into ring shapes on the baking sheet, making sure to leave some space between each cruller as they will puff up during frying. Aim for a diameter of about 2-3 inches, and don’t stress if they’re not perfect – the beauty of handmade pastries is in their uniqueness!
4. **Heat the Oil**: In a deep frying pan or a pot, heat about 2-3 inches of vegetable oil to 350°F (175°C). Use a candy thermometer to monitor the temperature, as this is crucial for achieving perfectly golden-brown crullers.
5. **Fry the Crullers**: Carefully lower the piped crullers into the hot oil, a few at a time. Allow them to fry for 2-3 minutes on one side until they are golden brown, then gently flip them over using a slotted spoon, frying for another 2-3 minutes until fully cooked. Keep an eye on the temperature – if it drops, the crullers will absorb more oil, resulting in greasy pastries.
6. **Drain and Cool**: Once golden brown, remove the crullers from the oil and transfer them to a plate lined with paper towels to drain any excess oil. Allow them to cool for a few minutes before glazing.
7. **Glazing the Crullers**: To create a simple glaze, whisk together powdered sugar and milk until smooth. You can customize your glaze by adding flavorings like maple syrup or cocoa powder. Dip the tops of each cruller into the glaze and set them back on the cooling rack to allow the excess to drip off.
8. **Serve and Enjoy**: Your homemade French Crullers are now ready to enjoy! These pastries are best served fresh, while still warm, and can be paired with a hot cup of coffee or tea for a truly indulgent experience.
6 Variations & Substitutions
1. **Chocolate Crullers**: To create rich chocolate crullers, simply add 2 tablespoons of unsweetened cocoa powder to the flour when preparing the dough. You can also enrich the glaze by incorporating melted chocolate or cocoa powder.
2. **Maple Glazed Crullers**: For a delightful twist, substitute half of the milk in the glaze with pure maple syrup. This adds a wonderful flavor that pairs beautifully with the sweetness of the crullers.
3. **Citrus Zest**: Brighten up your crullers by incorporating citrus zest, such as lemon or orange, into the dough before piping. A teaspoon of zest will bring a refreshing brightness to the flavor profile.
4. **Spiced Crullers**: Add a pinch of cinnamon or nutmeg to the dough for warming, aromatic flavors. This is especially delightful during the fall and winter months.
5. **Gluten-free Crullers**: Substitute all-purpose flour with a 1:1 gluten-free flour blend to create gluten-free French Crullers without sacrificing texture. Ensure that the blend contains xanthan gum for proper structure.
6. **Savory Crullers**: If you prefer a savory version, omit the sugar and vanilla extract. Instead, incorporate herbs like thyme or rosemary into the dough. These can be served as an appetizer or paired with cheese.
Common Mistakes to Avoid
Making French Crullers can be a hit or miss if certain precautions are not taken. Here are some common pitfalls and tips on how to avoid them:
– **Underheating the Oil**: If your oil is not hot enough (below 350°F), the crullers will absorb excess oil and become greasy. Always check the temperature with a thermometer before frying.
– **Overworking the Dough**: Mixing the dough too much can result in a dense texture, rather than the light, airy crullers we desire. Mix just until combined, ensuring a smooth texture.
– **Insufficient Cooling Time**: Allowing the choux dough to cool before adding the eggs is crucial. If the mixture is too hot, you risk cooking the eggs, which will affect the rise of your crullers.
– **Skipping the Piping Bag**: Trying to form the crullers by hand instead of piping them can lead to uneven shapes and inconsistent cooking. Use a piping bag with a star tip for the best results.
– **Not Allowing the Dough to Rest**: If you don’t let the dough rest for a few minutes after mixing in the eggs, it can lose some of its rise when frying. Always let it rest briefly before piping.
Storage, Freezing & Reheating Tips
To maintain the freshness of your French Crullers, it is essential to store them properly.
– **Storage**: Place any uneaten crullers in an airtight container lined with paper towels to absorb moisture. They can be stored at room temperature for up to 2 days. However, they are best enjoyed fresh on the day they are made.
– **Freezing**: Crullers can be frozen for later enjoyment. Allow them to cool completely, then place them in a single layer on a baking sheet. Once frozen solid, transfer them to a freezer-safe bag or container and freeze for up to 2 months.
– **Reheating**: To reheat frozen crullers, simply place them in a 350°F (175°C) oven for 5-7 minutes until warmed through. This will help restore some of their original texture.
Always practice food safety by ensuring crullers are cooled before storing and that they’re consumed within a suitable timeframe.
Frequently Asked Questions
1. **Can I make French Crullers without eggs?**
While eggs play a crucial role in the structure and texture of choux pastry, you can experiment with egg substitutes. Consider using a flaxseed meal mixture or commercial egg replacer. However, the results may vary, and the crullers might not be quite as fluffy.
2. **Why did my crullers not rise properly?**
Insufficient heat in the oil is one of the most common reasons for crullers failing to rise. Always ensure that your oil is at the correct temperature before frying. Additionally, if the dough is too dense or packed too tightly in the piping bag, this could also prevent proper rising.
3. **How can I achieve the perfect glaze consistency?**
The ideal glaze should be thick enough to coat the crullers but thin enough to flow smoothly. Start with a small amount of milk; gradually add it to the powdered sugar until you reach the desired consistency. If it’s too thick, add a little more milk; if it’s too runny, add more powdered sugar.
4. **Can I use a different fat instead of butter?**
While butter provides flavor and richness, you can substitute with margarine or coconut oil if needed. Be aware that it may alter the final taste and texture but can still yield a delicious cruller.
5. **What can I do with leftover cruller dough?**
If you have leftover dough, you can pipe and fry additional crullers or use the dough to make smaller pastries like éclairs or beignets. Alternatively, store it in the refrigerator for a short time or freeze it for later use.
In conclusion, French Crullers represent the delightful intersection of culinary creativity and traditional French pastry-making. This recipe not only delivers on taste and texture but also provides you with the skills to personalize your cruller experience in various delightful ways. Whether you choose to embellish them with rich glazes, experiment with flavors, or enjoy them simply dusted with powdered sugar, you can be proud of your homemade treats.
So gather your ingredients and get started on this sweet adventure! Your kitchen will soon be filled with the delightful aroma of freshly fried crullers, and your friends and family will be eager to taste the fruits of your labor. Happy baking!


