You know how sometimes you come across a dish that just fills you with warm memories and comfort? That’s mac and cheese for me. Extra creamy, classic mac and cheese. Not the instant kind you slurp down in two minutes (though let’s be honest, we’ve all been there). No, I’m talking about the kind you devote a cozy evening to—melting cheese, elbow macaroni, and that little bit of love that can only come from spending time in the kitchen.
This recipe matters to me because it’s a celebration of simplicity and nostalgia. I remember the first time I made it for myself; I had just moved into my first apartment, the seemingly endless walls of beige seeming to close in on me. I wanted something that reminded me of home—something that tasted like hugs from my grandmother. When I pulled that classic, golden-baked, cheesy goodness from the oven, all those warm feelings rushed back, and I can still draw a vivid picture of my little kitchen, the smell wrapping around me like a snuggly blanket. It turned out perfectly, even though I maybe burned the edges just a smidge (but who doesn’t like a little bit of crunch, right?).
Honestly, since that day, I’ve tweaked this recipe and poured my heart into it over the years. Friends come over, and I know I have to serve my mac and cheese when they need cheering up or are simply over to share stories and laughter—because who doesn’t feel better with a forkful of gooey, cheesy pasta? It bridges connections, fills empty bellies, and warms hearts. Plus, let’s face it, the creamy cheese sauce is worth a few pants that feel a little too tight afterward.
So, grab your apron, and let’s dive into making some serious comfort food magic happen with this extra creamy classic mac and cheese!
What Goes Into Extra Creamy Classic Mac and Cheese?
Let’s take a closer look at those ingredients. Each one adds a little something special, and I promise they’re all worth it.
Elbow macaroni: This is the star of the show! You can use any pasta, really, but for me, nothing beats that classic elbow shape. It holds onto the cheese sauce, and there’s something about the texture that just feels right. Plus, it reminds me of the mac and cheese I had as a kid—maybe that’s why I stick to it like glue.
Cheddar cheese: For the love of all things cheesy, you want to get yourself some good sharp cheddar. I’ve learned that the more robust the cheese, the better the flavor. I usually go for a mix of sharp and mild cheeses to get that perfect balance! The sharpness melts beautifully into the sauce, while the mild helps keep things creamy and smooth.
Milk: Whole milk is my go-to. I’ll say it with no regrets. Yeah, you could get fancy with half-and-half or cream, but honestly, whole milk gives just the right creaminess. It thickens the sauce just so, and your taste buds won’t complain.
Butter: Because butter makes everything better, right? I use unsalted butter to control the saltiness in the dish—no one wants an overly salty mac and cheese! You’ll need it for both the roux and the topping, so don’t skimp here.
Flour: A splendid sidekick to our butter! I use all-purpose flour because it creates the perfect roux (that fancy term for a mix of fat and flour that thickens sauces). Don’t be nervous about making the roux; it’s just a matter of cooking the flour and butter together!
Mustard powder: Here’s the thing—adding a touch of mustard powder elevates the flavor of the cheese without tasting like mustard. It’s a little secret ingredient of mine that amps up the taste and gives some depth to the dish. Trust me on this one!
Salt and pepper: Just the basics here. I usually go with a good pinch of salt, but I tend to keep things subjective. You know how it goes—taste as you go! I love a generous sprinkle of black pepper too, adding that unexpected little kick.
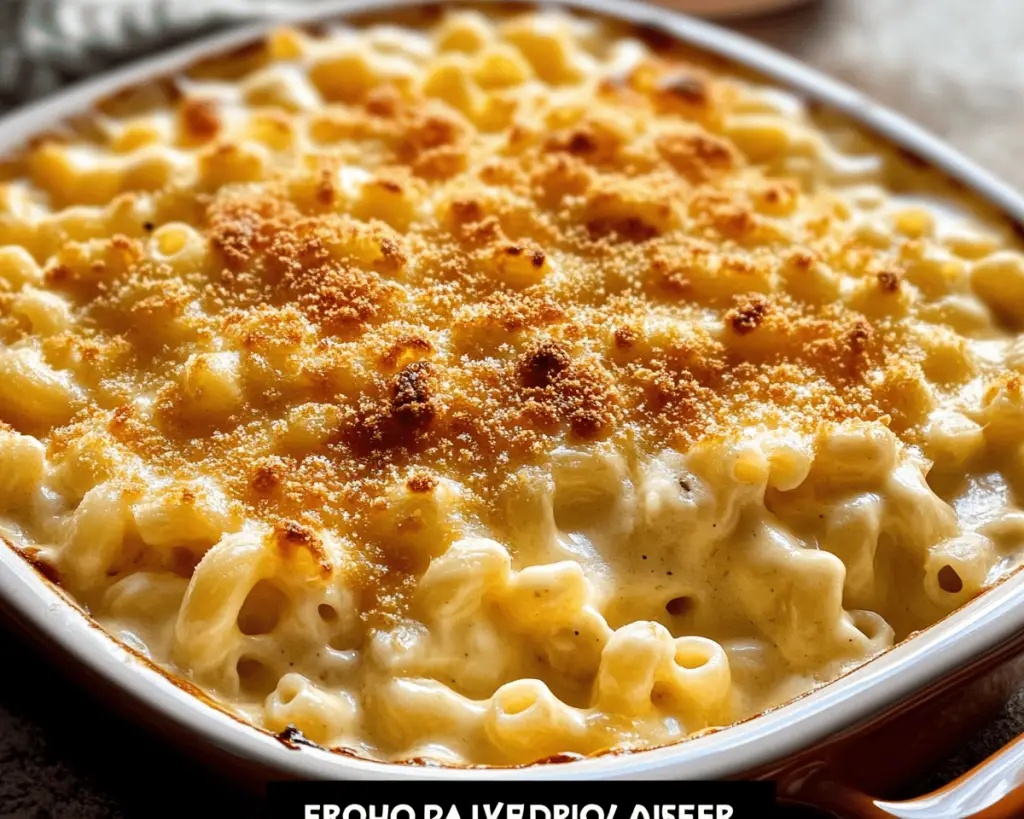
Bread crumbs: I can’t resist a crunchy topping! Tossed with a bit of melted butter, they add that satisfying crunch when you take a scoop. You could even use panko or crushed crackers if you want to switch things up.
Oof! Doesn’t that sound like a hug in every bite? Now let’s get onto the health aspect.
Is Extra Creamy Classic Mac and Cheese Actually Good for You?
Now, I’ll be real with you—this ain’t a salad, and I’m not about to pretend it is. Mac and cheese is one of those glorious indulgences that we all deserve, especially after a long week. But here’s where that honesty comes in: it’s okay to embrace a dish that’s not exactly “light” by health standards.
That being said, it does have its good moments too. The **cheddar cheese** provides some protein and calcium, while **milk** adds more nutrients to the game. The carbs from the **elbow macaroni** give you that energy boost for the day. I mean, we can find a bit of goodness tucked away amid the richness, right? It’s all about moderation and savoring each creamy bite!
If you’re looking to lighten it up a smidge, you can swap in whole grain pasta or add some veggies—like broccoli or peas—into the mix for some added nutrients and color.
Here’s What You’ll Need
– **2 cups elbow macaroni** (about 8 oz.)
– **2 cups sharp cheddar cheese**, shredded
– **1 cup mild cheddar cheese**, shredded
– **1.5 cups whole milk**
– **4 tablespoons unsalted butter**
– **¼ cup all-purpose flour**
– **1 teaspoon mustard powder**
– **Salt and pepper to taste**
– **1 cup bread crumbs** (for the topping)
– **2 tablespoons melted butter** (for the topping)
Let’s get cookin’!
How to Make Extra Creamy Classic Mac and Cheese Step-by-Step
1. **Cook the Pasta:** Bring a pot of salted water to a boil and throw in the macaroni. Cook it according to the package instructions until it’s al dente. Don’t overcook it, or it’ll get mushy in the oven later. This is one of those “trust your instincts” moments. Once it’s ready, drain it and set it aside.
2. **Make the Roux:** In a large saucepan over medium heat, melt the **4 tablespoons of butter**. Once it’s bubbly and a little foamy (the good kind), sprinkle in the **¼ cup of flour**. Whisk it up for about 2-3 minutes until it turns a lovely golden color. You want to cook out that raw flour taste but don’t burn it—keep an eye on the color!
3. **Add the Milk:** Slowly pour in the **1.5 cups of whole milk**, whisking constantly. This will thicken up and turn creamy before your eyes. Keep stirring until it starts to bubble and thicken, a few more minutes.
4. **Cheesy Goodness:** Once it’s thickened, toss in your **2 cups of sharp cheddar** and **1 cup of mild cheddar**. Stir until it’s all melted and silky. Then add in that **1 teaspoon of mustard powder**, and season generously with salt and pepper. Give it a taste and adjust these seasonings to your liking.
5. **Combine with Pasta:** Gently fold the cooked macaroni back into the cheese sauce. I love using a spatula for this—it gives you that nice folding motion without breaking up the pasta. Much like making peace with an old friend.
6. **Transfer to a Baking Dish:** Pour everything into a greased 9×13 baking dish (or whatever you have on hand). Spread it around and even it out, ensuring every nook and cranny is covered in that gooey goodness.
7. **Butter the Breadcrumbs:** In a small bowl, mix your **1 cup of bread crumbs** with **2 tablespoons of melted butter**. This is where the magic happens! Sprinkle those crumbs over the top of the mac. It’s like giving your dish a cozy blanket.
8. **Bake It:** Pop it into a preheated oven at 350°F (175°C) for about 25-30 minutes. You want the top to be golden and crispy and the cheese underneath to be bubbling. If you want to be slick, put it under the broiler for the last couple of minutes for that extra golden crisp. Just keep an eye on it—you don’t want a burnt offering!
9. **Let It Rest:** Once it’s out of the oven and smelling divine, let it sit for about 5-10 minutes. I know this is tough—your heart might want to dive straight in—but giving it that rest allows the cheese to firm up a little, making it easier to serve.
10. **Serve & Enjoy:** Dish it up and prepare for happiness. Trust me; this is going to make your day. Serve with a sprinkle of fresh parsley for a pop of color if you’re feeling fancy!
Little Extras I’ve Learned Along the Way
– **Cheese Variety:** Don’t limit yourself to just cheddar! Try adding some Gruyère or Monterey Jack if you’re feeling adventurous. Some folks even swear by a smidgen of blue cheese for a funky twist!
– **Add-Ins:** Wanna jazz it up? Throw in some crispy bacon, sautéed onions, or roasted veggies. You could even add fresh herbs like thyme or chives. The options are endless!
– **Best Leftovers:** If you happen to have leftovers (a rarity in my house!), they can be stored in an airtight container in the fridge for up to 3 days. Just reheat and maybe add a splash of milk to loosen up the sauce—trust me on this one!
– **Freezing Tips:** If you want to prep ahead, this recipe freezes surprisingly well. Just ditch the breadcrumbs initially and package it in a freezer-safe dish. When you’re ready to bake it, thaw in the fridge overnight, add the topping, and then bake!
This one means a lot to me. Seriously, mac and cheese is like a hug in a bowl, and I’ve poured so much love into perfecting this recipe for those rainy days, cozy nights, or just when you need something delicious and comforting. Put on some comfy pajamas, grab a spoon, and dig in! I’d love to hear your twists and turns with the recipe. Let me know if you try it—I can’t wait to hear how it goes!


