### Prep Time
10 minutes
### Cook Time
0 minutes
### Total Time
10 minutes
### Servings
About 1 cup
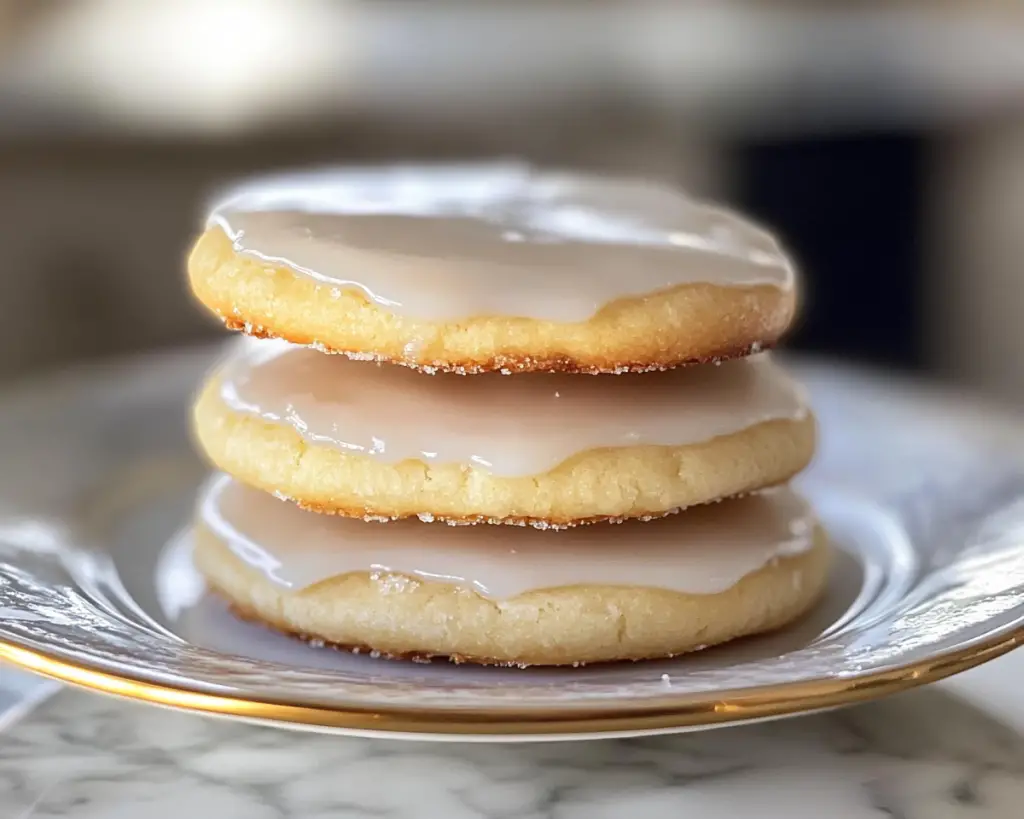
Glace icing, also known as sugar cookie icing, is a delightful and versatile topping that transforms ordinary cookies into extraordinary treats. Whether you’re preparing for a holiday gathering, a birthday party, or simply indulging in some homemade sweets, this icing is the key to elevating your creations. It’s shiny, smooth, and can be tinted with colors or flavored with extracts to suit any occasion.
In this article, you’ll learn how to make easy glace icing, its unique characteristics, tips for achieving the perfect consistency, how to store it, and variations to explore. This simple recipe is perfect for beginners and experienced bakers alike.
## What Is Easy Glace Icing?
Glace icing is a quick-f drying icing made primarily from powdered sugar and water, and it’s famously known for its smooth, glossy finish. Originating from classic French patisserie, this type of icing is often used to coat sugar cookies, giving them a professional look that is hard to resist.
The texture of glace icing is smooth and somewhat thin, allowing it to flow over the surface of cookies while still hardening to hold its shape once set. This makes it perfect for outlining designs or flooding cookies for a polished appearance. You can experiment with different flavors and colors, making it a truly customizable topping that suits any cookie theme or occasion, encouraging creativity in the kitchen.
## Why You’ll Love This Easy Glace Icing
There are countless reasons to adore easy glace icing! First, its **simple ingredients** mean you likely have everything you need in your kitchen already: just powdered sugar, water, and optional food coloring or flavoring. The ease of its preparation—simply whisking everything together—makes it a go-to for both seasoned bakers and those new to baking.
Additionally, glace icing is incredibly versatile. You can adjust its consistency by adding more or less liquid, allowing for both detailing work and covering large surfaces seamlessly. It dries quickly to a lovely sheen, giving your cookies a professional touch. Imagine how delightful it is to see your sugary creations come to life with a straightforward icing that appears complicated but is, in fact, quite easy to master!
Moreover, it’s a fantastic way to involve children in baking; they’ll have fun decorating cookies while learning about measurements and mixing. Plus, you’ll be amazed at how easily the icing takes on vibrant colors, making each batch unique and exciting.
## Ingredients You’ll Need
To make easy glace icing, you’ll need the following ingredients:
– **2 cups powdered sugar**: This is the base of your icing, providing sweetness and structure. If you’re out of powdered sugar, you can make your own by blending granulated sugar in a blender until fine.
– **2-4 tablespoons water**: Water helps achieve your desired consistency. Use less if you want a thicker icing for outlining, and more for a thinner icing suitable for flooding.
– **Optional food coloring**: Gel or liquid food coloring can be added for vibrant hues. A few drops will go a long way, so add gradually.
– **Optional flavoring**: Vanilla extract or almond extract can add an extra depth of flavor. Using pure extracts is best for a more authentic taste.
## How to Make Easy Glace Icing
### Step 1: Gather Your Ingredients
Start by gathering your ingredients. Ensure you have your powdered sugar measured out and sifted to avoid any lumps. The sifting process is essential, as it will help create a smooth icing. Place a mixing bowl on your counter for easy access.
### Step 2: Mix the Icing
In the mixing bowl, add the powdered sugar first. Then, carefully pour in 2 tablespoons of water. Using a whisk or a spatula, start mixing the two together. You’ll notice a thick paste forming initially; don’t worry, that’s expected.
### Step 3: Adjust the Consistency
Continue to mix and see how the consistency looks. If the icing is too thick for your liking (it should drip off a spoon), gradually add more water, one tablespoon at a time. Keep mixing until you achieve your desired consistency—slightly fluid but able to hold its shape without running off the edge of the cookies.
### Step 4: Add Color and Flavor
If you’d like to tint your icing, now is the time! Divide the icing into bowls if you’re making different colors. Add a drop or two of food coloring and mix until evenly combined. Similarly, if you want to flavor the icing, add a drop of your chosen extract at this stage. Remember to taste and adjust accordingly.
### Step 5: Decorate Your Cookies
Once your icing is ready, it’s time to start decorating your cookies! Use a piping bag or a simple technique where you cut the tip off a ziplock bag to create a makeshift piping bag. For flooding, pour the icing directly to coat the cookie and use a toothpick to help spread it evenly. For outlining, allow the flooded icing to set for about 30 minutes before piping on additional designs.
### Step 6: Let the Cookies Dry
Once decorated, let your cookies sit at room temperature. Depending on the thickness of your icing, it can take anywhere from one to several hours to dry completely. It’s essential to let them dry fully before stacking or packaging them.
## 3 Variations & Substitutions
### 1. Chocolate Glace Icing
To create a luscious chocolate icing, substitute 1/3 cup of the powdered sugar with cocoa powder. This change will deliver a rich chocolate flavor while maintaining all other aspects of the recipe.
### 2. Lemon Glace Icing
For a bright, zesty twist, replace some of the water with fresh lemon juice. The acidity from the lemon will blend beautifully with the sweetness of the sugar while offering a refreshing taste A perfect complement to vanilla or butter cookies.
### 3. Dairy-Free Glace Icing
For those who need a dairy-free option, there is no need to worry! This recipe is already dairy-free as it only requires powdered sugar and water. However, if you’re using flavorings, ensure to choose non-dairy options, such as coconut or almond extracts.
## Common Mistakes to Avoid
Making glace icing is simple, but there are a few common pitfalls you might encounter. One of the most important aspects is to **not rush the drying process**. If you stack or package your cookies before the icing sets completely, they may smudge or stick together, ruining your effort.
Another mistake is using too much water when mixing. If the icing becomes too thin, it won’t hold designs well. Always start with less water and adjust as needed. Finally, avoid humidity when making icing because moisture in the air can affect the icing’s ability to set properly, resulting in a sticky texture.
## Storage, Freezing & Reheating Tips
To store your leftover glace icing, place it in an airtight container at room temperature and use it within a week. If you need to store it for a longer period, you can place it in the refrigerator for up to two weeks, but let it come back to room temperature before using.
Since this icing isn’t initially intended for freezing, it’s not recommended; however, if you plan to freeze your decorated cookies, ensure they are completely dry first. You can layer parchment paper between them to prevent sticking.
When ready to reuse any stored icing, simply stir it until smooth, adding a tiny bit of water if necessary to reach a good consistency.
## Frequently Asked Questions
### Q1: Can I use granulated sugar instead of powdered sugar?
No, granulated sugar will not work for glace icing as it will not dissolve properly and can result in a gritty texture. Powdered sugar is necessary for achieving that smooth finish.
### Q2: How do I achieve a smoother finish on my cookies?
For a smoother finish, ensure that your icing is adequately thinned, and consider using a technique called “flooding,” where you fill in each cookie entirely with icing before adding details.
### Q3: Why is my icing not drying properly?
Humidity is often the culprit when icing doesn’t dry. Keep your cookies in a cool, dry place to promote faster setting. If you’re in a particularly humid environment, consider using a fan to circulate air.
### Q4: Can I flavor nadr tint the icing at the same time?
Yes! You can add flavoring and coloring simultaneously. Just be cautious of the quantity since it can affect the overall texture. Start with small amounts and adjust to taste.
### Q5: How can I clean off leftover icing from equipment?
To clean off icing, start by soaking any utensils or bowls in warm water to help dissolve the sugar. You can then wash them with dish soap, ensuring they’re rinsed well to avoid any stickiness.
## Conclusion
Easy glace icing is a delightful addition to any cookie-making endeavor. With this simple recipe, you’ll develop your technique in no time, leaving your friends and family marveling at your creations. Its shine and exquisite texture will have everyone reaching for seconds.
So go ahead, gather your ingredients, and let your creativity flow! Whether you stick to the classic version or explore flavorful and colorful variations, this glace icing will quickly become a staple in your kitchen. Don’t forget to share your deliciously decorated cookies with loved ones—baking is always better together!
Remember, the joy of baking lies not only in the delicious results but also in the moments shared with family and friends. Happy decorating!