**Prep Time:** 30 minutes
**Cook Time:** 20 minutes
**Total Time:** 50 minutes
**Servings:** 12 rolls
There’s something magical about the aroma of freshly baked dinner rolls wafting through your home. Whether you’re preparing for a family gathering, a holiday feast, or just your weeknight dinner, these homemade dinner rolls will elevate any meal. Soft, fluffy, and slightly sweet, they are the perfect accompaniment to savory dishes or are delightful enough to be enjoyed straight from the oven slathered with butter.
What makes these dinner rolls special is not just their incredible taste but also their ease of preparation. If you’re a beginner in the kitchen or a busy parent looking to provide your family with wholesome comfort foods, this recipe is tailored for you. I’ll walk you through each step and provide tips and variations for you to customize your rolls. Let’s dive into the world of dinner rolls that you will surely crave again and again.
What Are Dinner Rolls?
Dinner rolls are small, soft breads, typically served alongside a main course. They hold a special place in various cuisines worldwide, thanks to their versatility and warm, inviting nature. Traditionally, dinner rolls are made with **flour, yeast, water, and other enriching ingredients** like butter, milk, and sugar. These rolls can be either sweet or savory, depending on the ingredient ratios and additional flavors infused.
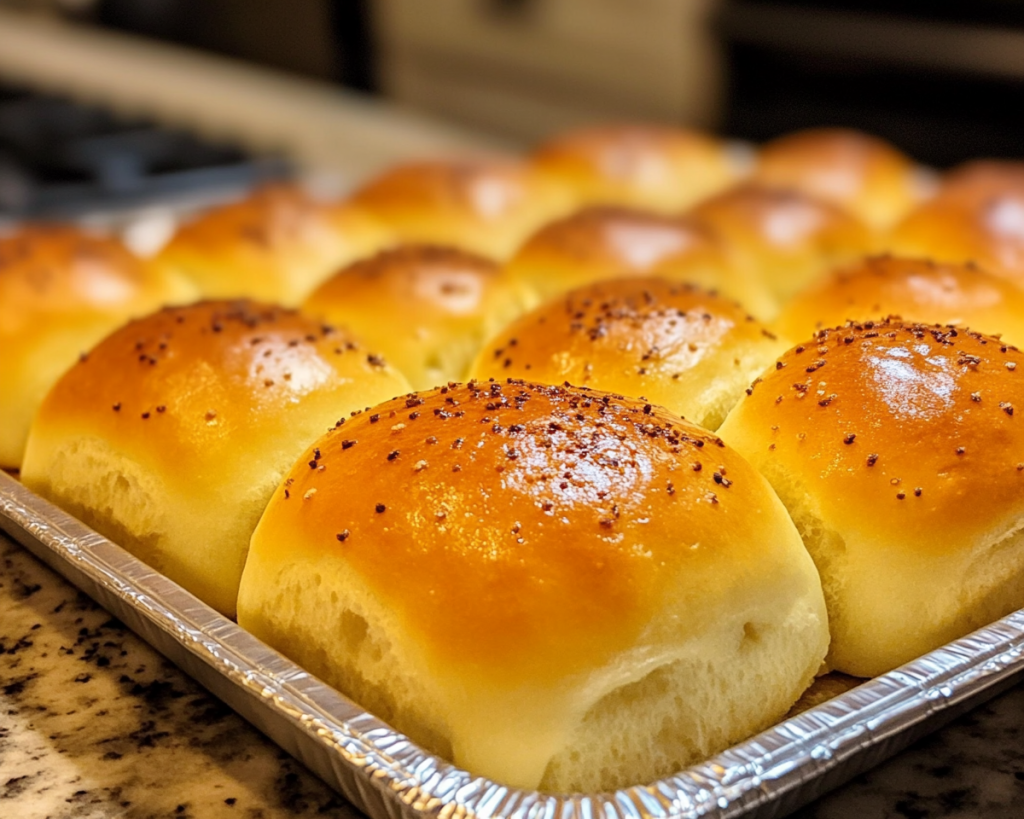
When baked, dinner rolls develop a beautifully golden crust that gives way to an airy, spongy crumb on the inside. The delight of pulling apart a soft roll and revealing its fluffy center is an invitation to enjoy the warm flavor even before taking that first bite. Originating as a way to soak up gravies and sauces from the main course, dinner rolls have become a staple at dinner tables around the globe, from Thanksgiving suppers to weeknight meals.
The beauty of dinner rolls lies not only in their taste and texture but also in their ease of preparation. With just a few simple ingredients and steps, you can create a batch of rolls that will impress your family and friends—no fancy equipment required.
Why You’ll Love These Dinner Rolls
There are several reasons why these dinner rolls will be your new go-to recipe.
1. **Taste:** The rolls have a delicate sweetness that complements savory dishes perfectly. Each bite is light and fluffy, providing a comforting texture that everyone will love.
2. **Ease:** You don’t need to be a professional baker to create perfect dinner rolls. This recipe is straightforward, with simple steps that beginners can easily follow.
3. **Cost-effective:** Making dinner rolls at home is not only fun, but it is also budget-friendly! You can whip up a batch for a fraction of the price of store-bought rolls.
4. **Versatile:** These dinner rolls can be easily customized. You can alter the flavors by adding herbs, cheese, or even garlic!
5. **Healthier Option:** By making your rolls from scratch, you control the ingredients, allowing you to create a healthier side option free from preservatives and additives.
One common misconception is that baking bread requires a lot of skill and time. While it may seem intimidating at first, this recipe ensures success for beginners. Prepare the dough, let it rise, and bake—the process is much simpler than you might imagine!
Ingredients You’ll Need
Here’s what you’ll need to gather to make these delightful dinner rolls:
– **4 cups all-purpose flour:** This provides the structure and body to your rolls. If you want a softer texture, you can use bread flour instead.
– **2 tablespoons granulated sugar:** This sweetens the rolls slightly and aids in browning during baking. You can use honey or maple syrup as substitutions.
– **2 ¼ teaspoons instant yeast:** Essential for the rolls to rise, instant yeast (or rapid rise yeast) works quickly and doesn’t require proofing.
– **1 teaspoon salt:** Enhances flavors in the bread. Make sure to use fine sea salt for even distribution throughout the dough.
– **1 cup warm milk (about 110°F):** This provides moisture and activates yeast. For a dairy-free option, use warm almond or soy milk.
– **4 tablespoons unsalted butter, melted:** Adds richness and a lovely flavor to the dough. For a vegan alternative, you can substitute with olive oil.
– **1 large egg:** Eggs enrich the dough and contribute to the texture. For a vegan version, you can use unsweetened applesauce (¼ cup) or a flax egg made with one tablespoon of ground flaxseed and a tablespoon of water.
Each ingredient plays a crucial role in the final product, so it’s essential to measure accurately for the best results.
How to Make Dinner Rolls
Follow these detailed steps to create your dinner rolls:
1. **Proof the yeast:** In a small bowl, combine warm milk with sugar and yeast. Let it sit for about 5–10 minutes until it becomes frothy. This indicates that your yeast is active. If your mixture doesn’t froth, your yeast may be expired, and you’ll need to start over.
2. **Mix dry ingredients:** In a large mixing bowl, combine 3 cups of flour and salt. Stir to distribute evenly. It’s important to mix your dry ingredients first to ensure the salt doesn’t directly interact with the yeast, which can impede its effectiveness.
3. **Combine wet ingredients:** Once the yeast mixture is frothy, add the melted butter and egg to the bowl. Mix until combined, creating a slightly thick slurry.
4. **Form the dough:** Pour the wet ingredients into the flour mixture. Stir with a wooden spoon until a shaggy dough forms. Gradually add the remaining flour (up to 1 cup) a little at a time, mixing until the dough starts pulling away from the sides of the bowl.
5. **Knead the dough:** Turn the dough onto a floured surface. Knead for about 8-10 minutes until the dough is smooth and elastic. You can check by the “windowpane test,” where you stretch a small piece of dough to see if it forms a thin membrane without tearing. If not, keep kneading!
6. **First rise:** Place the dough in a lightly greased bowl, cover it with a clean kitchen towel or plastic wrap, and let it rise in a warm place for about 1 hour or until doubled in size. This is the essential fermentation phase where the yeast works its magic.
7. **Shape the rolls:** Once the dough has risen, punch it down to release any air pockets. Divide the dough into 12 equal pieces. Shape each piece into a smooth ball by tucking the edges into the center and rolling it. Place the balls seam-side down in a greased 9×13-inch baking dish.
8. **Second rise:** Cover the formed rolls with a towel and let them rise again for about 30 minutes, until they are puffy and touching. This step is crucial for achieving that airy texture we love in dinner rolls.
9. **Preheat the oven:** While rolls are resting, preheat your oven to 375°F (190°C).
10. **Bake:** Once the rolls have finished rising, place them in the oven and bake for 15-20 minutes, or until golden brown. The internal temperature should register about 190°F (88°C).
11. **Cool and serve:** Once baked, remove the rolls from the oven and brush the tops with melted butter for a soft, shiny finish. Let them cool in the pan for a few minutes before serving them warm.
These step-by-step instructions will guide you in the right direction to achieving perfect dinner rolls at home.
5 Variations & Substitutions
These dinner rolls can be customized in numerous ways. Here are some delicious variations and substitutions to try:
1. **Herb & Garlic Rolls:** Add 2 teaspoons of dried herbs (like rosemary or oregano) and 2 minced garlic cloves to the dough for a savory twist. These add a fragrant aroma and a depth of flavor perfect alongside Italian dishes or roasts.
2. **Cheesy Rolls:** For a delightful cheesy bite, incorporate 1 cup of shredded cheese (like cheddar or mozzarella) into the dough during kneading. This addition will create gooey, savory rolls that add richness.
3. **Sweet Cinnamon Rolls:** Before shaping your dough, roll it out and sprinkle ¼ cup of brown sugar and 1 tablespoon of cinnamon on top. Roll it tightly and slice into rounds before placing in the baking dish for sweet, cinnamon goodness.
4. **Whole Wheat Rolls:** Substitute half of the all-purpose flour with whole wheat flour for added nutrition and a slightly nuttier flavor. Be sure to adjust the liquid slightly as whole wheat flour tends to absorb more moisture.
5. **Vegan Dinner Rolls:** Replace the egg with ¼ cup of unsweetened applesauce and the butter with vegetable oil. These substitutions maintain the moisture and structure, making for delicate rolls without dairy or eggs.
Each of these variations brings a unique flavor profile, allowing you to tailor your dinner rolls to fit any meal or occasion.
Common Mistakes to Avoid
Baking can sometimes be tricky, especially if you’re new to it. Here are some common pitfalls to watch out for when making dinner rolls, along with tips to set you up for success:
– **Using expired yeast:** Always check the expiration date of your yeast. If it doesn’t froth during proofing, discard it and start with fresh yeast. This is crucial as expired yeast will not rise, leading to dense rolls.
– **Kneading too little or too much:** Under-kneaded dough won’t develop enough gluten, resulting in flat rolls. On the opposite side, over-kneading can make the rolls dense. Aim for a smooth, elastic dough that springs back when poked.
– **Not letting the dough rise sufficiently:** Pay attention to the dough’s size during the rising times. If the dough hasn’t doubled, be patient—it needs time to develop flavor and texture.
– **Overcrowding the baking dish:** Ensure your rolls are spaced out since they expand while baking. If they’re too close together, they may bake unevenly.
– **Checking for doneness early:** Always trust the baking time indicated in the recipe, but also keep an eye on visual cues. Look for a golden-brown color and listen for a hollow sound when tapping the bottom of the roll.
By following these tips, you can avoid common mistakes and achieve dinner rolls that impress.
Storage, Freezing & Reheating Tips
If you ever have leftovers (which is rare!), here’s how to store them properly:
– **Storage:** Allow the dinner rolls to cool completely before placing them in an airtight container. They will stay fresh for up to 3 days at room temperature.
– **Freezing:** If you want to prepare rolls ahead of time, freeze the unbaked dough balls. To do this, shape the dough into balls and place them on a baking sheet lined with parchment paper. Freeze until solid, then transfer to a freezer bag. They can be stored in the freezer for up to 3 months. When ready to bake, thaw and let them rise before baking as per the original instructions.
– **Reheating:** To refresh your leftover rolls, preheat the oven to 350°F (175°C) and wrap them in aluminum foil to retain moisture. Heat for about 10-15 minutes until warmed through. A microwave can also be used for a quick reheat, though it may result in a slightly chewier texture.
For food safety, always remember to properly cool and store your rolls, preventing any risk of spoilage.
Frequently Asked Questions
1. **Can I use bread flour instead of all-purpose flour?**
Yes, you can use bread flour instead of all-purpose flour. Bread flour has a higher gluten content, which will yield even fluffier rolls. Just use the same quantity as specified in the recipe.
2. **What do I do if my dough is too sticky?**
If your dough feels too sticky, gradually add more flour, one tablespoon at a time, until it reaches the desired consistency. However, be careful not to add too much flour, or your rolls may become dense.
3. **How can I ensure my dinner rolls are soft and fluffy?**
To achieve soft dinner rolls, it is crucial to knead the dough adequately and let it rise until it has doubled in size. Also, brushing the tops with melted butter before and after baking adds moisture and flavor.
4. **Can I prepare the dough ahead of time?**
Yes, you can prepare the dough ahead of time. After the first rise, shape the rolls and place them in a baking dish. Cover and refrigerate overnight. Bring to room temperature for about 30 minutes before baking.
5. **Are dinner rolls gluten-free?**
Yes, you can make gluten-free dinner rolls by using a gluten-free flour blend. Ensure it contains xanthan gum or add it separately to provide structure. Follow the same recipe but check for any additional liquid adjustments.
In conclusion, these homemade dinner rolls are an incredible addition to any meal. They are not only delicious but also simple enough for beginners to tackle. With various customization options, you can adapt the recipe to suit your taste. So why not give these rolls a try? Gather your ingredients, get your hands doughy, and prepare to enjoy the warm, inviting goodness of freshly baked dinner rolls that will have everyone coming back for seconds. Don’t forget to share your creations with family and friends—it’s a delightful way to bring joy and comfort to any meal. Happy baking!