Prep time: 20 minutes
Cook time: 30 minutes
Total time: 50 minutes
Servings: 12
Indulging in a sweet treat can often serve as a delightful escape from a hectic day, but what if I told you that you could enjoy the rich flavors of chocolate and peanut butter combined in one perfect dessert? These Decadent Chocolate Peanut Butter Crunch Brownies are not just any brownie; they are a heavenly creation that combines moist, fudgy chocolate layers with a delightful crunch from peanut butter. Imagine biting into a brownie that melts in your mouth while delivering that familiar, comforting taste of peanut butter; it’s truly a match made in dessert heaven.
This recipe is special not only for its tantalizing flavors but also for how simple it is to whip up, making it perfect for busy parents or anyone who may find themselves short on time yet craving something extraordinary. You’ll learn how to make these brownies from scratch, including tips on achieving the perfect texture and variations to suit different dietary needs or preferences. Are you ready to elevate your dessert game?
What Is Decadent Chocolate Peanut Butter Crunch Brownies?
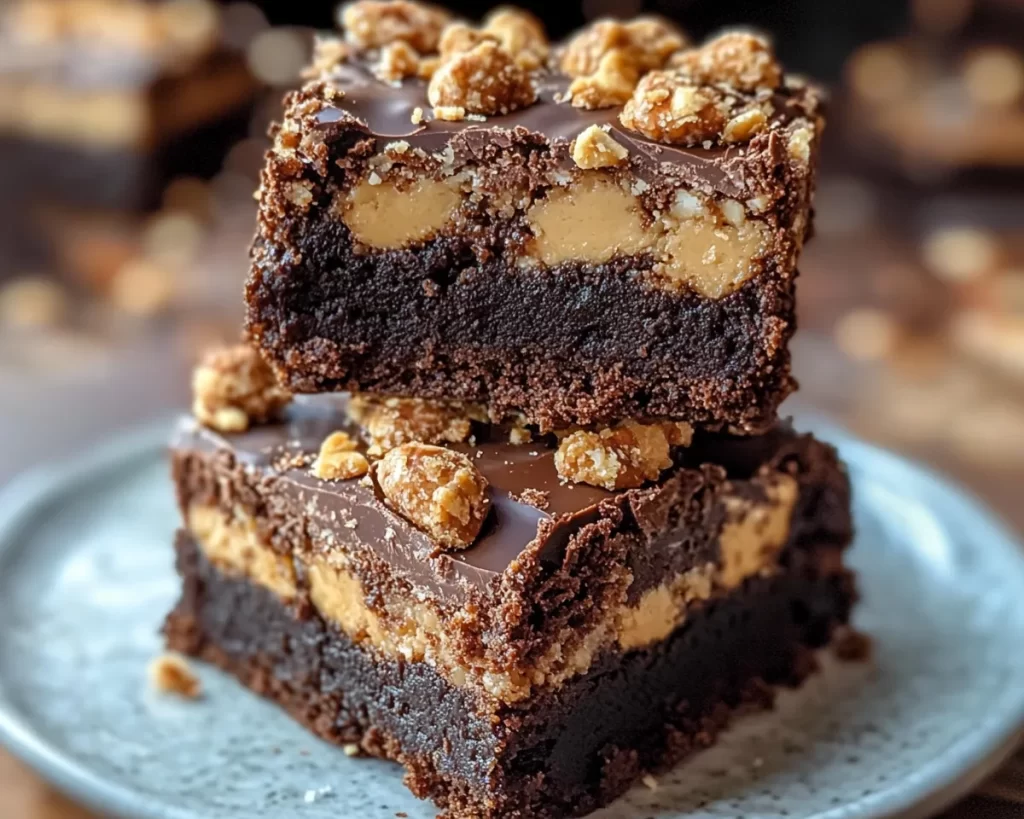
Decadent Chocolate Peanut Butter Crunch Brownies are a unique dessert that delivers unforgettable taste and texture. Originating from the classic brownie recipe, these brownies incorporate rich chocolate with a luscious peanut butter layer, topped with a crunchy layer that adds delightful texture. The incorporation of the peanut butter transforms the simple brownie into a *satisfying indulgence*, making it a favorite among chocolate lovers and peanut butter enthusiasts alike.
The beauty of these brownies is their layered composition. The bottom layer consists of a rich, fudgy brownie base made with high-quality cocoa and chocolate. The middle layer features a creamy peanut butter mixture, which is both sweet and salty, creating a balanced flavor profile that excites the palate. The top layer adds a delightful crunch, often achieved by incorporating crushed graham crackers or nuts, providing that essential texture contrast. Together, these elements create a dessert that is not only visually appealing but also brings a *symphony of flavors* to your taste buds.
When you bite into these brownies, you experience the rich chocolate melting in your mouth, complemented by the creamy peanut butter that practically dances on your tongue. The crunch on top adds a satisfying bite to each piece, making them feel very indulgent yet comforting. Often baked during family gatherings, special occasions, or just as a personal treat after a long day, these brownies resonate deeply with those who appreciate the simple pleasures of life—especially when it comes to dessert.
Why You’ll Love This
There are many reasons to fall in love with Decadent Chocolate Peanut Butter Crunch Brownies. For starters, they are incredibly delicious. Each bite encapsulates a *rich chocolate flavor* that is complemented harmoniously by the creamy peanut butter layer. This combination provides a taste experience that is both nostalgic and utterly satisfying. When entertaining guests or family, serving these brownies becomes a definitive crowd-pleaser, as they appeal to both children and adults alike.
In terms of ease of preparation, you will appreciate that this recipe requires just a few straightforward steps and common ingredients. Even if you’re a beginner in the kitchen, you will find that following these instructions will yield irresistible results. You can make them in one bowl, reducing cleanup time and allowing you to enjoy these delightful brownies sooner. The simplicity of the process encourages trial and error, so you can experiment without the fear of failure.
Cost-wise, the ingredients are accessible and budget-friendly, often found in your pantry. This makes the recipe perfect for those who are mindful of their spending while still wanting to indulge in delicious treats. Each brownie also packs a punch in terms of satisfaction, meaning a small piece can go a long way in curbing cravings without overindulging.
Lastly, these brownies are highly versatile. You can enhance them or modify them according to various dietary needs. Whether you want to make a gluten-free version by substituting regular flour for almond or coconut flour or you are interested in reducing sugar, there are plenty of options and variations available. The ability to adapt this recipe to suit your taste or health requirements is a fantastic way to get the most out of your baking endeavors.
Ingredients You’ll Need
- Unsalted butter: The base of any good brownie, unsalted butter brings richness and moisture. You can substitute it with coconut oil for a dairy-free version.
- Granulated sugar: Key to sweetening the brownies, this sugar creates a beautiful balance with the cocoa. Brown sugar can also be utilized for deeper flavor.
- Brown sugar: Adds a caramel note that complements chocolate well. If unavailable, granulated sugar can be substituted, but the taste will differ slightly.
- Eggs: Eggs are essential for binding the ingredients together. For a vegan version, you can substitute with flax eggs or aquafaba.
- Cocoa powder: A must for chocolate flavor. Use high-quality cocoa powder for the best taste. Dutch-processed cocoa can be used, but it will alter the flavor slightly.
- All-purpose flour: Provides structure to the brownies. If you prefer gluten-free, almond or oat flour work well as alternatives.
- Salt: A pinch enhances all the flavors and balances the sweetness. It’s crucial; don’t skip it!
- Vanilla extract: Adds a wonderful aroma and sweetness. You may use almond extract for a twist on the flavor profile.
- Peanut butter: A star ingredient, creamy or crunchy peanut butter can be used. For a nut-free version, opt for sun butter.
- Crushed nuts or graham crackers: This provides the crunch. Use pecans, walnuts, or crushed graham crackers for a textural finish.
How to Make
- Preheat your oven to 350°F (175°C) and grease a 9×13 inch baking pan. This step ensures that your brownies will come out smoothly without sticking. You can also line the pan with parchment paper for easy removal.
- In a medium saucepan over low heat, melt the unsalted butter along with the granulated sugar and brown sugar, stirring frequently. Keep an eye on it to prevent the sugars from caramelizing too much. You want a smooth mixture that is warm to the touch.
- Once the mixture is smooth, remove it from the heat and allow it to cool slightly. Then add in the eggs, one at a time, mixing well after each addition. The mixture will become glossy, showing you that you’re on the right track.
- Next, stir in the vanilla extract and cocoa powder. Mix until thoroughly combined, and then gently fold in the all-purpose flour and salt. Be mindful not to overmix; a few lumps are perfectly fine. You want to maintain that fudgy texture!
- Pour half of the brownie batter into the prepared baking pan, spreading it evenly. This forms the base layer for your brownies. Use a spatula to smooth it out, ensuring an even distribution.
- In a separate bowl, mix together the peanut butter and optional confectioner’s sugar to sweeten it if desired. Spread this peanut butter layer evenly over the brownie base. The contrast of the rich chocolate and creamy peanut butter will be divine.
- Pour the remaining brownie batter over the peanut butter layer, spreading it carefully to cover. Do not worry if a little peanut butter shows through; it will create a lovely marbled effect!
- For added crunch, sprinkle the crushed nuts or graham crackers on top of the brownie layer. This provides a delightful contrast in texture that truly elevates the experience.
- Bake in the preheated oven for 30 minutes. The brownies are done when a toothpick inserted into the center comes out with a few moist crumbs, indicating that they retain that fudgy center we all adore.
- Allow the brownies to cool in the pan for at least 15-20 minutes before cutting into squares. This cooling period is essential; it helps them set up ultimately, making it easier to achieve clean cuts.
Variations & Substitutions
Gluten-Free Brownies: For those who are gluten intolerant or aiming to reduce gluten in their diet, you can easily adapt this recipe by using gluten-free flour blends. Almond flour or coconut flour can also be substituted, though adjustments to liquid may be needed due to the different absorption properties of these flours. Keep an eye on the texture; gluten-free brownies can sometimes be drier, so incorporating a little extra butter or egg can help maintain moisture.
Nut-Free Options: If you or someone you know has a nut allergy, fear not! The *chocolate peanut butter layer* can be replaced with sunflower seed butter or any nut-free spread. Additionally, ensure that any mix-ins or toppings don’t contain nuts, and you’ll have a deliciously safe treat for everyone to enjoy.
Vegan Brownies: To make these brownies vegan, substitute eggs with flaxseed or chia seeds, using one tablespoon of ground seeds mixed with three tablespoons of water per egg. Also, ensure that the butter is swapped for a plant-based alternative. Asking for vegan chocolate chips or cocoa, check the labels, as some chocolates contain milk. These modifications still yield a fudgy brownie that everyone will love, regardless of dietary restrictions.
Chocolate Peanut Butter Swirl Brownies: For an artistic presentation, consider creating a *swirl effect* by dolloping the peanut butter mixture on top of the brownie batter before baking. Using a toothpick or knife, swirl the two mixtures together for a visually stunning effect that also provides delightful flavor twists. This method can be particularly appealing to kids or anyone who enjoys a fun interactive dessert!
Common Mistakes to Avoid
One common mistake when making brownies is overmixing the batter. Overmixing can lead to *caky brownies* instead of the desired fudgy texture. Mixing just until combined is key; don’t worry about small lumps. Another frequent error is underestimating the cooling time. If you cut the brownies while they are still warm, they may fall apart. Giving them adequate cooling time allows them to set properly, making it easier to serve.
Make sure you also adjust your baking time based on the oven used. Ovens can vary greatly in temperature accuracy, so always check your brownies a few minutes before they are due. When the toothpick tests come out with moist crumbs, they are ready. Finally, be mindful of ingredient substitutions; while improvising can lead to delicious variations, it can also alter the texture or flavor significantly. Always choose substitutes that complement the original recipe.
Storage, Freezing & Reheating Tips
To store your Decadent Chocolate Peanut Butter Crunch Brownies, allow them to cool completely, then transfer them to an airtight container. They can be stored at room temperature for about 3-4 days. For longer storage, refrigerate for up to a week for optimal freshness. If you want to keep them longer, consider freezing them. Cut the brownies into squares and wrap them individually in plastic wrap before placing them in a zip-top bag. These can be frozen for up to three months!
When it’s time to enjoy, simply remove the desired number of brownies from the freezer and let them thaw at room temperature for about 30 minutes. Alternatively, you can heat them up in the microwave for about 10-15 seconds for a *warm, melty treat*. Just be cautious, as over-microwaving can lead to tough texture. Keeping food safety in mind, never leave the brownies out at room temperature for extended periods to prevent spoilage.
Frequently Asked Questions
Can I use natural peanut butter instead of regular peanut butter?
Yes, you can definitely use natural peanut butter for this recipe! However, natural peanut butter tends to be a bit runnier than conventional peanut butter due to the absence of stabilizers. You may want to adjust the amount slightly or chill it in the fridge beforehand to help it firm up. This will help it retain its shape within the brownie layers, ensuring that you have that delightful peanut butter flavor without making the brownies overly gooey.
How do I know when my brownies are done?
A foolproof way to check for doneness is to use the toothpick test. Insert a toothpick into the center of the brownies—if it comes out with a few moist crumbs, they are ready. If it comes out completely clean, you may have overbaked them, leading to a drier texture. Remember that they will continue to cook a little after you remove them from the oven due to residual heat, so it’s better to err on the side of underbaking.
What can I substitute for eggs in this recipe?
If you’re looking to make these brownies egg-free, you can use flax eggs or chia seeds as a wonderful substitute. To make one flax egg, mix one tablespoon of ground flaxseed with three tablespoons of water and let it sit for about 10-15 minutes until it becomes gel-like. This not only binds the ingredients but also introduces some healthy omega-3s!
Can I make these brownies ahead of time?
Absolutely! These brownies are a great make-ahead dessert. You can bake them up to a day or two in advance, store them in an airtight container, and pop them in the fridge. They tend to taste even better after allowing the flavors to meld together for a bit. Just allow them to come to room temperature before serving them to get that perfect fudgy texture back.
What can I add to enhance the flavor?
Feel free to get creative with mix-ins and toppings! You can add chocolate chips, nuts, or even a sprinkle of sea salt on top for a sweet and salty flavor burst. Drizzling melted chocolate or peanut butter swirls over the top before serving can elevate the presentation and taste even further. Experimenting with additional flavors, like orange zest or espresso powder, can also provide that extra flavor kick!
Conclusion:
These Decadent Chocolate Peanut Butter Crunch Brownies are not just a sweet treat; they are a delightful ensemble of textures and flavors that are sure to please any crowd. Their simplicity and versatility make them a go-to option for busy lives while also satisfying sweet cravings in a fulfilling way. I encourage you to try this recipe, customize it to your preferences, and share it with friends and family. Embrace the joy of baking and create lasting memories around the dining table with each delicious piece. Your journey in the kitchen just got a whole lot sweeter!