Prep time: 15 minutes
Cook time: 10 minutes
Total time: 25 minutes
Servings: 24 cookies
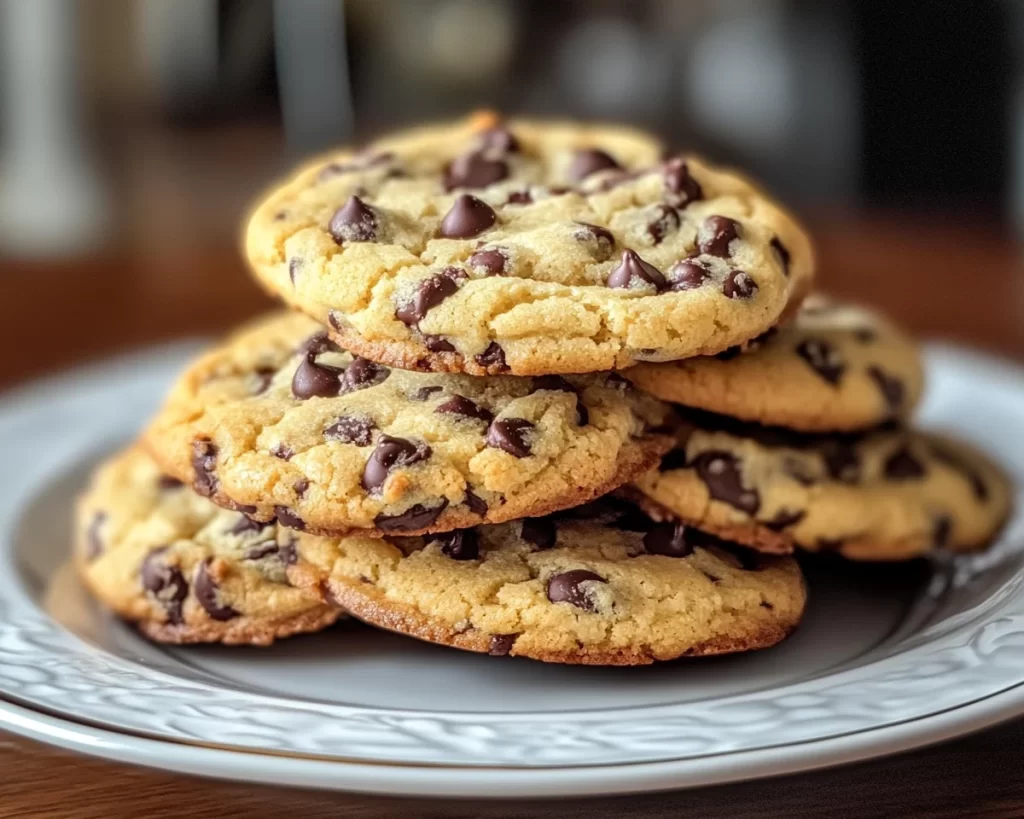
There’s something incredibly comforting about the aroma of fresh cookies wafting through your home, isn’t there? Imagine pulling a tray of soft, chewy CRK Cookies with Chocolate Chips out of the oven, their edges perfectly golden but the centers irresistibly gooey. This recipe holds a special place in the hearts of many because it combines simplicity with pure indulgence. It’s not just about baking; it’s about creating memories — weekends spent with family, back-to-school treats for kids, or even those late-night cravings that call out for something warm and sweet.
In this article, you will learn how to make CRK Cookies with Chocolate Chips that will leave your taste buds dancing. We’ll dive into the details — from the ingredients that make these cookies uniquely chewy to step-by-step instructions that even beginners can follow. You’ll find tips, variations for special diets, and common pitfalls to avoid so that you can make these cookies perfectly every time.
What Is CRK Cookies with Chocolate Chips (Soft + Chewy)?
CRK Cookies with Chocolate Chips is a delightful twist on the classic chocolate chip cookie, known for its soft and chewy texture. This recipe features a simple blend of pantry staples like butter, sugar, and flour, yet the magic lies in the technique. Originating from a strong love for cookies that both children and adults enjoy, CRK cookies stand out due to their **moist interior** and **slight crisp on the edges**.
When you bite into a CRK cookie, the **rich flavor of the chocolate kisses your palate**, and the texture remains unwavering — it’s soft yet not too dense. The secret? It’s all about the balance of ingredients and baking time. These cookies are perfect for any occasion, be it a picnic, family gathering, or just a quiet evening with a warm glass of milk. They capture the essence of comfort food while being deceptively easy to make at home.
Why You’ll Love This
You’re going to absolutely love these CRK Cookies with Chocolate Chips for several reasons. First and foremost, the taste is simply out of this world. With a **sweet chocolatey richness** complemented by the dough’s hint of vanilla, one bite is seldom enough. The **soft and chewy texture** is not just a description; it’s a promise that these cookies will melt in your mouth, offering a heavenly experience that aligns perfectly with any sweet cravings.
Additionally, this recipe is incredibly easy to whip up — even for beginners in the kitchen. With just a handful of ingredients and minimal equipment required, you can bring a bakery-quality treat into your home in less than thirty minutes. And let’s not forget about cost-effectiveness; using basic pantry staples means you won’t break the bank while indulgently treating yourself. If you’re looking for a versatile cookie that can easily adapt to your dietary preferences or pantry contents, this recipe has got you covered.
Many novice bakers often worry about achieving the perfect cookie, but the simplicity of this recipe dispels those fears. Just follow the detailed steps, embrace the process, and you will be rewarded with perfectly fluffy cookies every time.
Ingredients You’ll Need
- 1 cup unsalted butter: This contributes to the cookie’s rich flavor and chewiness. You can substitute with a plant-based butter for a dairy-free option.
- 1 cup granulated sugar: Enhances sweetness and aids in creating that delightful chewy texture.
- 1 cup brown sugar: The molasses in brown sugar adds moisture and a deeper flavor. Using light or dark brown sugar will alter the flavor slightly.
- 2 large eggs: They help bind the ingredients and add moisture. For a vegan alternative, use flaxseed meal or applesauce.
- 1 teaspoon vanilla extract: Adds a warm aroma that complements the chocolate perfectly.
- 3 cups all-purpose flour: The main structure of the cookie. Whole wheat flour can be used for a healthier alternative, but it may alter the texture slightly.
- 1 teaspoon baking soda: This is your leavening agent, helping the cookies rise perfectly.
- 1 teaspoon salt: Balances the sweetness and enhances flavor. Don’t skip this; it’s essential.
- 2 cups chocolate chips: The star ingredient for that indulgent chocolatey goodness. Feel free to mix and match with dark, milk, or white chocolate, depending on your preference.
How to Make
- Preheat your oven to 350°F (175°C). This is a crucial step for ensuring that your cookies bake evenly. While the oven heats up, gather all the ingredients on your countertop, so they’re easy to access during the mixing process.
- In a large mixing bowl, combine the softened butter, granulated sugar, and brown sugar. Use an electric mixer or whisk to beat the ingredients together until the mixture becomes light and fluffy, which usually takes about 2-3 minutes. You want to aerate the butter to promote softness in your cookies.
- Add the eggs, one at a time, mixing well after each addition. Then add the vanilla extract. This combination not only helps in blending but also adds a lovely aroma to the dough. Make sure to scrape down the sides of the bowl to incorporate everything thoroughly.
- In a separate bowl, whisk together the all-purpose flour, baking soda, and salt. This step ensures that the leavening agent is evenly distributed, preventing any uneven rising. Gradually add this dry mixture to the wet ingredients, mixing just until combined. Be careful not to overmix; you want a tender cookie.
- Fold in the chocolate chips using a spatula. This is where you can get creative — consider mixing in some nuts for crunch or coconut flakes for tropical flair. Chill the dough in the refrigerator for about 15 minutes; this allows the flavors to meld and helps to prevent the cookies from spreading too much while baking.
- While the dough chills, prepare a baking sheet by lining it with parchment paper. This will prevent sticking and make cleanup easy. Use a cookie scoop or tablespoon to portion the dough onto the prepared baking sheet, leaving about 2 inches of space between each ball to allow for spreading.
- Bake the cookies in the preheated oven for 10-12 minutes. Keep a close eye on them; you want the edges to be golden while the centers remain soft. They will continue to cook slightly once they’re out of the oven, achieving that perfect chewy texture. Allow the cookies to cool on the baking sheet for about 5 minutes before transferring them to a wire rack.
- Once cooled, serve your cookies with a glass of milk or some ice cream for an extra special treat. You can also store them in an airtight container for up to one week, but trust me, they won’t last that long!
Variations & Substitutions
Vegan CRK Cookies: If you’re looking to make these cookies suitable for a vegan diet, simply replace the eggs with flaxseed meal (1 tablespoon of flaxseed meal mixed with 2.5 tablespoons of water for each egg) and use a plant-based butter. The results will be surprisingly similar, keeping the cookie’s soft and chewy characteristic intact.
Gluten-Free CRK Cookies: For a gluten-free version, substitute the all-purpose flour with a 1:1 gluten-free flour blend. You might also consider adding in a teaspoon of xanthan gum to mimic the texture of regular flour. This will keep the cookies chewy while catering to those with gluten sensitivities.
Nutty Chocolate Chip Cookies: If you’re a fan of nuts, consider adding 1 cup of chopped walnuts or pecans to the dough. The nuts introduce a lovely crunch and an earthy flavor that nuances the sweetness of the chocolate chips. Just make sure to chop them finely so they incorporate evenly into the dough.
Double Chocolate CRK Cookies: For chocolate lovers, you can incorporate cocoa powder into the dough by replacing ½ cup of all-purpose flour with unsweetened cocoa powder. This will yield a rich, chocolatey flavor that is sure to impress. Pair this variation with dark chocolate chips for an even deeper chocolate experience.
Stuffed CRK Cookies: Want to elevate your cookie game? Consider stuffing your cookies with mini marshmallows or a piece of caramel. Simply flatten a tablespoon of dough, place your stuffing in the center, and cover it with another tablespoon of dough. This creates a gooey surprise when you bite into the cookie.
Common Mistakes to Avoid
While making CRK Cookies with Chocolate Chips may seem straightforward, there are some pitfalls to be aware of to ensure your baking endeavor is successful. One common mistake is not measuring the flour correctly. Scooping directly from the bag can lead to overpacking, resulting in cookies that are dense instead of soft. Always use a spoon to fill your measuring cup and level it off for accurate measurements.
Another critical point is **not chilling the dough**. This can result in flat cookies if the butter melts too quickly during baking. A quick chill in the refrigerator helps the dough solidify, leading to a thick, chewy cookie. Additionally, avoid overbaking, which can lead to dry cookies. They might look a bit underdone when you remove them from the oven, but they’ll continue to set as they cool.
Storage, Freezing & Reheating Tips
For those delicious CRK Cookies that you cannot finish in one sitting, proper storage is essential for maintaining freshness. Store your cookies in an airtight container at room temperature for up to a week. Adding a slice of bread to the container can help keep the cookies moist; the bread absorbs excess humidity while the cookies retain moisture.
For longer storage, freeze the cookies. Lay them flat on a baking sheet in a single layer until frozen solid, then transfer them to a freezer-safe bag or container with parchment paper between layers to prevent sticking. These cookies can be frozen for up to three months! When you’re ready to enjoy them, simply pop them in the oven at 350°F (175°C) for about 5-10 minutes from frozen.
Reheating leftover cookies also adds to their allure. A quick zap in the microwave for about 10-15 seconds will restore their soft, chewy texture, making them feel freshly baked again.
Frequently Asked Questions
Can I use olive oil instead of butter?
While olive oil can technically be used in cookie recipes, it will change both the flavor and texture. Cookies made with olive oil tend to spread more and lack the rich flavor that butter provides. If you don’t have butter, consider using a neutral oil or a margarine substitute.
What’s the best chocolate to use?
The best chocolate depends on your personal preference. Dark chocolate chips provide a rich and slightly bitter contrast to the sweetness of the cookie, while milk chocolate offers a sweeter, creamier taste. You can even mix different types of chocolate for added complexity in flavor.
Can I add other mix-ins?
Absolutely! Consider mix-ins like dried fruit, coconut, or even spices like cinnamon and nutmeg for a little twist. Just keep in mind that you’ll want to balance any additional sweetness and moisture added with these ingredients.
Why is my cookie dough too sticky?
If your dough is stickier than expected, it could be due to too much moisture in your ingredients, particularly in the butter, or not enough flour. You can simply add a little more flour, a tablespoon at a time, until you achieve the desired consistency.
How can I make my cookies even chewier?
To make your cookies chewier, consider using more brown sugar than granulated sugar or use a higher ratio of egg yolks to egg whites. Another trick is to underbake them slightly — removing them from the oven when they are just set in the center allows for a gooey, chewy texture.
Conclusion:
These CRK Cookies with Chocolate Chips are indeed a treasure that every home cook should try to master. They are not just easy to make, but the results are utterly rewarding. With a few simple ingredients and straightforward instructions, you can create a delightful treat that will be cherished by friends and family. Feel free to customize the recipe according to your taste — whether that means adding in some nuts, trying a gluten-free version, or experimenting with different types of chocolate.
After enjoying this recipe, consider sharing your creations with others or even gifting them as a heartfelt gesture. So, roll up your sleeves and get baking – I promise you won’t regret it!