## Prep Time
10 minutes
## Cook Time
40 minutes
## Total Time
50 minutes
## Servings
4 servings
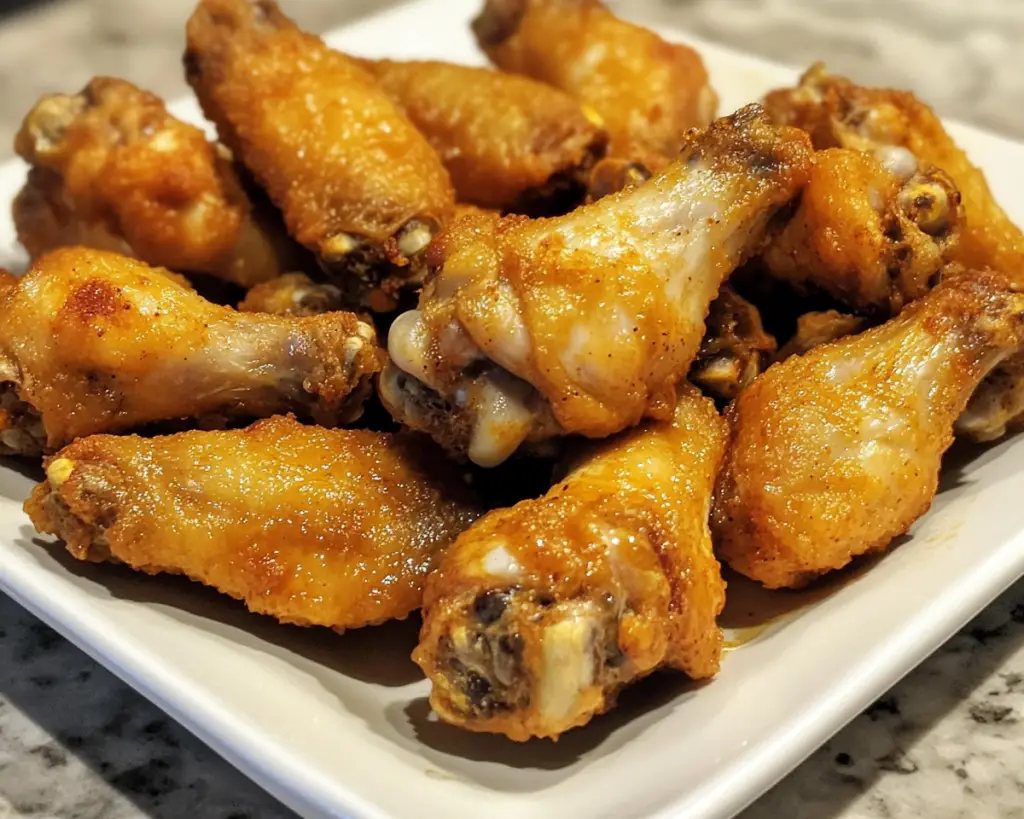
Oven-baked chicken wings are a game day staple that never fails to impress. There’s something magical about crispy chicken wings slathered in your favorite sauce, perfectly seasoned, and just waiting to be dipped. Whether you’re hosting friends for the big game or just enjoying a cozy night in with family, these **Crispy Oven-Baked Chicken Wings** are bound to become a fan favorite.
In this comprehensive guide, you will discover not only the perfect recipe for crispy oven-baked chicken wings but also tips on how to achieve the perfect crunch, variations to suit different tastes, and answers to all your burning questions about preparing chicken wings in the oven.
What Are Crispy Oven-Baked Chicken Wings?
Crispy oven-baked chicken wings are a healthier alternative to the classic deep-fried version but maintain all the deliciousness you expect from this beloved dish. Originating in Buffalo, New York, these wings are seasoned and baked until they develop a beautiful golden-brown color and a satisfying crunch. The secret to the crispy exterior lies in the way they are cooked: a combination of high heat and a baking rack helps render the fat and creates that signature crunch that makes wings so irresistible.
When baked correctly, the wings have a light and crispy texture on the outside, thanks to a simple yet effective technique of patting them dry and using baking powder in the seasoning mix. The juicy, tender meat inside keeps you going back for more, especially when paired with your choice of sauce, from classic buffalo to tangy BBQ or even sweet chili.
Why You’ll Love These Crispy Oven-Baked Chicken Wings
There are numerous reasons to fall in love with these crispy oven-baked chicken wings:
1. **Taste**: With the perfect balance of seasoning and crispiness, these wings deliver robust flavors that can be personalized with your favorite sauce. The versatility in flavors means you can please the palate of everyone in the family or among friends.
2. **Ease**: Baking wings in the oven is incredibly easy compared to frying. You simply prepare the wings, season them, and let the oven do the work. This means you can spend more time enjoying the game and less time hovering over the stove.
3. **Healthier Option**: Oven-baked wings drastically reduce the amount of oil used in cooking, making them a healthier choice than their fried counterparts, without sacrificing taste or texture.
4. **Cost-Effective**: Chicken wings are often one of the more budget-friendly cuts of meat. You can feed a crowd without breaking the bank, making these wings perfect for game day gatherings or casual get-togethers.
5. **Versatility**: The flavor combinations are endless. Whether you prefer them spicy, sweet, or savory, you can easily customize the sauce or dry rub to match your taste.
While many people think cooking wings can be tedious or complicated, these wings are straightforward and foolproof. Let’s dive into the specifics by looking at the ingredients you’ll need.
Ingredients You’ll Need
To prepare these crispy oven-baked chicken wings, gather the following ingredients:
– **2 pounds of chicken wings**: Look for fresh wings instead of frozen for the best texture. If you can find whole wings, buy them and separate the drumsticks and flats yourself; this often saves money.
– **1 tablespoon of baking powder**: This is the key secret ingredient that helps achieve that coveted crispy texture. Make sure you use aluminum-free baking powder for the best results.
– **1 teaspoon of salt**: Enhances the flavor of the wings and aids in drawing moisture out, contributing to that crispiness.
– **½ teaspoon of black pepper**: Adds some heat and depth to the flavor without overpowering the wings.
– **½ teaspoon of garlic powder**: A great addition that brings out the savoriness in the chicken.
– **½ teaspoon of onion powder**: Complements the garlic and enhances the overall taste profile of the wings.
– **1 teaspoon of your favorite sauce (optional)**: Such as hot sauce, BBQ sauce, or any other marinade you prefer to toss them in after baking.
Each ingredient plays its part, not only for flavor but also for achieving that perfect texture. If you have specific dietary preferences or need substitutions, keep reading for creative variations.
How to Make Crispy Oven-Baked Chicken Wings
Follow these step-by-step instructions for the best results:
1. **Preheat the Oven**: Begin by preheating your oven to 425°F (220°C). This high temperature is crucial for achieving that crispy skin.
2. **Prepare the Chicken Wings**: In a large bowl, take the chicken wings and remove any excess moisture. Pat them dry thoroughly with paper towels. Removing moisture helps the skin crisp up during baking. It’s a step you shouldn’t skip.
3. **Season the Wings**: In a separate bowl, mix together the **baking powder**, **salt**, **black pepper**, **garlic powder**, and **onion powder**. Sprinkle this mixture over the wings, ensuring they are evenly coated. You can also toss the wings in the bowl for an even distribution.
4. **Set Up the Baking Sheet**: Line a baking sheet with aluminum foil for easy cleanup. Place a wire rack on top of the baking sheet. This allows air to circulate around the wings for even cooking and reduces the chance of sogginess.
5. **Arrange the Wings**: Lay the seasoned wings in a single layer on the wire rack. Ensure the wings aren’t touching each other; this step is essential for even baking and achieving maximum crispiness.
6. **Bake the Wings**: Place the baking sheet in the preheated oven and bake for about 40 minutes. If you desire extra crispiness, flip the wings halfway through the cooking time to ensure both sides crisp up nicely.
7. **Toss in Sauce (Optional)**: If you prefer sauced wings, remove them from the oven and toss them in your favorite sauce in a large bowl immediately after baking. Return them to the oven for an additional 5–10 minutes if you want the sauce to caramelize slightly.
8. **Serve**: Once the wings are cooked, remove them from the oven and let them rest for a few moments before serving. This gives the juices time to redistribute. Serve them with celery sticks and your favorite dipping sauce, such as ranch or blue cheese.
With these steps, you’ll have golden, crispy wings that will rival any restaurant dish. But if you’re looking for ways to mix things up, let’s explore some delicious variations.
5 Variations & Substitutions
### 1. **Spicy Buffalo Wings**
For a classic buffalo flavor, toss the wings in a mixture of melted butter and hot sauce (such as Frank’s RedHot) after baking. The heat of the sauce combined with the rich flavor of the butter creates the ideal buffalo wing experience. If you like it extra spicy, consider adding cayenne pepper to the baking mix.
### 2. **Honey Garlic Wings**
To make honey garlic wings, create a sauce by combining honey, soy sauce, and minced garlic. Drizzle or toss the cooked wings in this mixture right after baking. This sweet and savory combo will delight those who prefer wings with a hint of sweetness.
### 3. **Teriyaki Wings**
For an Asian twist, prepare a teriyaki sauce using soy sauce, ginger, garlic, and honey. After baking the wings, dip them in the teriyaki sauce to infuse your wings with a mouthwatering flavor. Top with sesame seeds and green onions for added garnish.
### 4. **Lemon Pepper Wings**
Combine lemon zest and cracked black pepper for a simple, zesty twist. Toss the cooked wings in melted butter mixed with lemon zest, black pepper, and a little salt. This variation offers a refreshing alternative while keeping your wings flavorful.
### 5. **BBQ Wings**
For BBQ lovers, after baking, toss the wings with your favorite barbecue sauce, then return them to the oven for another 5–10 minutes. This lets the sauce set and caramelize slightly, adding that smoky depth to every bite.
These variations prove how versatile chicken wings can be. Experimenting with different sauces allows you to cater to everyone’s taste preferences and make the dish your own.
Common Mistakes to Avoid
Even the best cooks can encounter pitfalls when making chicken wings. Here are a few common mistakes and how to avoid them:
1. **Not Drying the Wings**: One common mistake is neglecting to remove moisture from the chicken wings. If the wings are wet, they will steam instead of bake, resulting in a rubbery texture instead of crispy skin. Always ensure they are thoroughly dried before seasoning.
2. **Overcrowding the Baking Sheet**: Another error is placing too many wings on the baking sheet. Overcrowding can lead to uneven cooking and soggy wings. Use multiple trays if needed to ensure they have enough space to crisp up.
3. **Ignoring the Baking Powder**: Baking powder not only helps with crispiness but also aids in browning. Do not skip this essential ingredient, and be sure to use aluminum-free baking powder for best results to avoid any metallic taste.
4. **Under-seasoning**: Many beginner cooks underestimate the power of seasoning. Be generous with your spice mix to enhance the chicken’s flavor. Remember that the skin will absorb some seasoning during cooking.
5. **Skipping the Wire Rack**: Cooking wings directly on the baking sheet can hinder airflow and moisture drainage, leading to less crispy skin. If you want perfectly crisp wings, always use a wire rack.
By avoiding these pitfalls, you ensure your wings will turn out perfectly every time and will be a hit at any gathering.
Storage, Freezing & Reheating Tips
To store leftover chicken wings, begin by letting them cool completely. Place them in an airtight container and refrigerate for up to 3 days. If you want to keep them longer, consider freezing them. To freeze, ensure they are well-wrapped in labeling to avoid freezer burn, and they can last up to 3 months.
When reheating, preheat your oven to 350°F (175°C) and place the wings in a single layer on a baking sheet. Heat for about 10–15 minutes or until heated through and re-crisped. You can also use an air fryer to reheat the wings for a few minutes to restore their crunch.
**Food Safety Best Practices**: Always ensure to refrigerate leftover chicken wings within two hours of cooking to prevent bacterial growth. When defrosting frozen wings, it’s best to do so in the refrigerator overnight rather than at room temperature.
Frequently Asked Questions
**1. Can I use frozen chicken wings for this recipe?**
Using frozen chicken wings is possible, but it is advisable to thaw them first. Thawing ensures even cooking and crispy skin. You can place them in the refrigerator overnight or use the defrost setting on your microwave if you’re short on time.
**2. How can I make the skin extra crispy?**
To ensure extra crispy skin, pat the wings dry completely and use aluminum-free baking powder in your seasoning mix. Additionally, bake them on a wire rack to allow air to circulate around all sides, which prevents steaming.
**3. What dipping sauces go best with these wings?**
Common dipping sauces for chicken wings include ranch dressing, blue cheese dressing, or even a simple mix of sour cream and hot sauce. The options are limitless depending on your flavor preferences.
**4. Can I grill these wings instead of baking them?**
Yes, you can grill the wings instead of baking them for a deliciously smoky flavor. Pre-cook them in the oven for about 20–25 minutes, then transfer them to a preheated grill on medium heat for about 10 minutes for crispiness and flavor infusion.
**5. Are these wings gluten-free?**
This recipe can easily be made gluten-free by ensuring that any sauces or seasonings you use are gluten-free as well as using gluten-free baking powder. Always read labels to be sure.
The culinary charm of these **Crispy Oven-Baked Chicken Wings** lies not only in their crunch and flavor but also in their versatility and ease of preparation. Whether you’re enjoying them while watching the big game or serving them at a barbecue, they are sure to steal the spotlight.
In conclusion, I encourage you to try making these wings yourself. Customize them with different sauces and variations as you see fit. Let your creativity shine and enjoy each delicious bite! Remember to share your experiences and feel free to experiment – the best recipes often come from a little improvisation. Happy cooking!


