Prep time: 15 minutes
Cook time: 25 minutes
Total time: 40 minutes
Servings: 4
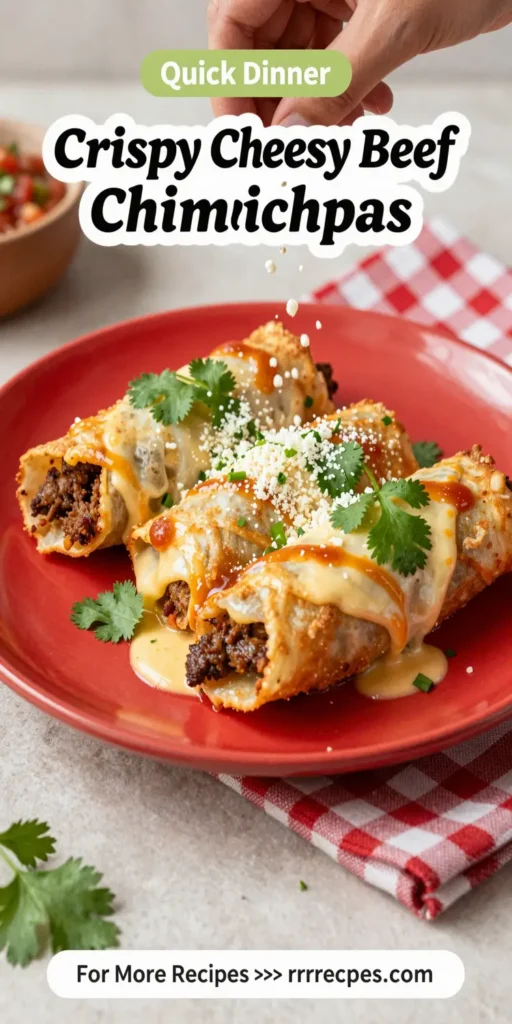
If you’re looking for a delicious, make-ahead meal that packs a flavorful punch, then **Crispy Cheesy Beef Chimichangas** are the perfect choice. Bursting with seasoned ground beef, melty cheese, and fried to a crispy golden brown, these hearty chimichangas are sure to be a family favorite. Not only are they easy to prepare, but they also offer the additional bonus of being a hit at parties or game day gatherings.
What Is Crispy Cheesy Beef Chimichangas?
Crispy Cheesy Beef Chimichangas are deep-fried burritos filled with seasoned ground beef, cheese, beans, and various spices, wrapped in a flour tortilla. The name “chimichanga” is derived from Mexican cuisine, where this dish is commonly served. The crispy exterior contrasts beautifully with the melty cheese and flavorful beef inside.
Why You’ll Love This
These chimichangas are not only delicious but also versatile. They can be easily customized according to your family’s tastes. Plus, they can be made ahead of time and frozen for later, making them ideal for busy weeknights or prepping for a party. The combination of textures—from the crispy outside to the gooey inside—is a delight for your taste buds. You’ll appreciate how this dish caters to your cravings, whether it’s for something hearty or comforting.
Ingredients You’ll Need
- 1 pound ground beef: The star ingredient, packed with flavor, especially when seasoned correctly.
- 1 cup shredded cheddar cheese: Adds that wonderful cheesy essence that makes these chimichangas irresistible.
- ½ cup refried beans: Acts as a binding agent and adds creaminess to the filling.
- 1 tablespoon taco seasoning: Enhances the flavor profile with various spices.
- 8 large flour tortillas: These wrap the delicious filling and facilitate the crispy frying.
- Oil for frying: Essential for achieving that golden, crispy texture we love.

How to Make
- Prepare the beef filling: In a large skillet over medium heat, add the ground beef. Cook until browned, breaking it apart with a spatula. Stir in the taco seasoning and refried beans. Cook for an additional 3-4 minutes until heated through. Ensure the mixture is nicely blended, and the aroma fills your kitchen, setting the stage for what’s to come.
- Assemble the chimichangas: Lay out a tortilla on a flat surface. Spoon about 2-3 tablespoons of the beef mixture into the center of the tortilla. Sprinkle grated cheddar cheese on top. Fold the sides of the tortilla inward, then roll it up tightly from the bottom to the top. This ensures the filling remains inside during frying.
- Heat the oil: In a deep frying pan or a heavy pot, heat about 2 inches of oil to 350°F. Use a thermometer for an accurate reading to ensure a perfectly crispy result. You’ll know it’s ready when you drop a small piece of tortilla in, and it sizzles immediately.
- Fry the chimichangas: Carefully place deep-fried chimichangas in the hot oil, a couple at a time, being cautious not to overcrowd the pan. Fry for 3-4 minutes on each side until the tortillas turn golden and crispy. Make sure to flip them carefully using tongs for even cooking.
- Drain and serve: Once fried, remove the chimichangas with a slotted spoon and transfer them to a plate lined with paper towels to absorb excess oil. Allow them to cool slightly before serving. The crispy exterior and warm filling will provide a delightful first bite.
Variations & Substitutions
Vegetarian Chimichangas: If you want a meatless version, you can substitute the ground beef with black beans, corn, and bell peppers. This hearty mix offers great texture and flavor while keeping it vegetarian-friendly. Season the filling with taco seasoning as usual to keep that bold flavor intact.
Spicy Chicken Chimichangas: Replace the beef with shredded chicken marinated in hot sauce for a spicy kick. The chicken can be pre-cooked and seasoned for an explosion of flavor. This variation is particularly great for those who enjoy a bit of heat.
Cheesy Bean Chimichangas: For a simpler approach, use only cheese and refried beans as the filling. This is excellent for picky eaters or anyone looking for a comforting, less complicated option.
Gluten-free Option: Use gluten-free tortillas instead of regular flour tortillas to accommodate gluten sensitivities. You can replicate the same crispy texture while making it accessible for those with dietary restrictions.
Common Mistakes to Avoid
Overfilling the tortillas: Avoid the urge to pack them too tightly. This can cause them to break during frying, leading to messy chimichangas. Stick to the recommended amount of filling for best results.
Not heating the oil adequately: Insufficiently heated oil can lead to greasy chimichangas rather than the desired crispy texture. Use a thermometer to confirm the oil has reached 350°F before frying.
Skipping the draining step: It’s crucial to drain the chimichangas on paper towels after frying. Failing to do this can leave your dish overly oily, which detracts from the overall taste and texture.
Storage, Freezing & Reheating Tips
To store leftover chimichangas, place them in an airtight container and refrigerate for up to 3 days. For longer storage, consider freezing them before frying. Wrap each chimichanga in plastic wrap, then foil, and freeze for up to 2 months.
When you’re ready to eat, there are two options: you can defrost them in the fridge overnight and fry directly, or bake them from frozen. If baking, preheat your oven to 375°F, place the chimichangas on a baking sheet, and bake for approximately 20-25 minutes or until heated through.
When reheating, check that the center is warm and be careful not to overcook, as this can dry them out. Enjoy your chimichangas!
Frequently Asked Questions
Can I bake chimichangas instead of frying? Yes, you can absolutely bake them for a healthier alternative. Preheat your oven to 375°F, place the chimichangas on a greased baking sheet, and brush the tops with oil for extra crunch. Bake for about 15-20 minutes or until golden and crispy.
Can I make them ahead of time? Yes! These chimichangas are great for meal prep. You can assemble them a day ahead and keep them in the refrigerator. If you want to store them for a longer period, freeze them before frying.
How do I ensure my chimichangas are crispy? Ensure the oil is hot enough before frying. If the oil is too cool, the chimichangas will absorb more oil and become greasy instead of crispy.
What dips go well with chimichangas? Chimichangas are delicious on their own, but they also pair wonderfully with guacamole, salsa, or sour cream. These dips add freshness and a creamy contrast to the crispy exterior.
Can I use different types of cheese? Absolutely! Feel free to mix and match different cheeses. Pepper Jack will add a nice kick, while Monterey Jack offers a smooth texture. Experiment with your favorites for a unique twist on the classic recipe.
Conclusion: Enjoying a homemade batch of **Crispy Cheesy Beef Chimichangas** is not only satisfying but also allows you to customize this beloved dish to fit your taste. Follow the steps outlined, avoid common mistakes, and you’ll create a delightful meal that your family will crave time and time again. Whether for a busy weeknight or a festive gathering, these chimichangas are sure to impress!