Prep time: 30 minutes
Cook time: 25 minutes
Total time: 55 minutes
Servings: 10-12
The aroma of freshly cooked stuffing balls can evoke warm memories of family gatherings and holiday meals. There’s something incredibly comforting about “Cozy Grandma Dot’s Stuffing Balls Recipe.” Each bite is a delightful combination of savory, tender, and slightly crispy textures, transporting you back to simpler times spent around the dinner table. This recipe isn’t just about food; it’s about the love and traditions that come with it. You will learn how to easily prepare these delicious stuffing balls, tips for perfecting your method, and ways to customize them to suit your tastes and dietary preferences.
What Is Cozy Grandma Dot’s Stuffing Balls Recipe?
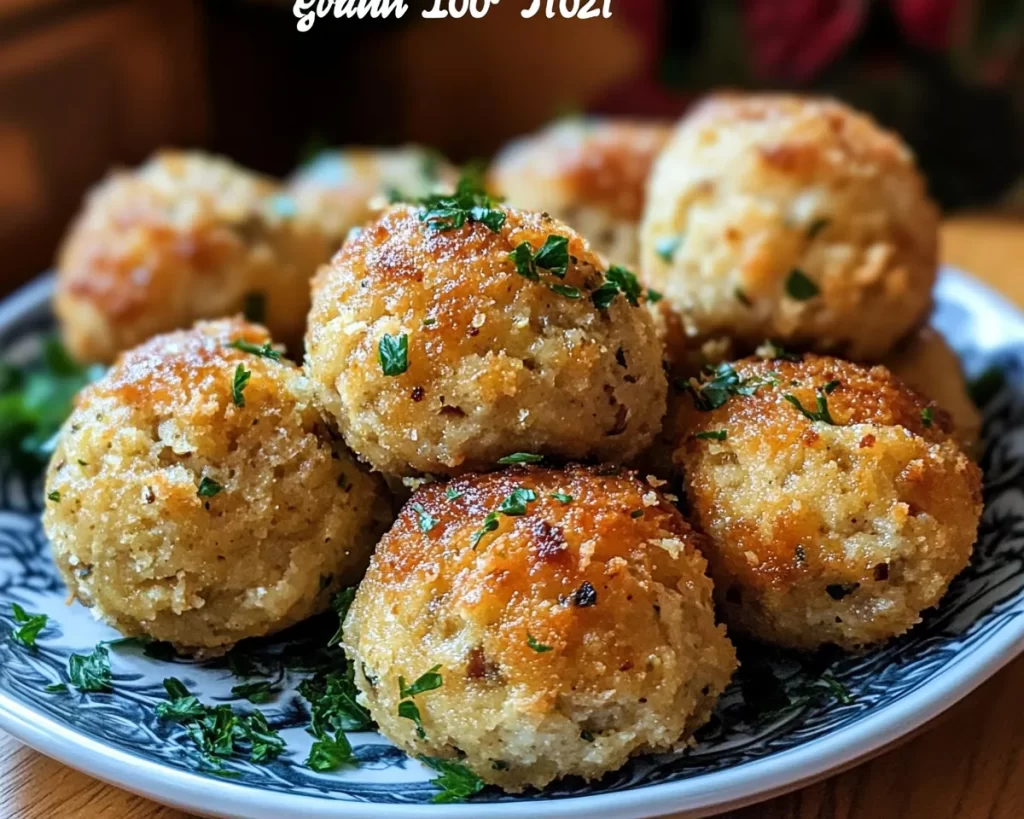
This dish is a cherished family favorite that has been passed down through generations. Originating from traditional holiday meals, stuffing balls are essentially a delightful twist on classic stuffing, transformed into bite-sized, golden-brown balls that are crispy on the outside and soft on the inside. The core flavor profile typically consists of bread, aromatic vegetables, and a medley of spices, making each mouthful a delicious burst of flavor.
The secret to the enticing allure of Grandma Dot’s stuffing balls lies in their texture and flavor. The crunchy exterior gives way to a warm, soft center that absorbs all the savory goodness of broth and spices. This dish is versatile enough to accompany a holiday turkey or stand alone as a snack or appetizer. The satisfying mix of herbs and spices provides a comforting aroma that fills the kitchen, creating an inviting atmosphere for family and friends.
Not only are these stuffing balls easy to make, but they’re also a crowd-pleaser. Whether you’re welcoming guests during the festive season or simply want to enjoy a cozy evening at home, this recipe promises satisfaction and a touch of nostalgia. Savory and herbaceous, they bring a sense of togetherness that makes every meal feel special.
Why You’ll Love This
There are several reasons that elevate Cozy Grandma Dot’s Stuffing Balls to a must-try dish. First and foremost, the **taste** is undeniably unbeatable, blending the savory notes of herbs with the comforting flavor of bread. You may find that they become your go-to recipe for family gatherings, holiday feasts, or just a hearty weeknight meal.
Another highlight is the **ease** of preparation. Even if you’re a beginner in the kitchen, these stuffing balls don’t require advanced cooking skills. With clear steps and easily accessible ingredients, this recipe is designed to guide you successfully from start to finish.
Moreover, this dish is quite **affordable**. Utilizing common pantry staples like bread and seasoning keeps costs low, making it perfect for budget-conscious cooking. Plus, their versatility means they can accommodate various dietary needs, whether you’re looking to adjust them for gluten-free diets or incorporate more vegetables for a healthier twist.
One common misconception surrounding stuffing is that it must exclusively be prepared for special occasions. In actuality, these stuffing balls are perfect any time of year! You can serve them as appetizers, snacks, or even as part of your regular meals. You will soon realize just how many ways this recipe can fit into your culinary repertoire.
Ingredients You’ll Need
To prepare Grandma Dot’s Stuffing Balls, gather the following ingredients:
- 6 cups of cubed bread: A mix of white and whole grain bread works well. This acts as the base, providing structure and texture. You can substitute with gluten-free bread if required.
- 1 cup of vegetable broth: This keeps the stuffing moist. Chicken broth can be used for a richer flavor.
- 2 tablespoons of butter: For sautéing the onions and celery. Using olive oil as a substitute can make this dish vegan-friendly.
- 1 medium onion, chopped: Adds depth and savoriness, but feel free to use shallots for a milder flavor.
- 1 cup of chopped celery: Imparts a lovely crunch and freshness.
- 2 teaspoons of dried sage: A key seasoning that enhances the stuffing’s aroma.
- 1 teaspoon of dried thyme: Complements the sage; you can also use fresh thyme for a more vibrant taste.
- 1 teaspoon of salt: Essential for flavor enhancement; adjust to taste.
- ½ teaspoon of black pepper: Adds a subtle kick; feel free to increase this for more heat.
- 1 egg: Binds the ingredients together. For a vegan version, you can substitute with a flax egg or apple sauce.
Each ingredient plays a pivotal role in creating the ultimate flavor balance, making every bite a memorable experience. Remember to choose quality ingredients for the best results.
How to Make
Now let’s dive into the step-by-step instructions for making these delicious stuffing balls:
- Preheat your oven: Begin by preheating your oven to 375°F (190°C). This ensures that your stuffing balls will cook evenly and develop a beautiful golden crust.
- Sauté the vegetables: In a large skillet, melt the butter over medium heat. Add the chopped onions and celery, sautéing them until they become soft and translucent, about 5-7 minutes. The aroma will fill your kitchen, creating an inviting atmosphere.
- Combine the bread and broth: In a large mixing bowl, combine the cubed bread and vegetable broth. Stir gently to ensure the bread is evenly moistened. The bread should be saturated but not overly soggy; you want it to hold its shape.
- Add seasonings: Sprinkle in the dried sage, thyme, salt, and pepper. Mix well, ensuring that the seasonings are evenly distributed throughout the bread. This is vital for a balanced flavor.
- Incorporate vegetables: Add the sautéed onion and celery to the mixture, folding them in carefully. The combination of textures and flavors will start to come together beautifully at this point.
- Add the egg: Crack the egg into the mixture and stir thoroughly. The egg acts as a binder, keeping the stuffing balls intact during cooking. Ensure everything is well integrated for consistent cooking.
- Shape the mixture: Using your hands, take a scoop of the mixture and form it into balls, roughly the size of a golf ball. This step can get a little messy, but that’s part of the fun!
- Place on a baking sheet: Arrange the formed stuffing balls on a parchment-lined baking sheet, making sure to leave some space between them. This gives them room to expand and promotes even cooking.
- Bake: Place the baking sheet in your preheated oven and bake for 20 to 25 minutes. You want them to be golden brown on the outside and warm on the inside. The waiting time will fill your home with an irresistible aroma.
- Cool and serve: Once done, allow the stuffing balls to cool for a few minutes before serving. This step will help them firm up a little more. Enjoy them warm, and savor every bite!
Making these stuffing balls is not only rewarding but also a great way to bring family together in the kitchen.
Variations & Substitutions
Herbed Stuffing Balls: For a fresher twist on the classic, consider incorporating fresh herbs such as parsley, rosemary, or basil into your mixture. Fresh herbs offer a vibrant flavor and brightness that can elevate the stuffing balls significantly. Aim for about 2 tablespoons of finely chopped fresh herbs, and don’t be afraid to experiment with your favorites. This version is great for anyone wanting to add a touch of gourmet flair or enhance nutritional content.
Cheesy Stuffing Balls: If you’re a fan of cheesy flavors, adding shredded cheese like cheddar or mozzarella can be a game-changer. Just fold in about 1 cup of shredded cheese just before shaping the balls. The cheese will melt beautifully during baking and create a delightful gooey texture inside. This variation is particularly appealing to kids or anyone craving a comfort food indulgence.
Vegetarian Stuffing Balls: To make these stuffing balls suitable for a vegetarian or plant-based diet, everything can remain the same, just ensure the broth used is vegetable-based. You can also add in diced mushrooms for an earthy flavor and hearty texture, enhancing the overall profile of the dish with minimal fuss.
Spiced Stuffing Balls: For a hint of warmth and depth, consider incorporating spices such as cinnamon or nutmeg. Just a pinch of either will add a pleasing complexity to the stuffing balls. This version can transport the dish to a new level of flavor, making it suitable for fall or holiday gatherings!
Common Mistakes to Avoid
While making Cozy Grandma Dot’s Stuffing Balls is typically straightforward, there are a few common pitfalls to be aware of. One critical mistake is using stale bread. Ensure your bread is either fresh or lightly toasted; stale bread can lead to stuffing that is either too soggy or doesn’t bind correctly.
Another common issue is over-saturating the mixture with broth. If it becomes too wet, the stuffing balls may not hold their shape during baking. A good rule of thumb is to add broth gradually, mixing and checking the texture as you go. You want the bread to be moist but not swimming in liquid.
Keep an eye on cooking time as well. Baking them too long can make the outside overly hard while leaving the insides undercooked. Aim for a beautiful golden color and a gentle firmness when they’re ready.
Storage, Freezing & Reheating Tips
If you find yourself with leftovers, these stuffing balls can be stored in the refrigerator for up to four days. Make sure to seal them in an airtight container to maintain freshness. If you want to keep them longer, you can freeze them for up to three months. Simply lay them out on a baking sheet to freeze before transferring them to a freezer bag—this prevents them from sticking together.
When you’re ready to reheat, warm them up in a preheated oven at 350°F (175°C) for about 10-15 minutes. If frozen, they may require a longer time, so check for warmth in the center. Avoid using the microwave if possible, as this may lead to a loss of texture, making them mushy instead of crisply inviting.
Frequently Asked Questions
Can I use different bread types for the stuffing balls?
Absolutely! While white and whole grain bread are classic choices, feel free to experiment with sourdough, rye, or even cornbread for unique flavors. Just ensure that the bread you use will hold up well when mixed with broth.
Can I make these stuffing balls ahead of time?
Yes, you can prepare the mixture a day in advance and store it in the fridge. When you’re ready, simply form the balls and bake them right before serving for maximum freshness.
How can I make these stuffing balls spicier?
If you enjoy some heat, consider adding diced jalapeños or a sprinkle of red pepper flakes to the mixture. Adjust according to your heat tolerance for the best results.
What’s the best way to reheat stuffing balls?
The best method is to reheat them in the oven to retain their texture. Simply place them on a baking sheet at 350°F (175°C) for about 10-15 minutes. This will ensure they stay warm and crispy.
Can I adapt this recipe for a gluten-free diet?
Definitely! Simply substitute the bread for a gluten-free variety and ensure your broth is also gluten-free. Adjust the cooking time as needed, and you’ll have delicious, gluten-friendly stuffing balls ready to enjoy.
Conclusion:
In summary, Cozy Grandma Dot’s Stuffing Balls are more than just a dish—they’re a tool for creating joyful memories and connections. With their delightful flavor and comforting texture, they are a hit for any occasion. I encourage you to give this recipe a try, customize it to match your unique tastes, and share the joy of cooking with family and friends. Your kitchen will soon be filled with love, laughter, and the unforgettable aroma of freshly baked stuffing balls. Enjoy every minute of creating, sharing, and tasting these delicious morsels!


