Prep time: 20 minutes
Cook time: 40 minutes
Total time: 1 hour
Servings: 12 bars
Coconut Dream Bars are the epitome of indulgent sweetness blended with a tropical twist. Perfect for any occasion, these bars will transport you to a sunny beach with every bite. Rich coconut flavor combined with buttery crust and a creamy topping makes them irresistible. Whether you’re a busy parent looking for a quick treat or someone new to baking, this recipe will guide you through the process seamlessly. Imagine serving these luscious bars at your next gathering; your friends and family will be asking for seconds!
What Is Coconut Dream Bars?
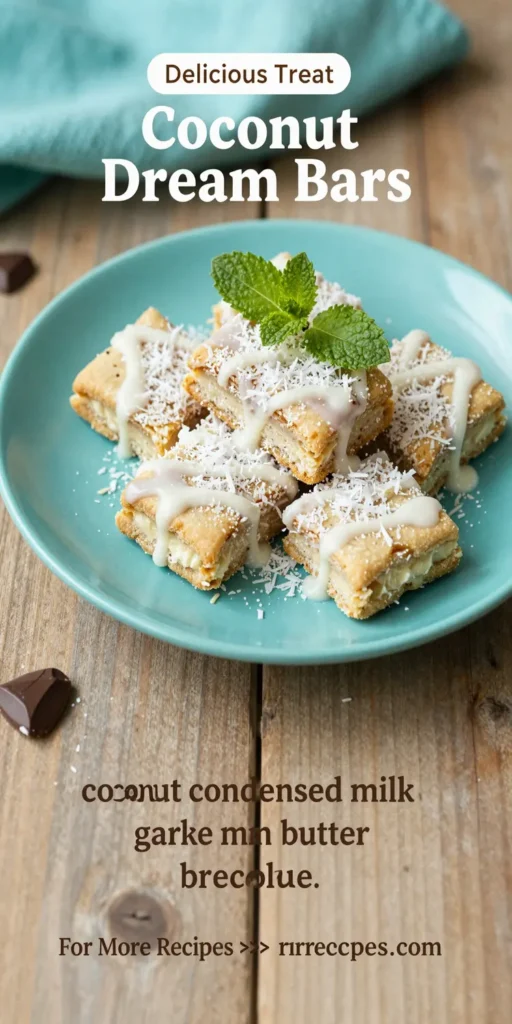
Coconut Dream Bars are a delightful dessert that brings together the richness of coconut with a luscious, creamy filling. Typically set on a buttery crust and topped with a soft, coconut-flavored layer, they create a delightful contrast of textures. The combination of the crumbly base and the smooth top layer makes each bite a heavenly experience. These bars are often enjoyed chilled, making them a refreshing treat on a warm day. They are excellent for parties, potlucks, or simply as a sweet pick-me-up during the week.
Why You’ll Love This
There are countless reasons to adore Coconut Dream Bars. For one, they are incredibly easy to make, requiring only a few simple ingredients. This simplicity makes them an ideal choice for kitchen beginners or those pressed for time. Additionally, the **flavor profile** is heavenly – the rich sweetness of coconut combined with a buttery crust is simply divine. Plus, these bars are versatile enough to suit various occasions, whether you’re hosting a summer barbecue or enjoying a quiet evening at home. You’ll also appreciate that they can be made ahead of time, perfect for meal prep.
Ingredients You’ll Need
- 1 cup unsalted butter: Creates a rich, flaky crust; be sure to have it at room temperature for even mixing.
- 1 cup granulated sugar: Sweetens the bars and helps achieve the right texture.
- 2 cups all-purpose flour: Forms the base of your crust, providing structure and stability.
- 1 tsp baking powder: Adds lightness and helps the crust rise slightly.
- 1/4 tsp salt: Balances sweetness and enhances overall flavor.
- 3 large eggs: Bind the ingredients together and add richness to the filling.
- 2 cups sweetened shredded coconut: The star ingredient, providing that unmistakable coconut flavor and chewiness.
- 1 cup sweetened condensed milk: Adds creaminess and moisture, making the bars extra indulgent.
- 1 tsp vanilla extract: Enhances the flavor profile and complements the coconut.
How to Make
- Preheat your oven: Start by preheating your oven to 350°F (175°C). This ensures an even bake, which is critical for achieving the perfect texture.
- Prepare your pan: Grease a 9×13-inch baking dish with butter or line it with parchment paper for easy removal later.
- Make the crust: In a mixing bowl, cream together the softened butter and granulated sugar until fluffy. This may take about 3-5 minutes. Gradually add in the flour, baking powder, and salt. Mix until the dough starts to come together.
- Press the dough: Take the crust mixture and evenly press it into the bottom of the prepared baking dish. Use the back of a measuring cup to ensure even distribution and compactness.
- Bake the crust: Place the crust in the oven and bake it for about 15 minutes or until it’s just starting to turn golden brown. Keep an eye on it to prevent burning.
- Prepare the topping: While the crust is baking, whisk together the eggs, sweetened condensed milk, shredded coconut, and vanilla extract in a mixing bowl until well combined.
- Assemble the bars: Once the crust is done baking, pour the coconut mixture over the hot crust. Spread it evenly to ensure that every bite has a delicious topping.
- Bake again: Return it to the oven and bake for an additional 25 minutes, or until the topping is set and lightly browned. You’ll know it’s ready when the top has a slight jiggle but does not feel liquid.
- Cool and slice: Allow the bars to cool completely in the pan before slicing them into squares. For the best results, refrigerate for a couple of hours beforehand, as this will help them set and make cutting easier.
Variations & Substitutions
Chocolate Coconut Dream Bars: If you’re a chocolate lover, consider adding chocolate chips to the coconut mixture. About 1 cup of semi-sweet chocolate chips will create a delightful contrast and make every bite even more decadent.
Fruit-Infused Coconut Dream Bars: You can add a layer of fruit, like raspberries or strawberries, between the crust and the coconut topping. This adds a burst of fresh flavor and a beautiful pop of color, elevating your bars to a new level.
Nutty Coconut Dream Bars: For an extra crunch, mix in chopped nuts like pecans or almonds into the filling. About 1/2 cup of nuts will add texture that contrasts perfectly with the creaminess of the coconut topping.
Common Mistakes to Avoid
One common mistake is overmixing the crust. When you mix the butter and sugar, aim for a light, fluffy consistency without overworking it, as this can lead to a dense crust.
Another frequent error is not cooling the bars completely before slicing. If you cut them while still warm, they may crumble and lose their shape. Patience is key to get neat, beautiful slices.
Lastly, be cautious not to overbake the topping. It should be set but still slightly soft to the touch. If it looks too brown, this indicates it may be overdone and could detract from the ideal texture.
Storage, Freezing & Reheating Tips
For optimal freshness, store Coconut Dream Bars in an airtight container in the refrigerator. They can last for up to a week. Freezing is also an excellent option; simply wrap them in plastic wrap and then foil, ensuring they are well-protected against freezer burn. They can be frozen for up to three months. When ready to enjoy, let them thaw in the refrigerator overnight before serving.
To reheat, place them in a microwave for about 10-15 seconds just until warm. This step is optional, as they are incredibly delicious served cold or at room temperature.
Frequently Asked Questions
Can I use fresh coconut instead of shredded coconut? Yes, you can. However, fresh coconut has a different moisture content, which may alter the texture slightly. Make sure to finely grate it to match the texture of shredded coconut for the best results.
Can I make these bars gluten-free? Absolutely! Substitute regular flour with a gluten-free all-purpose flour blend. Just ensure that the blend contains xanthan gum for the best texture and structure in your bars.
What can I serve with Coconut Dream Bars? These bars are delicious on their own, but you can pair them with a scoop of vanilla ice cream or a dollop of whipped cream. Fresh fruit like mango or pineapple also complements the coconut flavor beautifully.
Can I adjust the sweetness of these bars? If you prefer less sweetness, you can reduce the amount of sugar in the recipe. However, keep in mind that this may affect the overall texture, so start with a modest reduction.
How do I know when the bars are done baking? You’ll know they are done when the top appears set and lightly golden. A slight jiggle is acceptable, but it shouldn’t feel liquid. Trust your instincts; if it looks golden and firm, it’s ready!
Conclusion: Coconut Dream Bars are an absolute treat for anyone who enjoys a touch of tropical delight in their desserts. With their simple ingredients and easy preparation, they are perfect for every occasion, ensuring your friends and family will savor every bite. Whether enjoyed at a summer gathering or as a sweet treat at home, these bars are sure to bring joy and satisfaction. Don’t forget to try the variations to make them your own! Enjoy your baking adventure!


