There’s something undeniably romantic about the rich, velvety textures of a well-made chocolate lava cake. Imagine cutting into the delicate exterior to unleash a flow of molten chocolate goodness—it’s a dessert that promises to impress and tug at the heartstrings, making it the perfect finale for your date night or Valentine’s Day celebration. You will learn how to craft these delights from scratch, ensuring a sweet end to your evening.
In this article, we’ll explore the world of chocolate lava cakes, highlighting why they are not just delicious but also relatively easy to whip up, even for those who may feel less than confident in the kitchen. You’ll find everything you need to know about the ingredients, step-by-step preparation, variations to delight every palate, and common pitfalls to avoid—all wrapped in a warm, inviting tone.
What Are Chocolate Lava Cakes?
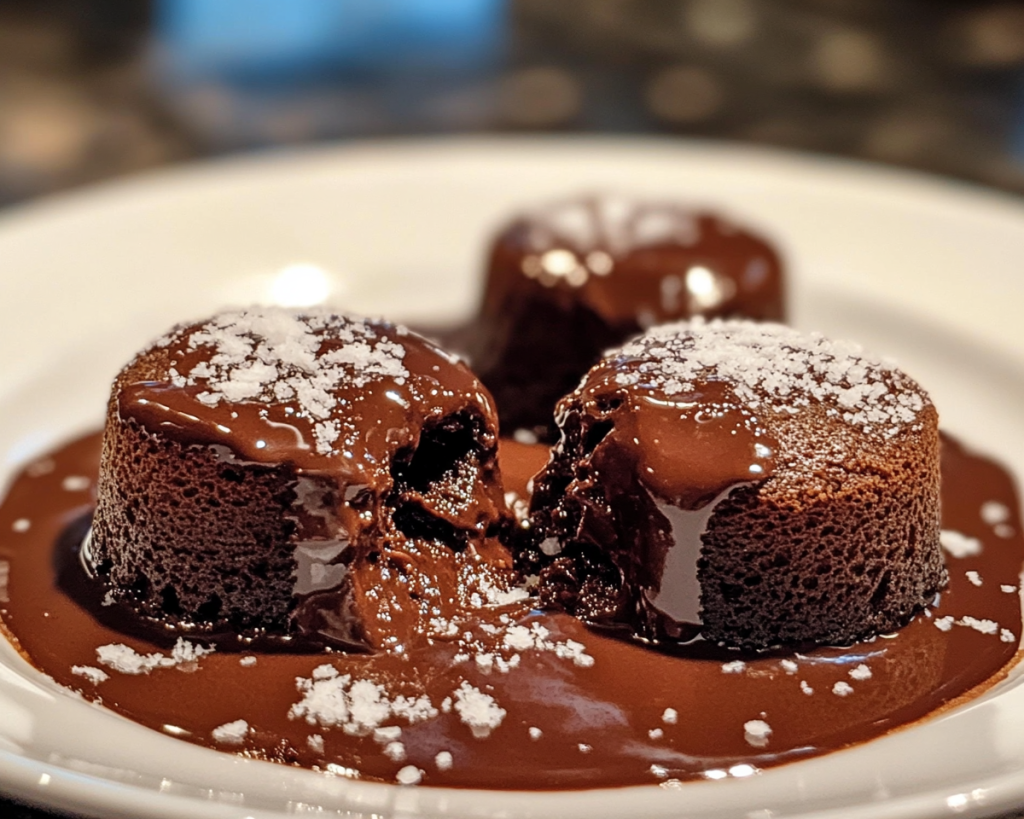
Chocolate lava cakes, also known as molten chocolate cakes, are individual-sized chocolate cakes with a unique feature: a gooey, molten chocolate center that flows out when the cake is cut into. They originated in France and have become a modern classic, often served in upscale restaurants as a decadent dessert. These cakes are typically made from high-quality chocolate, butter, eggs, sugar, and a small amount of flour.
The exterior of the cake is soft yet slightly firm, giving way to a warm, molten core that’s reminiscent of liquid chocolate. Each bite offers a luxurious combination of textures—from the light cake surrounding to the rich, liquid center. They are perfect for making an impression on a special occasion such as Valentine’s Day.
Creating chocolate lava cakes allows for a sense of culinary achievement that’s achievable even for novice chefs. With just a little technique and attention to detail, you can serve up a dessert that looks and tastes like it came straight from a Michelin-starred restaurant.
Why You’ll Love This Chocolate Lava Cake Recipe
There are countless reasons to fall in love with this chocolate lava cake recipe, making it an essential dessert for occasions like date nights or Valentine’s Day.
– **Taste**: The balance of slightly bitter dark chocolate with a hint of sweetness will tantalize your taste buds. The molten center adds an erotic sensibility that pairs exquisitely with a dollop of vanilla ice cream or a sprinkle of fresh berries.
– **Ease**: This recipe is straightforward and requires minimal ingredients, making it perfect even for busy parents or those new to baking. Most of the ingredients are pantry staples, meaning little to no last-minute grocery runs.
– **Cost**: Impressing your significant other doesn’t have to break the bank. You can create an elegant dessert at home for a fraction of the price of dining out.
– **Versatility**: This recipe is highly adaptable. You can play with different types of chocolate (think milk, dark, or even white chocolate) or add flavors such as espresso or orange zest to customize your cakes.
– **Romantic Presentation**: Serving these individual cakes straight from the oven adds an element of surprise and anticipation. You can present them with toppings like whipped cream or a dusting of powdered sugar for a truly homemade touch.
One common misconception is that chocolate lava cakes are difficult to make. In reality, with a little patience and attention to your baking times, they are quite manageable! The key lies in perfecting the timing—overbaking results in a standard cake, while underbaking yields that delectable molten center.
Ingredients You’ll Need
To create your chocolate lava cakes, you’ll need the following ingredients:
– **4 ounces of bittersweet chocolate** (chopped): This is the star of the show, providing the rich chocolate flavor and desired molten center. You can substitute with semi-sweet chocolate if preferred.
– **½ cup (1 stick) of unsalted butter**: Butter adds moisture and richness to the cakes, contributing to their decadent texture.
– **2 large eggs**: Eggs serve as a binding agent, providing structure while keeping the dessert moist.
– **2 large egg yolks**: Adding extra yolks enriches the batter and strengthens the cake’s interior.
– **½ cup of granulated sugar**: Sugar sweetens the mix and helps create that crusty outer layer.
– **2 tablespoons of all-purpose flour**: This ingredient gives the cake structure, but in a small amount so that it remains tender.
– **A pinch of salt**: Salt enhances the chocolate flavor, making it more rounded and delicious.
– **Optional toppings**: Vanilla ice cream, fresh berries, or whipped cream can complement the dessert beautifully.
Each ingredient plays a pivotal role in delivering the perfect chocolate lava cake. Be mindful when selecting your chocolate; higher quality chocolate will yield a more luxurious experience. For substitutions, consider using coconut oil in place of butter for a dairy-free option, or even going for a gluten-free flour blend if necessary.
How to Make Chocolate Lava Cakes
Creating these delightful cakes is simpler than you might think. Follow this step-by-step guide to bake your chocolate lava cakes to perfection.
1. **Preheat Your Oven**: Start by preheating your oven to 425°F (220°C). This is important as a hot oven is crucial for the cakes to rise quickly and trap that molten center inside.
2. **Prepare Your Ramekins**: Generously grease four 6-ounce ramekins using butter or non-stick cooking spray. Sprinkle a light dusting of flour inside each ramekin, tapping out the excess. This helps prevent sticking, ensuring your cakes release beautifully from their molds.
3. **Melt the Chocolate and Butter**: In a microwave-safe bowl, combine the chopped chocolate and butter. Heat in 30-second intervals, stirring between each round until both are fully melted and smooth. This process helps prevent scorching. Alternatively, you can also melt them together using a double boiler on the stove.
4. **Combine Eggs and Sugar**: In a large mixing bowl, whisk together the eggs, egg yolks, and granulated sugar until the mixture is light and frothy. This step is crucial as it incorporates air, giving your cakes a fluffy texture.
5. **Mix in the Chocolate Mixture**: Once your chocolate and butter mixture is melted and slightly cooled, pour it into the egg mixture while whisking. This ensures the eggs do not cook from the heat of the chocolate.
6. **Fold in Flour and Salt**: Sift the flour and salt into the mixture gently and fold until just combined. Overmixing can affect the texture of your cakes, so be gentle here.
7. **Pour into Ramekins**: Divide the batter evenly among the prepared ramekins, filling each about ¾ full. This will allow enough room for the cakes to rise without overflowing.
8. **Bake**: Place the ramekins on a baking sheet and bake in the preheated oven for 12-14 minutes. The edges should appear firm while the center remains soft. It’s essential to keep a close eye during the last few minutes to avoid overcooking.
9. **Cool Slightly**: Once baked, remove the cakes from the oven and let them sit for one minute. Run a knife around the edges to loosen the cakes before inverting them onto individual dessert plates.
10. **Serve Immediately**: Serve your chocolate lava cakes warm. You can drizzle them with chocolate sauce or top them with ice cream, berries, or whipped cream for a delightful finish.
With this simple yet wonderful recipe, you should be rewarded with deliciously gooey cakes that are sure to impress.
5 Variations & Substitutions
If you’re looking to switch things up or make the recipe work for specific dietary needs, consider these variations and substitutions:
1. **White Chocolate Lava Cakes**: For a sweeter, creamier treat, swap out bittersweet chocolate for white chocolate. Note that this will create a different flavor profile, often sweeter and less intense, which some will prefer, especially those who aren’t fanatics of dark chocolate.
– **Tip for success**: Ensure to add a little more flour (approximately 1 additional tablespoon) to account for the lack of cocoa solids.
2. **Flavored Lava Cakes**: Add a tablespoon of espresso powder or a few drops of pure vanilla extract to the chocolate batter for an extra flavor kick.
– **Who it’s for**: Coffee lovers or anyone looking for a deeper, more complex taste.
3. **Nutty Chocolate Lava Cakes**: Stir in about 1 tablespoon of finely chopped nuts, like hazelnuts or almonds, into the chocolate mixture for a delightful crunch.
– **Tip for success**: Toast the nuts lightly beforehand to enhance their flavor.
4. **Vegan Molten Lava Cakes**: Substitute eggs with flaxseed meal (1 tablespoon of flaxseed meal + 2.5 tablespoons of water per egg). Use a vegan butter or coconut oil and dairy-free chocolate.
– **Who it’s for**: Anyone adhering to a vegan diet or lactose intolerance.
5. **Gluten-Free Lava Cakes**: Simply replace all-purpose flour with a 1-to-1 gluten-free flour blend. This makes the dessert accessible to those with gluten sensitivities.
– **Tip for success**: Ensure that there are no cross-contamination issues with gluten products when selecting your ingredients.
These variations keep chocolate lava cakes flexible, allowing everyone to enjoy them regardless of specific tastes, dietary preferences, or restrictions.
Common Mistakes to Avoid
When baking chocolate lava cakes, a few common pitfalls can lead to less-than-stellar results. Here are some mistakes to be aware of and how to avoid them:
– **Overbaking**: This is the most frequent issue people encounter. If you bake the cakes too long, they’ll become a solid chocolate cake instead of the desired molten center. Keep a close eye on the timer, and do not exceed the suggested baking time.
– **Under-greasing the Ramekins**: If you don’t adequately grease the ramekins, the cakes may stick, leading to a broken structure when unmolding. Ensure you coat the entire inside of each ramekin with butter or cooking spray before adding batter.
– **Not Allowing Them to Rest**: Don’t skip the resting time after baking. Letting the cakes sit for a moment allows them to retract slightly from the sides, making it easier to release them. Without this resting period, the cakes may break apart.
– **Skipping the Toppings**: The molten richness of the lava cake deserves something to balance it out! Whether it’s a scoop of ice cream, a drizzle of sauce, or fresh fruit, be sure to bring texture and temperature contrasts to enhance the dessert experience.
Storage, Freezing & Reheating Tips
While freshly baked chocolate lava cakes are undoubtedly best enjoyed immediately, you can prepare some aspects in advance to keep the romantic vibe without breaking a sweat.
– **Storage**: Store leftover baked lava cakes covered in the fridge for up to two days. When it comes time to enjoy them again, the best approach is to reheat them gently in the microwave for 10-15 seconds. Be careful not to overheat, as this can cause the center to solidify.
– **Freezing Unbaked Cakes**: If you want to prepare ahead of time, you can make the batter and portion it into the greased ramekins, then cover them tightly with plastic wrap. Freeze them before baking, and they can be kept for up to three months.
– **Baking from Frozen**: When you’re ready to bake, there is no need to defrost. Simply add a couple of extra minutes to the baking time, keeping an eye out until they are puffy and set.
– **Food Safety Best Practices**: If you’ve stored the cakes in the fridge, ensure to consume them within the timeframe mentioned and never reheat more than once to maintain freshness and prevent any foodborne illnesses.
Frequently Asked Questions
1. **Can I use a muffin tin instead of ramekins?**
Yes, you can use a muffin tin, but ensure to adjust the baking time. The individual portions will likely bake faster, so check for doneness around the 10-12 minute mark. Just remember to grease well!
2. **What should I do if my cakes won’t come out of the ramekins?**
If your cakes stick, run a small knife along the edge to loosen them, and then try inverting them again. If this fails, serve the cakes still in the ramekins and offer guests a spoon for an alternate experience!
3. **Can I make the batter a day ahead?**
Absolutely! You can prepare the batter ahead of time and store it in the refrigerator for up to 24 hours in greased ramekins. Just ensure they come back to room temperature before baking for the best results.
4. **Is it possible to double the recipe?**
Yes, easily! You can double the ingredients, but ensure you have enough ramekins and alternatively bake them in batches if you don’t have enough. Just keep an eye on the baking time, as it may differ slightly based on the overall batch size.
5. **How do I know when the lava cakes are done?**
The cakes should be set around the edges and slightly jiggly in the center. The outer edge will look puffy and solid, while the middle may still appear soft and liquid. The secret is to trust your instincts—check it early to avoid baking too long!
In conclusion, chocolate lava cakes are a scrumptious play on texture and flavor—both rich and indulgent. They are the ultimate homemade dessert for elevating any date night or special occasion, proving that you don’t need to be a professional chef to create stunning dishes. So, heat your oven and prepare to dazzle your partner with an unforgettable dessert that encapsulates romance, flavor, and a touch of culinary magic. You’ll be left with melted hearts and satisfied taste buds, making this indulgent treat one you’ll want to recreate time and again. Enjoy every moment of this delightful process, and don’t forget to cherish the sweet moments it brings!


