Prep time: 20 minutes
Cook time: 0 minutes
Total time: 20 minutes
Servings: 12
There’s something magical about the combination of chocolate and coconut; it takes you back to favorite vacations or lazy afternoons with a book. When craving a sweet treat that satisfies both the palate and the body, look no further than Chocolate Coconut Bliss Balls. This recipe is not only a delightful no-bake snack, but it also offers the benefit of being healthy, making it perfect for busy parents on the go or anyone needing a quick pick-me-up without the guilt.
What makes these bliss balls so special is their simplicity. With a handful of ingredients, you’ll learn how to create a snack that’s not only satisfying but incredibly healthy. In this article, you will discover the incredible taste, texture, and benefits of making these delightful treats. We’ll delve into ingredient insights, an easy step-by-step procedure, variations for customization, common pitfalls to avoid, and answers to frequently asked questions. Are you ready to elevate your snack game? Let’s dive in!
What Is Chocolate Coconut Bliss Balls Recipe – Easy No-Bake Healthy Snack?
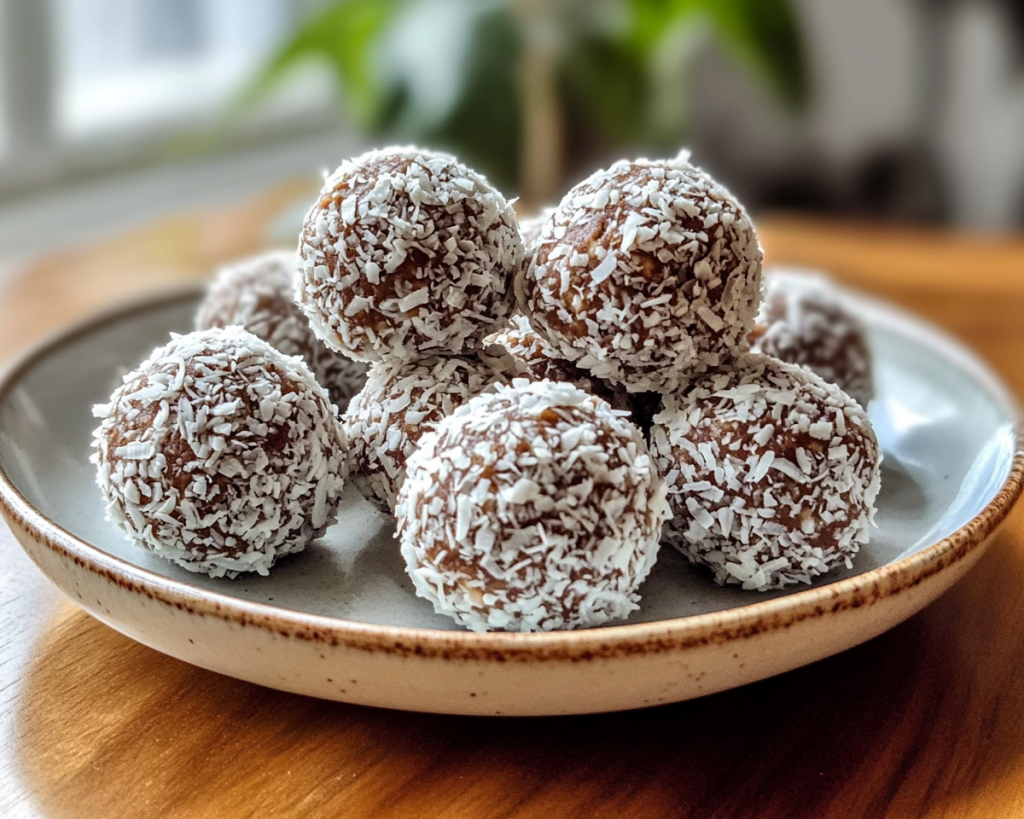
Chocolate Coconut Bliss Balls are small, round bites made primarily from sweetened shredded coconut and cocoa powder, combined with a sticky base like dates, nuts, or nut butter. Originating from the realm of healthy snacking, these bite-sized wonders have gained popularity due to their versatility and simplicity. They strike a harmonious balance between rich chocolate flavor and the tropical sweetness of coconut, making your taste buds dance with joy.
The texture is another reason these bliss balls are so captivating. As you bite into one, you experience a delightful combination of chewiness from the coconut and slight crunch from the nuts, all enveloped in a rich, creamy chocolate flavor. The flavors meld beautifully to create a treat that feels indulgent yet is packed with nutritious ingredients, perfect for those craving a guilt-free dessert. Whether you serve them at a party or enjoy them as a personal snack, they can be delightful for all occasions.
The beauty of this recipe lies in how quickly it comes together; you can whip it up in just 20 minutes! That makes it an accessible option for even the busiest of cooks. Once you understand the basic preparation method, you’ll find it easy to adapt according to what you have in your pantry.
Why You’ll Love This
There are countless reasons to love Chocolate Coconut Bliss Balls. First and foremost is the taste—rich, decadent chocolate meets the tropical zing of coconut in a way that is irresistible. These little bites not only provide a sweet fix but do so without refined sugars or unnecessary preservatives, thus being a healthier alternative to conventional snacks. They can easily be made on a budget, allowing you to enjoy a fabulous treat without breaking the bank.
Another key benefit is the versatility of these bliss balls. You can use them as a quick snack for kids, a post-workout treat, or even a guilt-free dessert after dinner. This appeal resonates with busy parents and health-conscious individuals alike, allowing them to stay nourished without compromising on flavor. Plus, making them at home means you can control all the ingredients and customize them to suit your dietary needs or preferences.
One common misconception is that preparing healthy snacks requires extensive skill or time. That’s simply not the case here! With just a food processor or a simple mixing bowl, you can combine all the ingredients and roll them into perfect balls. The ease of preparation makes them a go-to for beginner cooks who want to impress without stress.
Ingredients You’ll Need
- Sweetened shredded coconut: This ingredient provides a chewy texture and distinct coconut flavor. For a healthier option, you can opt for unsweetened shredded coconut.
- Cocoa powder: Use high-quality cocoa for a deep chocolate flavor. If you’re looking for a vegan option, make sure to use raw cocoa.
- Medjool dates: These naturally sweet fruits act as a binding agent. They add moisture and sweetness, but feel free to substitute with other dried fruits or maple syrup.
- Nut or seed butter: This will give creaminess and help bind the ingredients. Almond or peanut butter works wonderfully, but you can also use sunflower seed butter for a nut-free alternative.
- Chia seeds: These tiny seeds are packed with omega-3 fatty acids and add nutritional value. You can replace them with flaxseeds if needed.
- Vanilla extract: Provides a flavor boost. Always opt for pure vanilla extract whenever possible for the richest taste.
- Pinch of salt: This simple yet essential ingredient balances the sweetness and enhances all other flavors.
Each ingredient plays a pivotal role not just in the flavor but also in the nutritional profile of these bliss balls. Knowing the purpose of each ingredient can assist in making wise substitutions if you’re missing something.
How to Make
1. Begin by preparing your ingredients. If using dates, make sure they are pitted. Medjool dates work best due to their sticky and chewy texture. If they are too dry, soak them in warm water for about 10 minutes before using to soften them.
2. Place the sweetened shredded coconut, cocoa powder, and chia seeds in a food processor. Pulse these ingredients together until they are well-combined and the coconut has broken down a bit. This will result in a grainy but cohesive mixture.
3. Now, add in the pitted dates and nut or seed butter. Don’t forget that pinch of salt! Pulse the mixture again until everything is fully blended. You want the mixture to be sticky and hold together when pressed between your fingers. If it feels too dry, you can add a teaspoon of water or more nut butter.
4. Once the mixture is ready, remove it from the food processor and transfer it to a bowl. Use your hands to roll the mixture into small balls, about one inch in diameter. Each ball should feel compact and cohesive, which shows that you’ve mixed it thoroughly.
5. After rolling the balls, you can optionally roll them in additional shredded coconut or cocoa powder for a beautiful finish. This adds a delightful touch and extra flavor.
6. Finally, place the finished bliss balls on a plate or a baking sheet lined with parchment paper, and refrigerate them for at least 30 minutes to firm up. This step is crucial as it helps the balls maintain their shape when serving.
Making these Chocolate Coconut Bliss Balls doesn’t require special culinary skills, which makes it the perfect recipe for novice cooks. You’ll enjoy the aromas filling your kitchen, from the rich chocolate to the nutty undertones.
Variations & Substitutions
Chocolate Mint Bliss Balls
For a refreshing twist, add a few drops of peppermint extract during the blending phase. This variation brings a cool, invigorating flavor that melds beautifully with the chocolate and coconut. Just be cautious with the amount of peppermint extract; start with a small amount and adjust according to your taste preference.
Protein-Packed Bliss Balls
Want a post-workout snack? Incorporate a scoop of protein powder into your mixture. Choose a flavor that complements chocolate, such as vanilla or chocolate itself. This boosts protein content, making it ideal for those who need a quick refuel after exercising.
Nut-Free Option
If you’re preparing these treats for those with nut allergies, simply substitute the nut butter with sunflower seed butter. You can also incorporate sunflower seeds into the mixture for extra crunch and added nutrition. These bliss balls will still maintain their delicious taste and texture without any nuts.
Vegan Bliss Balls
Though the original recipe is already vegan-friendly, you can enhance its vegan attributes by using raw cocoa and ensuring your nut butter is free from any added oils or sugars. This modification remains entirely plant-based while ensuring that the flavor stays rich and satisfying.
Berry Bliss Balls
Add dried fruits such as cranberries, raspberries, or cherries to introduce a tangy flavor to your bliss balls. This variation is excellent for adding not only sweetness but also a rich burst of color, making them visually appealing.
Experimenting with these variations allows you to customize the flavor and nutritional benefits of your bliss balls. These alternatives are great ways to cater to your dietary preferences or simply try something new.
Common Mistakes to Avoid
One of the most frequent issues when preparing Chocolate Coconut Bliss Balls is over-processing the mixture. If you over-blend it, the nuts and coconut can turn into a fine powder rather than maintaining their delightful texture. Aim for a consistency that is sticky yet chewy; this prevents the bliss balls from feeling dry.
Another critical point is not to measure the cocoa powder precisely. Using too much cocoa might result in a bitter taste, while too little may not provide the rich chocolate flavor you desire. Experimentation is often key; taste the mixture and adjust accordingly!
Lastly, be cautious when rolling the balls. If they feel overly crumbly, adding more nut butter or a splash of water can help. On the flipside, if they are sticky, a dusting of cocoa powder or shredded coconut can help you manage the texture.
Proper storage is also essential. Storing bliss balls at room temperature might lead to them getting soft and losing their shape. Instead, refrigerate them in an airtight container to prolong freshness.
Storage, Freezing & Reheating Tips
To ensure the longevity of your Chocolate Coconut Bliss Balls, store them in an airtight container in the refrigerator for up to two weeks. If you’re preparing them for meal prep or want to have them on hand for longer, consider freezing them. Lay the balls out on a baking sheet lined with parchment paper, freeze until solid, and then transfer them to a freezer-safe bag or container. Properly stored, they can last for up to three months.
When you’re ready to enjoy your frozen bliss balls, take them out and allow them to thaw at room temperature for about 10-15 minutes before indulging. This will help restore their texture and keep them from being too hard.
Additionally, ensure that the container you use is clean and dry to avoid moisture build-up, which could lead to spoilage.
Frequently Asked Questions
Can I use honey instead of dates?
While honey can be used as a sweetener, it will not have the binding properties that dates do. If you choose to use honey, you may need to adjust the amount of nut or seed butter to ensure the mixture holds together.
How many bliss balls can I consume in a day?
Since these bliss balls are rich in natural sugars from dates and healthy fats from nut butters, it’s best to enjoy them in moderation. One to three bliss balls a day can be a satisfying snack without overwhelming your nutritional goals.
Can I make them ahead of time for meal prep?
Absolutely! Making a big batch in advance allows you to have healthy snacks readily available throughout the week. Just make sure to store them properly in an airtight container in the fridge or freezer.
Are these bliss balls suitable for kids?
Yes! Chocolate Coconut Bliss Balls are an excellent healthy treat for kids. You can even have them assist in rolling the balls or selecting mix-ins for a fun kitchen activity.
What’s the best way to roll these bliss balls?
Using slightly damp hands can help prevent the mixture from sticking while you roll them. It creates a smooth surface for each ball, ensuring that they are visually appealing as well!
Conclusion:
Chocolate Coconut Bliss Balls are a fantastic way to satisfy your sweet tooth while maintaining a healthy lifestyle. Their delightful flavor, simple preparation, and versatility make them suitable for everyone, from busy parents to health-conscious individuals. So why not give this easy no-bake recipe a try? Feel free to customize it based on your preferences and share with friends and family! You’ll find that once you try these bliss balls, they’ll become a staple in your healthy snacking repertoire. Enjoy this delightful treat, and happy cooking!


