Prep time: 15 minutes
Cook time: 12 minutes
Total time: 27 minutes
Servings: 24 cookies
When you think of a dessert that marries nostalgia and indulgence, red velvet cookies with a luscious cream cheese frosting comes to mind. Perhaps you remember those delightful red treats at a family gathering or a special celebration. The soft texture, paired with the decadent sweetness and tang of cream cheese, makes these cookies a go-to for any occasion. What truly sets this recipe apart is not just the vibrant color but also the rich flavor profile, which is balanced perfectly with that signature frosting. It’s easy to make, so whether you’re a busy parent, a kitchen beginner, or just someone who craves a delectable sweet treat, you’re in for a delightful journey.
In this article, you’ll learn step-by-step how to create chewy red velvet cookies topped with velvety cream cheese frosting. We’ll dive into what makes this dish special, the ingredients you’ll need, and some tips and variations to make this recipe your own. Plus, I’ll share some common mistakes to avoid so that your cookies turn out perfect every time.
What Is Chewy Red Velvet Cookies With Cream Cheese Frosting?
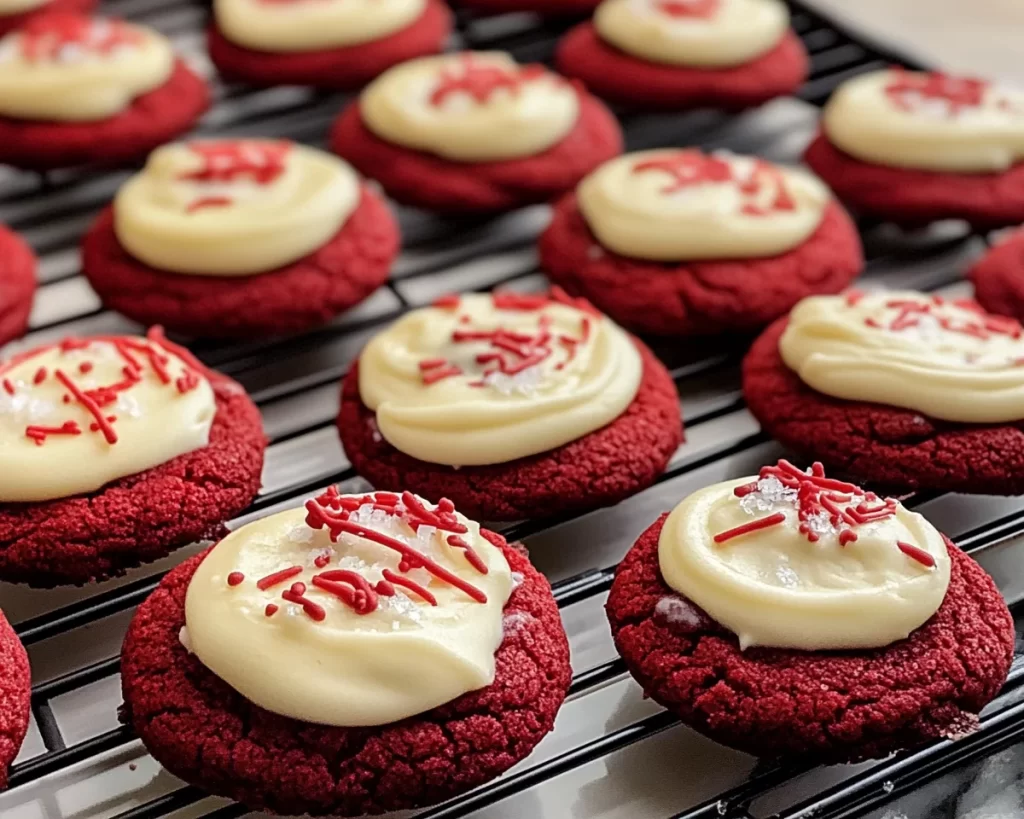
Chewy red velvet cookies are a unique twist on the classic red velvet cake, capturing its iconic flavor and color in a convenient cookie form. The origins of red velvet can be traced back to the southern United States, where the deep red color—aspects of which can come from natural cocoa or food coloring—became a popular choice. These cookies boast a soft, chewy texture that melts in your mouth, and the color is not just eye-catching but also indicative of the flavor.
The cookies are filled with buttery goodness, and the addition of white chocolate chips takes them to a whole new level. The cream cheese frosting, with its tangy flavor, complements the rich taste of the cookie, making each bite an exquisite experience. If you think about the first bite, the cookie edges are slightly crisp, while the center remains soft and chewy. The frosting adds a creamy layer that enhances both flavor and visual appeal.
Why You’ll Love This
There are countless reasons to fall in love with these cookies. Firstly, the taste is extraordinary—an elegant balance between sweet and slightly tart. The deep, rich flavor complemented by the smooth frosting creates a delightful explosion of sweetness. Secondly, they are very easy to make! Even if you’re a novice in the kitchen, these cookies will give you a confidence boost when they come out perfectly baked.
Finally, these cookies are reasonably cost-effective to make, with ingredients commonly found in your kitchen. Whether you’re making them for a special occasion or just a cozy night in, they are perfect for sharing with friends and family. A common misconception with cookies is that they are difficult to bake correctly, but this recipe is incredibly forgiving. With the tips provided, you’ll be producing cookie masterpieces in no time!
Ingredients You’ll Need
- All-purpose flour: The base for your cookies, providing the desired structure. Consider using whole wheat flour for a nuttier flavor.
- Cocoa powder: This adds a subtle chocolate flavor and contributes to the cookie’s color. Use unsweetened cocoa powder for the best results.
- Baking powder: The leavening agent that makes the cookies rise, resulting in a light and fluffy texture.
- Salt: Just a pinch enhances the sweetness of the cookies.
- Unsalted butter: Provides richness, moisture, and flavor. Make sure it’s at room temperature for easy mixing.
- Granulated sugar: Sweetness is essential! It also helps create a chewy texture. Brown sugar can be used for a richer taste.
- Egg: Binds everything together for a cohesive cookie dough.
- Vanilla extract: Adds depth to the flavor. Opt for pure vanilla extract for the best taste.
- Red food coloring: Gives the cookies their vibrant color. You can use natural alternatives like beet juice if you’re looking for a healthier option.
- White chocolate chips: Optional but recommended for that creaminess and extra sweetness.
These ingredients work together to create cookies that are both visually stunning and delicious. Substituting any of them can lead to different textures and flavors, which is part of the fun of baking!
How to Make
1. **Preheat your oven**: Start by preheating your oven to 350°F (175°C). This is crucial as it ensures even baking. While your oven is warming up, line a baking sheet with parchment paper, which prevents the cookies from sticking and makes clean-up a breeze.
2. **Combine dry ingredients**: In a medium mixing bowl, whisk together the all-purpose flour, cocoa powder, baking powder, and salt. This will evenly distribute the dry ingredients and help your cookies rise well, creating that sought-after chewy texture.
3. **Cream the butter and sugar**: In your stand mixer (or a large bowl with a hand mixer), beat the room temperature unsalted butter and granulated sugar together until the mixture is light and fluffy. This usually takes about 3-5 minutes. The incorporation of air into the butter is essential for achieving a delightful chewy texture!
4. **Add the egg and flavorings**: Once creamed, add in the egg, vanilla extract, and red food coloring. Mix until everything is fully combined. The batter should be beautifully tinted red and fragrant, which means you are well on your way!
5. **Combine dry with wet ingredients**: Gradually add the dry ingredient mixture to your wet ingredients, mixing on low speed until just combined. Avoid overmixing as it can create tough cookies. The dough should be thick and somewhat sticky.
6. **Fold in the chocolate chips**: With a spatula, gently fold in the white chocolate chips if you’re using them. They add an extra level of creaminess and sweetness that complements the cookie base beautifully.
7. **Shape the cookies**: Using a cookie scoop or two tablespoons, drop cookie dough balls onto the prepared baking sheet, leaving about two inches of space between each. This allows the cookies to spread evenly while baking.
8. **Bake**: Place your baking sheet in the preheated oven and bake for 10-12 minutes, or until the edges are firm but the centers look slightly underbaked.
9. **Cool down**: Once baked, let the cookies cool on the baking sheet for about 5 minutes before transferring them to a wire rack to cool completely. This step is important as it allows the cookies to set and maintain their chewy texture.
10. **Frost your cookies**: In a separate bowl, prepare the cream cheese frosting. Beat together softened cream cheese, butter, powdered sugar, and a splash of vanilla extract until smooth and creamy. Once the cookies have cooled, generously spread the frosting on top of each one.
11. **Final touches**: Optional—garnish with sprinkles or additional white chocolate shavings for an extra festive flair. The visual appeal of these cookies makes them perfect for special occasions.
Variations & Substitutions
Chocolate Chip Variation: Swap out the white chocolate chips for semi-sweet chocolate chips to create a dual-chocolate experience. This variation offers a richer taste and more contrast, balancing the sweetness of the red velvet very nicely. This is a perfect switch for chocolate lovers who can’t get enough cocoa in their sweets!
Gluten-free Option: For those with gluten intolerance, substitute the all-purpose flour with a 1:1 gluten-free baking blend. Ensure your other ingredients, especially the baking powder, are also gluten-free. This variation allows everyone to enjoy these cookies without sacrificing texture or taste.
Vegan Adaptation: You can create a vegan version by substituting the egg with a flax egg (1 tablespoon of ground flaxseed mixed with 2.5 tablespoons of water) and using vegan butter and cream cheese. This option allows those on a plant-based diet to indulge without losing the fundamental qualities of this classic recipe.
Nutty Flavor Addition: For a nutty touch, you can incorporate chopped pecans or walnuts into the cookie dough. This variation adds a new depth of flavor and delightful crunch, enhancing the overall texture.
Common Mistakes to Avoid
One of the most frequent mistakes while baking these cookies is using cold butter. If your butter is too hard, it will not cream properly with the sugar, affecting the cookie’s texture. Always remember to allow your butter to reach room temperature for the best results.
Another common pitfall is overbaking. If you leave the cookies in the oven for too long, they can become dry and lose that beloved chewy texture. The cookies will continue to cook slightly after removing them from the oven, so it’s better to take them out when they still look slightly underbaked.
Be mindful of the red food coloring as well. Too much can overpower the rest of the flavors, while too little can lead to a pale cookie lacking that distinct red hue. Aim for the perfect balance that enhances your cookie without overshadowing it.
Storage, Freezing & Reheating Tips
Storing your cookies correctly is essential to keep them fresh. Place the fully cooled cookies in an airtight container. They can last for up to one week at room temperature or two weeks in the fridge, although they are best eaten freshly baked.
If you want to make these cookies in advance, you can freeze the dough. Shape the cookie dough into balls, place them on a baking sheet, and freeze until solid. Once frozen, transfer them to a freezer bag and store for up to three months. When you’re ready to bake, simply add a couple of extra minutes to the baking time.
For frosted cookies, it’s best to keep the frosting separate until you’re ready to serve. Once frosted, they should be eaten within a few days, as the cream cheese can spoil faster than the cookies themselves.
Frequently Asked Questions
Can I make these cookies without food coloring?
Absolutely! You can omit the red food coloring if you prefer a more natural approach. The flavor will remain the same, but the cookies will have a brown hue, which is still delicious.
What is the secret to chewy cookies?
The secret to chewy cookies lies in the proportion of fat to flour and the baking time. Make sure to not overbake them, allowing them to stay slightly soft and chewy in the center. The combination of unsalted butter and sugars also plays a crucial role in achieving that chewy texture.
Can I substitute the frosting with something else?
Yes! While cream cheese frosting is traditional, you can create a simple buttercream frosting or even a ganache for a different taste. Both options will provide a delicious contrast to the cookie base.
How do I troubleshoot if my cookies spread too much?
If your cookies spread too much while baking, it could be due to too much butter or not enough flour. Ensure that you accurately measure your ingredients and consider chilling the cookie dough for at least 30 minutes before baking, as this can help prevent excessive spreading.
Are these cookies suitable for a gluten-free diet?
Yes, you can make these cookies gluten-free by swapping the all-purpose flour with a gluten-free baking blend. Just ensure that your other ingredients are gluten-free as well.
Conclusion:
In summary, these chewy red velvet cookies with cream cheese frosting are a delightful treat with something for everyone—great taste, beautiful appearance, and straightforward preparation. Whether you’re serving them at a party or treating yourself to a sweet moment at home, they will surely become a favorite in your baking repertoire. Don’t be afraid to put your spin on this recipe, experiment with the variations, or even share them with friends and family. I encourage you to try making these cookies and experience their wonderful flavors. Happy baking and enjoy every bite!


