Prep time: 20 minutes
Cook time: 30 minutes
Total time: 50 minutes
Servings: 12
Delight your guests at your next BBQ with these luscious Cherry Cheesecake Bars! They are a perfect blend of creamy cheesecake, crunchy graham cracker crust, and sweet cherry topping. These bars are not just visually appealing but also incredibly delicious and can be made ahead of time, making them a go-to option for busy parents or anyone short on time.
What Is Cherry Cheesecake Bars for BBQ Dessert Table?
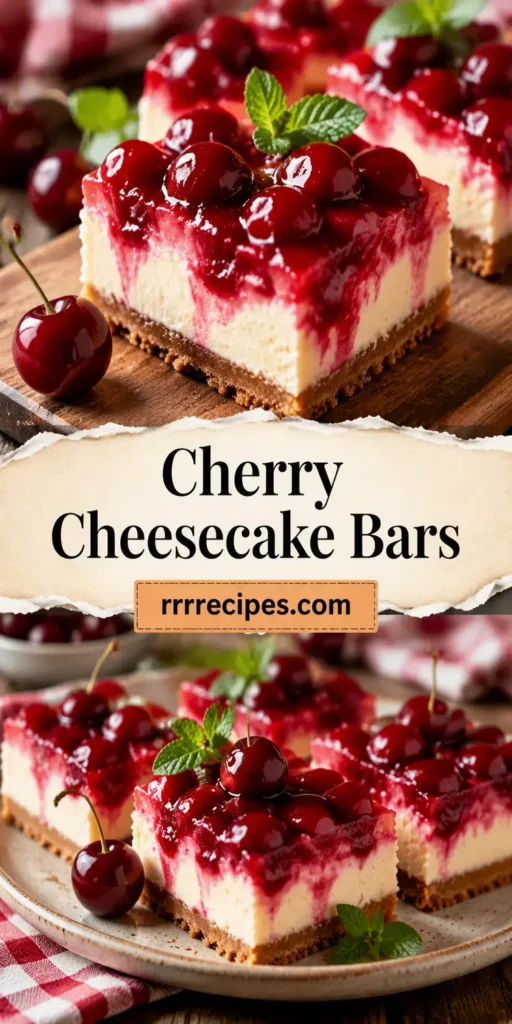
Cherry Cheesecake Bars are an elegant dessert option that combines the richness of cheesecake with bursts of juicy cherries. They are typically baked in a pan and cut into bars, making them easy to serve and perfect for gatherings. The crust is made from crushed graham crackers, adding a nice crunch that complements the smooth and creamy cheesecake filling. Topped with a generous layer of cherry pie filling, these bars are not only a feast for the eyes but also an explosion of flavors. Whether you’re serving them at a summer BBQ or a family dinner, they are sure to impress!
Why You’ll Love This
One of the main reasons you’ll adore these Cherry Cheesecake Bars is their **versatility**. They fit perfectly into any occasion, from casual BBQs to festive parties. The balance of sweet and tart flavors, combined with a rich cheesecake filling, creates a delightful taste experience that everyone will love. These bars are also incredibly easy to make, which is a significant advantage for busy parents and novice bakers. Additionally, preparing them in advance means less stress on the day of the event. Another bonus is their easy-to-serve nature; no messy cake slices here!
Ingredients You’ll Need
- 1 ½ cups graham cracker crumbs: This forms the base of your cheesecake bars, providing a crunchy texture that contrasts perfectly with the creaminess of the cheesecake.
- ½ cup unsalted butter, melted: Acts as a binding agent that holds the crust together, adding richness and flavor.
- 2 tablespoons granulated sugar: Sweetens the crust, balancing out the flavors of the cheesecake and cherry filling.
- 16 oz cream cheese, softened: The key ingredient in the cheesecake added for a rich and creamy texture.
- 2/3 cup granulated sugar: Sweetens the cheesecake layer, making it indulgently delicious.
- 2 large eggs: Adds structure and stability to the cheesecake filling.
- 1 teaspoon vanilla extract: Enhances the flavor of the cheesecake, making it more aromatic.
- 1 can (21 oz) cherry pie filling: Provides a sweet and tart topping that brings the bars to life with beautiful color and flavor.

How to Make
- Start by preheating your oven to 325°F (160°C). This ensures that your cheesecake bars bake evenly. Grease a 9×13-inch baking pan with cooking spray or line it with parchment paper for easier removal.
- Next, in a large bowl, combine the graham cracker crumbs, melted butter, and sugar. Mix well until the mixture resembles wet sand. Press this mixture firmly into the bottom of the prepared pan to form an even crust. This step is crucial for a solid base.
- Bake the crust in the preheated oven for 10 minutes, or until it’s lightly golden. Let it cool while you prepare the filling. This cooling step keeps the crust from becoming soggy when the cheesecake filling is added.
- In another bowl, beat the softened cream cheese until smooth using an electric mixer on medium speed. This process should take about 2-3 minutes. Ensure there are no lumps for a velvety cheesecake texture.
- Add the granulated sugar, eggs, and vanilla extract to the cream cheese. Beat the mixture until well-combined and smooth. Make sure to scrape down the sides of the bowl to incorporate all ingredients fully.
- Pour the cream cheese mixture over the cooled graham cracker crust, spreading it evenly across the surface. This step ensures every bite is filled with creamy goodness.
- Bake the bars for about 20 minutes or until the edges are set, but the center remains slightly jiggly. This indicates that the cheesecake will firm up as it cools. Overbaking can lead to a dry texture, so watch carefully!
- After removing from the oven, let the bars cool completely at room temperature. Once cool, spread the cherry pie filling evenly over the top. The vibrant cherries will add a beautiful finishing touch.
- Chill the bars in the refrigerator for at least 2 hours (or ideally overnight) before slicing. This chilling time enhances the flavors and makes cutting easier.
- Once chilled, slice into squares and serve on your dessert table. These bars can be garnished with fresh cherries or whipped cream if desired.
Variations & Substitutions
Chocolate Cherry Cheesecake Bars: For a different flavor twist, consider melting some semi-sweet chocolate and swirling it into the cheesecake mixture before baking. This variation adds a rich chocolate flavor that pairs beautifully with cherries.
Berry Cheesecake Bars: If cherries aren’t your go-to fruit, you can substitute the cherry pie filling with other pie fillings like blueberry or raspberry. Each variation creates a distinct flavor profile while maintaining the cheesecake essence.
Vegan Cherry Cheesecake Bars: To make a vegan version, replace cream cheese with a blended mixture of cashews and coconut cream. Use plant-based butter for the crust and maple syrup instead of granulated sugar for added sweetness without animal products.
Gluten-Free Cherry Cheesecake Bars: To cater to gluten-sensitive guests, simply use gluten-free graham crackers for the crust. This way, everyone can enjoy the delicious flavors without compromising their dietary needs.
Common Mistakes to Avoid
Using cold cream cheese is a common error. Always allow it to soften at room temperature; this helps in achieving a smooth filling. If you forget, microwaving it for a few seconds can be a quick fix. Additionally, overbaking is another significant mistake. Cheesecake should jiggle slightly in the center when you take it out of the oven; it will continue to cook as it cools. Lastly, ensure your measurements are accurate. Baking is a science, and even a small error can affect the outcome.
Storage, Freezing & Reheating Tips
To store your Cherry Cheesecake Bars, place them in an airtight container in the fridge for up to 5 days. If you wish to enjoy them later, these bars freeze exceptionally well. Cut them into squares and wrap each piece tightly in plastic wrap, followed by aluminum foil. They can be frozen for up to 3 months. For reheating, simply take the bars out of the freezer and thaw them in the refrigerator overnight. Once thawed, they can be served cold or at room temperature, maintaining their delightful texture.
Frequently Asked Questions
Can I use fresh cherries instead of pie filling?
Absolutely! If fresh cherries are in season, pitting and slicing them can add a fresh, tart flavor to your bars. Toss them with a bit of sugar to enhance their sweetness before topping your cheesecake layer.
How can I tell when the cheesecake is done baking?
The best way to know if the cheesecake is perfectly baked is by checking the edges. The edges should be set, while the center remains slightly wobbly. This indicates that the cheesecake will firm up upon cooling.
Can I make these bars ahead of time?
Yes, these bars are perfect for making ahead! Preparing them a day or two in advance not only enhances the flavors but also saves you time on the day of your event.
What should I do if my cheesecake cracks?
Cracks can occur due to overbaking or sudden temperature changes. To avoid this, bake in a water bath or ensure that it cools gradually in the oven. If cracks do happen, a layer of cherry pie filling can effectively disguise them!
Can I reduce the sugar in this recipe?
While you can reduce the sugar, be mindful that sweetness is essential for balancing the tartness of the cherries and achieving that traditional cheesecake flavor. Experiment with small reductions to find the right balance for your palate.
Conclusion: These Cherry Cheesecake Bars are an irresistible treat, perfect for any gathering. Their creamy texture, delightful graham cracker crust, and vibrant cherry topping make them a showstopper. With easy preparation and numerous variations, they can be adapted to suit any taste or dietary need, ensuring everyone can enjoy this sweet delight at your next BBQ or family gathering!


