Prep time: 15 minutes
Cook time: 25 minutes
Total time: 40 minutes
Servings: 8
There’s a special place in every home cook’s heart for a recipe that brings sheer joy to the table. Imagine pulling a loaf of warm, melting cheese bread from the oven, the rich aroma wafting through your kitchen, enveloping you in a cozy embrace. “Can You Make Irresistibly Cheesy Bread This Week?” is not just another recipe. It’s a culinary adventure that promises to elevate your snacking game, making it a perfect companion for soups, salads, or even as a stand-alone indulgence.
What makes this cheesy bread recipe special is its simplicity and versatility. It’s a dish that calls for everyday ingredients but transforms them into an extraordinary experience that you and your loved ones will cherish. In this article, you will discover the steps to create this mouthwatering dish, along with tips, variations, and answers to common questions, making it easy and enjoyable for everyone, even if you consider yourself a novice in the kitchen.
What Is Can You Make Irresistibly Cheesy Bread This Week?
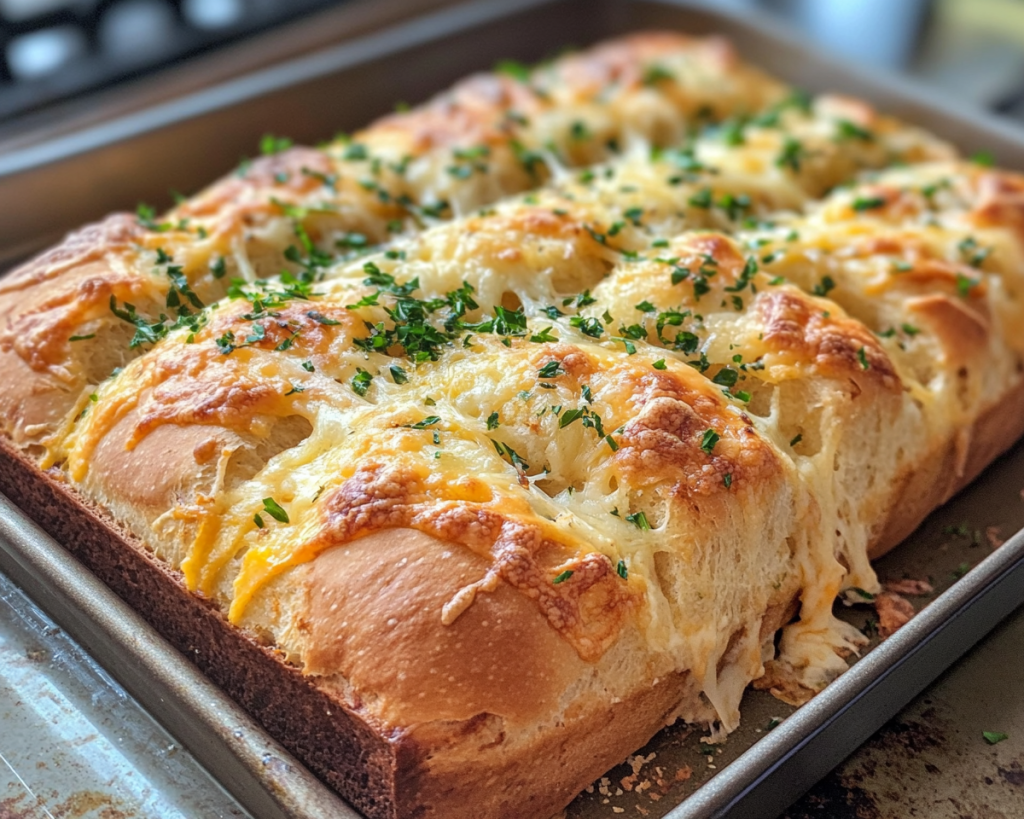
“Can You Make Irresistibly Cheesy Bread This Week?” is a delightful and savory bread that combines the unbeatable comfort of fresh bread with the rich, gooey goodness of melted cheese. Originating from various cultures that relish cheese in bread, this dish can be said to be a fusion of flavors and textures that anyone can appreciate. The crust is golden and slightly crispy, while the inside is soft, fluffy, and bursting with the rich flavor of cheese.
Whether you choose to use cheddar, mozzarella, or a mix of your favorite cheeses, the bread texture is perfectly balanced and draws you in with every bite. The cheese melts beautifully, creating a tantalizing gooeyness that pulls apart, offering that classic “cheese pull” we all love. Making this cheesy bread at home not only satisfies your cravings but allows you to tailor it to your taste preferences—like adding spices or herbs for an extra flavor boost.
For beginners, this recipe is approachable yet rewarding. You don’t need to become a bread-making expert; all you need is the desire to enjoy something warm, cheesy, and utterly satisfying. No fancy equipment is required—just a mixing bowl, a baking dish, and a bit of patience. This bread serves as both comfort food for cozy nights and an impressive side dish for dinner parties.
Why You’ll Love This
Imagine serving a warm loaf of cheesy bread to your family or guests. The smiles and compliments will truly make your day! The biggest reason to love this recipe is, of course, the taste: it is savory, cheesy, and incredibly comforting. Additionally, the ease of preparation makes it perfect for busy parents or anyone looking to whip up a quick treat without spending hours in the kitchen.
Another benefit is the cost. Creating this bread at home is much more economical than purchasing gourmet cheese bread from a bakery, and let’s face it, homemade always tastes better. The versatility is another appealing element; whether you want to indulge on a rainy day or pair it with a healthy soup for dinner, this cheesy bread fits seamlessly into any dining scenario.
Common misconceptions about yeast bread being challenging to make often deter people from trying recipes like this. However, this cheesy bread is fuss-free! You don’t have to be a baking whiz to achieve a delectable outcome—mistakes can be easy to fix, and the end result is always worth it.
Ingredients You’ll Need
- All-Purpose Flour: This is the base of your bread dough. Opt for unbleached flour for better texture.
- Instant Yeast: Instant yeast is preferred for its ease of use; you don’t need to activate it in water before mixing.
- Sugar: A small amount helps feed the yeast and contributes to the browning of the crust.
- Salt: This essential ingredient not only flavors the bread but also strengthens the gluten structure.
- Warm Water: Yeast thrives in warm conditions, which is why it’s crucial for proofing and activating the dough.
- Butter: Melted butter adds richness to the flavor and creates a delightful golden crust.
- Cheese: Use shredded cheese like mozzarella for a stretchy texture and cheddar for a sharp flavor. Feel free to mix your favorites!
- Herbs or Spices: Optional but recommended! Add garlic powder, Italian herbs, or even chili flakes for a unique twist.
Understanding the role of each ingredient not only enhances the flavor but also equips you to make substitutions if necessary. For instance, if you’re looking for a gluten-free option, consider using a flour blend designed for baking.
How to Make
1. **Mix Dry Ingredients**: In a large mixing bowl, combine the all-purpose flour, instant yeast, sugar, and salt. Stir the ingredients together until evenly mixed. This step is essential for ensuring that each bite of your bread is balanced with flavor.
2. **Add Liquid Ingredients**: Create a well in the center of your dry ingredients and pour in the warm water and melted butter. Mix the ingredients gently until it starts forming a shaggy dough. The warmth of the water activates the yeast, encouraging it to work its magic.
3. **Knead the Dough**: Lightly flour your countertop and transfer the dough onto the surface. Begin kneading the dough for about 8-10 minutes. The dough should become smooth and elastic. If it feels too sticky, sprinkle a little more flour as needed. Proper kneading develops the gluten, leading to a light and airy bread.
4. **Let it Rise**: Place the kneaded dough back in the mixing bowl, covering it with a damp cloth or plastic wrap. Allow it to rise in a warm place until it doubles in size, which usually takes about 1 hour. This is a crucial phase where the yeast ferments, adding flavor to your bread.
5. **Prepare the Cheese**: While the dough is rising, shred your cheese of choice. If you want to add herbs or spices, feel free to mix them into the cheese for an extra kick of flavor. This ensures that every bite is bursting with cheesy goodness.
6. **Shape the Dough**: Once the dough has risen, punch it down to release the gases. Transfer it to a floured surface and flatten it slightly. Sprinkle your cheese mixture over the surface, folding and kneading to incorporate it throughout the dough. This will create that delightful cheesy pull when you slice into your bread.
7. **Second Rise**: Shape the dough into a log or loaf and place it in a greased baking pan. Cover it again and let it rise for another 30 minutes. This second rise allows for improved flavor and texture.
8. **Bake the Bread**: Preheat your oven to 375°F (190°C). Once the dough has risen again, place it in the oven to bake for about 25-30 minutes or until the bread is golden brown and sounds hollow when tapped. The aroma that fills your kitchen during this time is nothing short of heavenly.
9. **Cool and Enjoy**: Once done, remove the bread from the oven and let it cool in the pan for about 10 minutes before transferring it to a wire rack. This step allows the bread to firm up a bit, making it easier to slice. Serve warm, and watch as your loved ones eagerly dig in!
This step-by-step guide not only simplifies the process but also enhances your understanding of how each phase contributes to the final product.
Variations & Substitutions
Garlic Cheesy Bread: For garlic lovers, incorporating minced garlic into the dough is a game changer. Simply combine 2-3 cloves of minced garlic with the butter before mixing it into the dough. This aromatic addition will infuse each bite with flavor, making it perfect to pair with soups or pasta dishes.
Herbed Cheese Bread: If you’re a fan of fresh herbs, adding chopped parsley, basil, or thyme can elevate your cheesy bread experience. Mix about ¼ cup of finely chopped fresh herbs with the cheese just before folding it into the dough. This variation not only looks lovely but also brings freshness that perfectly balances the richness of the cheese.
Spicy Jalapeño Cheesy Bread: For those who love a kick of heat, adding diced jalapeños to your dough can turn this cheesy loaf into a fiesta. Start by mixing in 1/2 cup of diced jalapeños with the cheese. If you’d like it even spicier, consider adding a pinch of cayenne pepper or chili flakes to get those taste buds tingling.
Gluten-Free Cheesy Bread: For those requiring a gluten-free option, replace the all-purpose flour with a dedicated gluten-free flour blend. Ensure that you also use gluten-free baking powder. This will give you a similar texture and flavor, allowing everyone to enjoy this tasty bread without worry.
Sweet Cheesy Bread: For a sweeter variation, you can add a mix of shredded cheddar and cream cheese, plus a hint of sugar to the dough. After baking, brush the top with melted butter and sprinkle some cinnamon sugar for a delightful sweet treat. This unique take is perfect for brunch or dessert.
These variations make it easy to customize the recipe based on your preferences or dietary restrictions. With a bit of creativity, you can craft a cheesy bread that suits every occasion and palate.
Common Mistakes to Avoid
One of the most common mistakes people make is using water that is too hot. Remember, overheating the water can kill the yeast, preventing the bread from rising properly. The ideal temperature for water is around 110°F (43°C)—just warm to the touch. A kitchen thermometer can help ensure you get it just right.
Another mistake is neglecting the second rise. This step is crucial for developing a light and airy texture. Skipping it can result in a denser, less delightful bread. Always allow your dough to double in size during both rises for optimal results.
Lastly, be careful not to overload the dough with too much cheese, as it can lead to a soggy texture. While it might be tempting to add extra cheese for indulgence, be mindful of balance. Aim for a ratio that allows the bread to hold its shape while still offering that delicious cheesy surprise in every bite.
Storage, Freezing & Reheating Tips
To enjoy your cheesy bread later, it’s essential to store it properly. Once cooled, wrap it tightly in plastic wrap or aluminum foil and keep it in an airtight container. This will prevent it from becoming stale, enabling you to enjoy its wonderful flavor for up to 3 days at room temperature.
If you want to store it for longer, freezing is an excellent option. To freeze, slice the bread first for easier reheating later. Wrap each slice individually in plastic wrap, place them in a freezer bag, and store them in the freezer for up to three months. When you’re ready to enjoy it, simply pop the slice in a toaster oven or microwave until warm.
For reheating, avoid using the microwave alone, as it can make the bread chewy. Instead, place the slices in a preheated oven or toaster oven until warmed through, retaining that lovely texture and flavor. If you enjoy that golden crust, broil the top for a minute or two for added crispiness.
By following these storage and reheating tips, you can ensure that every slice of your cheesy bread remains enjoyable!
Frequently Asked Questions
Can I use different types of cheese?
Absolutely! You can mix and match any cheese you prefer, like pepper jack for a kick or gouda for a smoky flavor. Experimenting with different types will allow you to find your ideal cheesy combination.
Can I make this in advance?
Yes! You can prepare the dough earlier in the day and allow it to rise in the fridge. Just bring it back to room temperature before continuing with the shaping and second rise steps. This method actually enhances the flavor.
Is this recipe suitable for vegetarians?
Yes! All the ingredients in this recipe are vegetarian-friendly. However, if you are strictly vegan, you can use plant-based cheeses and substitutes for butter. Just make sure to check the labels for other dietary concerns.
How can I tell when my bread is done baking?
Your bread is perfectly baked when it’s golden brown and sounds hollow when tapped on the bottom. Additionally, using a thermometer to check the internal temperature can help; it should be around 190°F (88°C) when done.
Can this be made as rolls instead of a loaf?
Certainly! You can divide the dough into smaller pieces and shape them into rolls. Place them in a round baking dish for pull-apart rolls. Just be sure to adjust the baking time, as smaller rolls will bake faster than a full loaf.
Conclusion:
“Can You Make Irresistibly Cheesy Bread This Week?” is a recipe that beckons you to indulge in its rich, cheesy flavors and delightful textures. Whether you choose to follow the classic method or experiment with the variations offered, the joy that comes from seeing your loved ones enjoy this homemade treat is immeasurable. Don’t hesitate to customize it to suit your taste, and make it your own!
So why wait? Grab those ingredients and embark on a culinary adventure that is bound to impress. Your kitchen will soon become the heart of treasured moments shared around a table. Happy baking!


