Prep time: 15 minutes
Cook time: 15 minutes
Total time: 30 minutes
Servings: 12 cookies
Have you ever craved something delightful that combines the rich flavors of dark chocolate with the tartness of cherries? If so, you’re in for a treat with these Black Forest Cookie: Dark Chocolate Cherry Crinkle Cookies! Perfectly chewy and decadent, these cookies come together in just 30 minutes, making them ideal for busy parents, kitchen beginners, and anyone who loves a quick and satisfying dessert.
What Is Black Forest Cookie: Dark Chocolate Cherry Crinkle Cookies in 30 Minutes?
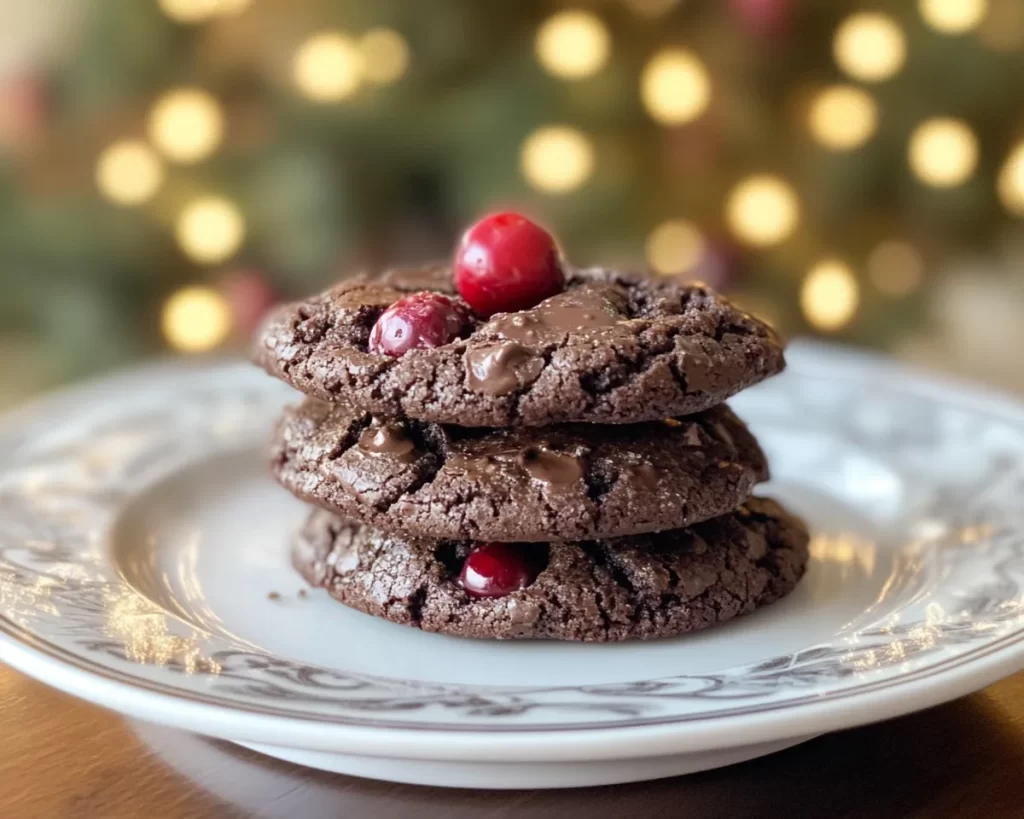
The Black Forest Cookie is a delightful dessert inspired by the traditional Black Forest cake, which is known for its layers of chocolate, cherries, and whipped cream. These cookies capture that same essence but in a convenient, crispy-on-the-outside-chewy-on-the-inside format. The dark chocolate provides a rich base while the cherry pieces add a burst of flavor in each bite. Plus, the visual appeal of the crinkly surface, dusted with powdered sugar, makes them irresistible for friends and family alike.
Why You’ll Love This
There are countless reasons to adore these cookies! First, they are incredibly simple to make, requiring no special skills or equipment. Second, the flavors are elevated, combining the sweetness of chocolate with the tanginess of cherries. Additionally, they are adaptable; you can easily tweak the recipe to suit your taste preferences. Whether you want to enjoy them as a delightful treat after dinner or pack them in lunchboxes, these cookies will certainly impress.
Ingredients You’ll Need
- 1 cup all-purpose flour: This acts as the base for your cookie dough, providing structure and texture.
- 1/2 cup unsweetened cocoa powder: For that rich chocolatey flavor and color.
- 1/2 teaspoon baking powder: Helps the cookies rise and become chewy.
- 1/4 teaspoon salt: Enhances the flavors of the other ingredients.
- 1/2 cup unsalted butter, melted: Adds moisture and richness.
- 1 cup granulated sugar: Sweetens the dough and helps create a crisp texture.
- 1 large egg: Binds the ingredients together.
- 1 teaspoon vanilla extract: Adds depth of flavor.
- 3/4 cup dark chocolate chips: Melts into gooey spots of chocolate in your cookie.
- 3/4 cup dried cherries: Infuses a fruity flavor that balances the chocolate.
- Powdered sugar for dusting: This adds a beautiful finish and a touch of sweetness.
How to Make
- Start by preheating your oven to 350°F (175°C). Prepare a baking sheet by lining it with parchment paper. This will prevent the cookies from sticking and make for easy cleanup.
- In a mixing bowl, combine the flour, cocoa powder, baking powder, and salt. Whisk these dry ingredients together until they are evenly blended. This ensures that the leavening agent is uniformly distributed throughout the flour.
- In a separate bowl, whisk together the melted butter and granulated sugar until smooth. The mixture should appear glossy and well-combined. Then, add the egg and vanilla extract, whisking until the mixture is thick and creamy.
- Gradually fold the dry ingredients into the wet mixture using a spatula. Be careful not to over-mix; you want just enough blending to incorporate the flour. The cookie dough should be soft and slightly sticky.
- Gently fold in the dark chocolate chips and dried cherries, ensuring they are evenly distributed throughout the dough. The chocolate should soften slightly as you mix, creating patches of melted chocolate in the final cookies.
- Using a cookie scoop or tablespoon, drop portions of dough onto the prepared baking sheet, spacing them about 2 inches apart. Bake in the preheated oven for 10-12 minutes or until the edges look set. Remove them from the oven when they still appear slightly underbaked in the center – this is key for that chewy texture.
- Once out of the oven, let the cookies cool on the baking sheet for 5 minutes before transferring them to a wire rack. Dust with powdered sugar while they are still warm for a beautiful presentation.
Variations & Substitutions
Nut Lovers Variation: If you enjoy a bit of crunch in your cookies, consider adding 1/2 cup of chopped nuts like walnuts or pecans. The nuts will add an extra layer of texture and flavor.
Gluten-Free Alternative: You can easily convert this recipe to be gluten-free by using a 1:1 gluten-free flour blend instead of all-purpose flour. This ensures that those who have dietary restrictions can also enjoy these delicious cookies without missing out on taste.
Fruit Twist Variation: For a different fruit flavor, substitute dried cherries with dried cranberries or apricots. Each option provides its unique flavor profile while maintaining a delightful tartness that pairs well with chocolate.
Fudgy Version: To make these cookies even more indulgent, replace half of the all-purpose flour with more cocoa powder. This results in a fudgier texture that is sure to satisfy any chocolate lover’s cravings.
Common Mistakes to Avoid
One common mistake is overmixing the dough. When combining the wet and dry ingredients, mix just until combined. Overmixing can lead to tough cookies rather than the soft and chewy texture you desire. Another pitfall is baking at incorrect temperatures. Always preheat your oven as directed; a cooler oven could lead to cookies that spread too much, and a hotter oven might burn the edges while leaving them raw in the center.
Additionally, rushing the cooling process can cause cookies to crumble when transferring them. Always allow them to set on the baking sheet first before moving them to a wire rack. Checking for the right doneness is key; cookies should be slightly underbaked when they come out for perfect chewiness.
Storage, Freezing & Reheating Tips
To store your cookies, place them in an airtight container at room temperature. They will last for up to a week, maintaining their chewy texture. If you’d like to keep them for longer, freeze the cookies in a single layer on a baking sheet until solid. Then, transfer them to a freezer bag or container, where they can last for up to three months. To reheat, simply pop them in a preheated oven at 350°F for a few minutes, ensuring they regain their soft, chewy texture.
Frequently Asked Questions
Can I use fresh cherries in these cookies?
While fresh cherries can be delicious, they have a high water content that might lead to a soggy cookie dough. If you’d like to incorporate fresh cherries, it’s best to freeze and then dry them slightly before mixing them into your dough to avoid altering the texture.
How do I ensure my cookies stay chewy?
To maintain chewiness, avoid overbaking the cookies. Take them out of the oven when they look slightly underbaked in the middle, allowing them to continue setting while cooling on the baking sheet. Additionally, using melted butter vs. softened butter will help achieve that chewy texture.
Can I make the dough ahead of time?
Absolutely! You can prepare the cookie dough and store it in the refrigerator for up to 24 hours. This allows the flavors to develop further. Simply allow it to reach room temperature a bit before baking.
What should I do if my cookies spread too much?
If your cookies spread while baking, it may have been due to warm dough or insufficient flour. Next time, try chilling the dough for 30 minutes before baking, and be sure to accurately measure ingredients.
Can I use other kinds of chocolate?
Certainly! While dark chocolate chips work beautifully for their rich flavor, you can substitute with semi-sweet or even white chocolate chips for a different taste experience. Each type of chocolate will create a distinct flavor profile for your cookies.
Conclusion: In just 30 minutes, you can whip up these delectable Black Forest cookies that are perfect for satisfying your chocolate cravings. With a few simple ingredients, step-by-step instructions, and several variations to try, these cookies will likely become a staple in your dessert repertoire. Enjoy them fresh out of the oven with a glass of milk or share them with friends and family for a delicious treat. Happy baking!